[ Note: This post consists of 13 photographs with captions. All photos were taken on a Google Pixel 6 Pro smartphone and post-processed with Faststone Image Viewer. ]
TUESDAY 01 – MONDAY 14 November
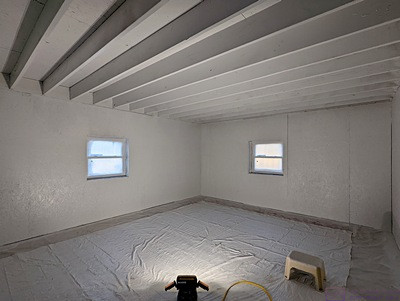
A view of the shop looking toward the NE corner from the door in the SW corner. The ceiling/joists and walls have been primed with Killz-2 using an airless sprayer and then painted with Valspar Pro Storm Coat Exterior semi-gloss acrylic white paint. The spray nozzle clogged frequently and the whole process was messy and inefficient. Still, it was probably better than doing the joists and the OSB on the ceiling with a brush and roller.
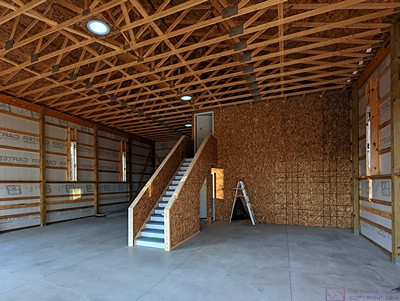
The stairs to the storeroom. The risers have been primed and painted white. The treads have been primed and painted light gray using Valspar Pro Deck, Floor, & Porch anti-skid paint. The stair walls and the spaces at either end of each step have been trimmed in 1x pine but have not yet been primed/painted. The doors for the shop and storeroom have been installed.
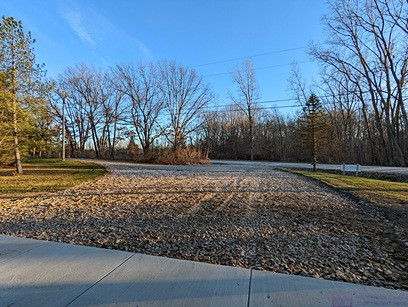
The extension of the west pull-through driveway to the front of the barn. Phil (Precision-Grading) was here most of the day on the 5th, initially redistributing the 1×3 crushed concrete based, and then finish grading the dirt on the other three sides of the barn.
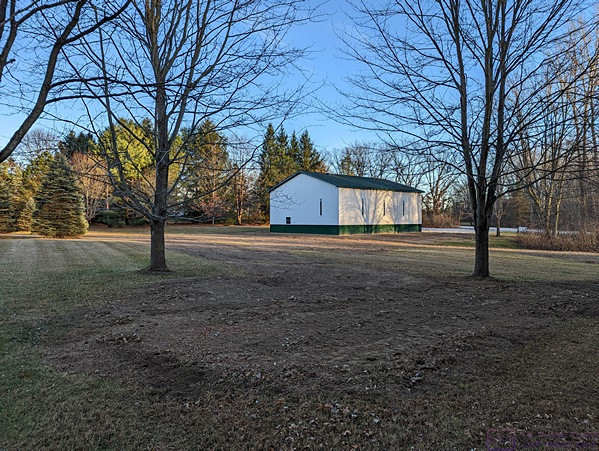
The view of the accessory building from the NW after the finish grading. The grades on the E, N, and S sides were sloped away from the building a bit more and tapered gradually into the existing terrain. That created some extra dirt in addition to the large and small piles that were already there. Phil had me designate low areas to fill in, and I selected ones that were both obviously in need of some fill and not too far from the building to make it efficient for him.
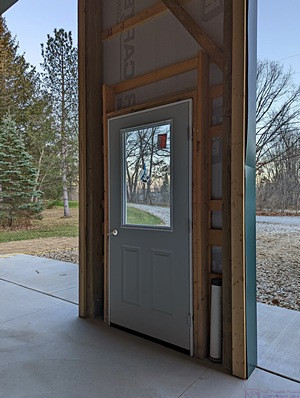
The main/permanent entry door for the barn. The carpenters removed the temporary one and replaced it with this one. Besides the class window, this door has extra deep jams which will allow it to be properly finished off if I ever decide to install paneling/drywall and trim.
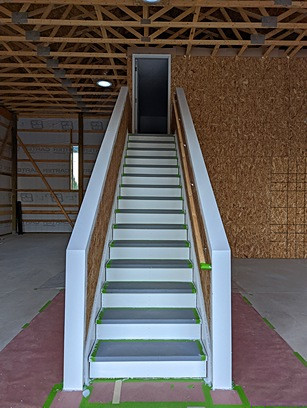
Looking straight up the stairs to the storeroom, the risers and trim have been primed/painted white and the treads have been primed/painted light gray with anti-slip floor paint. Although not visible, the landing at the top of the stairs and the floor of the storeroom have also been primed and painted with the light gray anti-slip paint. Everything will have two coats of paint when the job is done, although some of that might not happen until spring 2023.
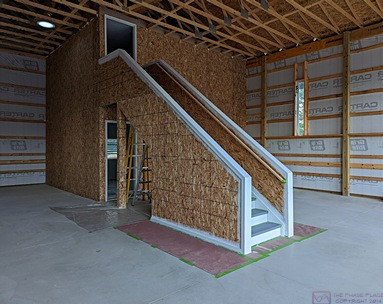
The carpenters trimmed between the OSB and the stairs, under the trim on the top and front of the walls, and along the floor. I was able to get all of this primed and painted (one coat) before the weather turned too cold. The Valspar Pro Storm Coat paint can be applied down to 35 degrees (F), but the weekend after these photos were taken, the lows started dropping into the mid-to-low 20s (F) at night and only rising into the 30s during the day. That signaled the end of the painting until spring. As is obvious in these photos, the larger walls that enclose the shop and storeroom have not been primed and painted yet, a big job that will have to wait until next year.
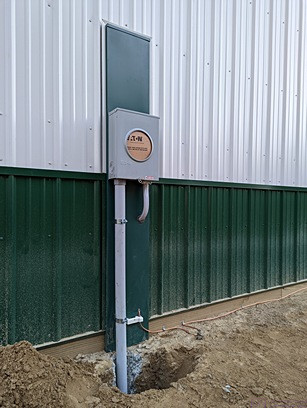
The electrician (Bill) was finally able to fit our barn into his extensive commitments and install the service entrance. Seen here is the meter can and riser conduit on the SE corner of the building.
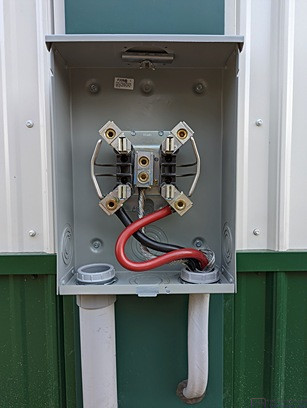
The meter can with the cover removed. The black and red wires are the two ‘hot’ leads (L1 and L2) and the bare aluminum wire is the neutral, all going to the load center on the other side of the wall. The conduit lower/left is where the wires from DTE will come into the meter can and attach to the lugs at the top of the box. The meter blades will plug into the four vertical spring-slots and then the cover will go back on and be secured by DTE.
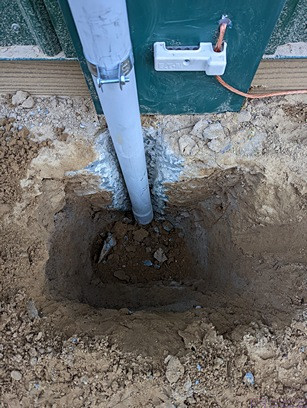
The electricians had to chisel out part of the foundation to allow the riser conduit descend vertically (more or less) below ground level. I will install the 2” Schedule 40 PVC Conduit that connects to this pipe and runs through the yard to junction box by the utility pole (once it is installed). I will rent a trencher from The Home Depot in Howell for this work. The horizontal white device is just a clamp for the ground wire. The wire coming up from this device goes through the wall and into the bottom of the load center; it does not go through the meter can. It leaves the clamp through the bottom and then runs to the right where it attaches to two, 8’ long copper ground rods driven into the ground next to the foundation.
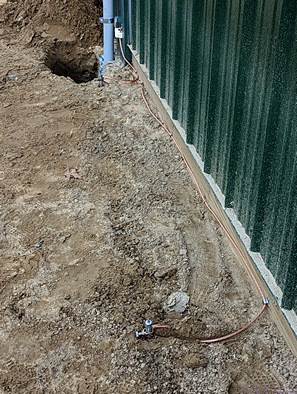
The top few inches of both ground rods are visible, as is the bare copper ground wire that connects them to the ground bus (and case) of the load center.
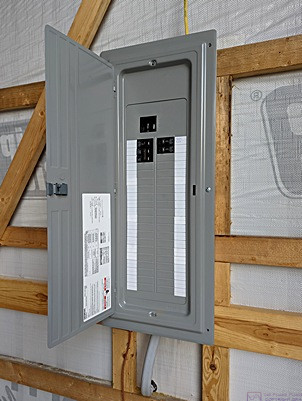
Shown here is the Siemen’s 240/120V – 200A Load Center. The service entrance cable and ground wire come through the wall and up into the bottom of the load center. Just visible at the top/right is a yellow 12-2+G Romex cable that feeds a duplex outlet out of sight to the left of the photo.
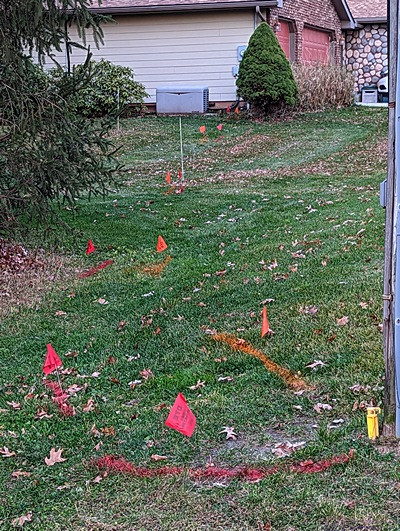
I put in a request for the Miss Dig 811 service late last week with a work start date of November 10. I had to create an account and do the whole thing online, but it was otherwise a fairly smooth process. The only caveat was that I could not draw the work area polygon using the pencil on my iPad Pro and ended up having to do the whole thing on my laptop computer. The confirmation said the site would be marked not later than 12:57 PM on November 10. The utility location service showed up around noon on that date, and was done before one o’clock. The flags and paint for the DTE electric (magenta) and the AT&T phone (orange) cables to the house are marked. (The AT&T cable is no longer in use.) We have natural gas and broadband cable on the property as well, but they are on the other end of the house, well away from the work area, and did not need to be marked.
…