Category Archives: Bus Barn – Workshop

20240801-04_A busy-start-to-August

NOTE:  This is a moderate length post (for me).  It has two (2) photos with captions, both taken by me (Bruce) with a Google Pixel 6 Pro.


THURSDAY 01 thru SUNDAY 04 August 2024 — Heat, rain, mosquitoes, and a busy week (BdW guests, laundry appliances, dogs, glasses, finances, and more) but no more yard work


Thursday 01 August … New glasses, a dead battery, more work tables, and Wild Turkeys in a tree
I got a text message yesterday that my new/remade tri-focal glasses were ready, so we made a trip to the Brighton SVS Vision Center to pick them up.  But not in the F-150.  When I tried to start it, the battery was completely dead.  It turned out that the headlight switch had been moved from the AUTO position to the Running Lights position, and left that way overnight.  Mea culpa, and I should have known, but I ignored the chime that continued when I turned off the engine last night and removed the key.  Dumb.  We took Linda’s car instead.

My new tri-focal glasses were correct this time, improving my distance vision just enough to make road signs at various distances sharper.  The reading and middle portions of the lenses were the same as before.  The optician made adjustments to the ear hooks and the nose pads until they sat correctly on my face with its slightly askew nose, which was broken many, many years ago.  I also had her look at my reading glasses.  I got the lenses there a month or so ago, but had them use an existing frame that I liked.  One of the ear covers had cracked and separated into two pieces.  She was able to heat them both up (left and right, one at a time) to remove them and replace them with new ones.  She also noticed that the nose pads were cracked and needed to be replaced, so she did that as well.  She then adjusted the ear hooks and nose pads so they sat correctly on my slightly crooked face.  No charge for the extra services.

Back home, we stopped at the barn and I retrieved a battery charger and a set of jumper cables.  The truck was in the garage.  The engine compartment is “tall”, so I placed the battery charger on the fold out platform of a 6 ft stepladder.  This allowed the battery cables to reach the battery in the engine compartment and the power cord to reach a nearby ceiling outlet.  I connected the cables, plugged in the power cord, and set the operating parameters:  AGM, 25 Amps.  The display quickly ramped up to 25.8 Amps and stayed there.  That was good news; some battery chargers will not work unless they detect at least some minimum voltage level from the battery.  I am hopeful that the battery will recover; it’s only a few years old had never been abused prior to this accidental discharge.

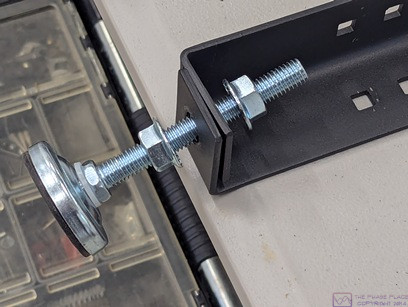
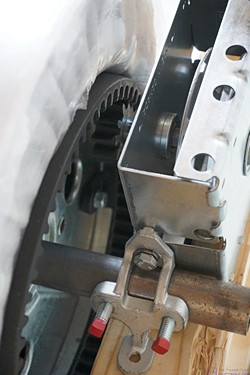
The bottom end of one of the Rockler Rock-Steady 32” legs with the adjustable foot installed, but not adjusted or tightened.

The Rock-Steady leg is a simple, but cleaver, design.  A flat sheet of steel is machined with various openings, both round and square, to allow other components to be attached, either with machine screws/bolts, or with carriage bolts.  The bottom end is partially slit at the mid-point to form two tabs, one slightly longer than the other.  The tabs are then bent 90 degrees, shorter one first and then the longer one.  The entire sheet is then folded along its midline, forming an angle iron, with the tabs overlapping.  The overlapping tabs are drilled to accept the adjustable feet, and the whole piece is then power-coated.

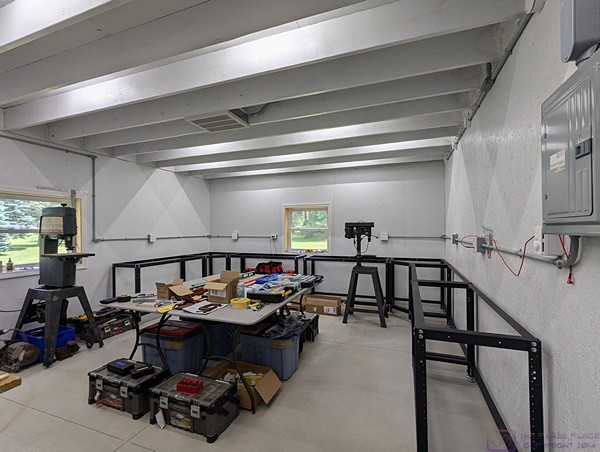
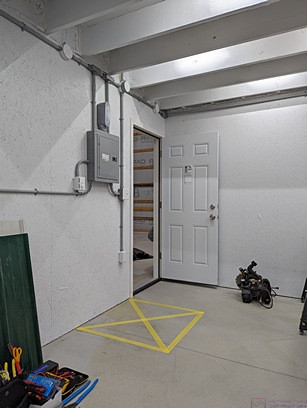
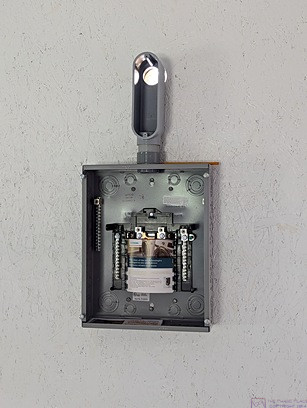
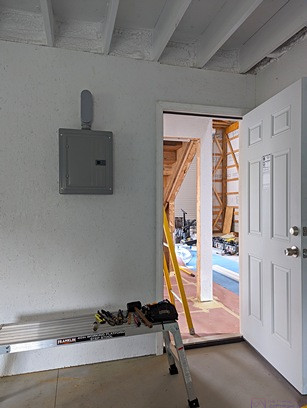
I changed into my work clothes and headed to the barn to assemble the last (for now) Rockler Rock-Steady Work Table.  I attached this one to the table along the south wall of the shop that was already attached to the Corner Table in the SE corner of the shop.  In this configuration, I will have a work surface along the south wall of the shop that is at least 20” deep and 144” (12’) long.  It will end just shy of the “protected” (no storage allowed) area in front of the shop/storeroom electrical sub-panel.  A picture will make this much clearer.

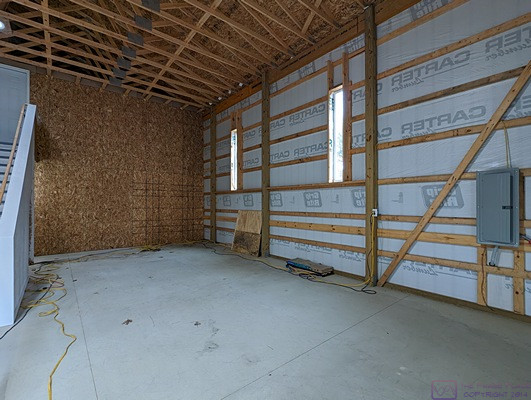
The workshop (in the barn) as seen from the entry door looking east.  The Corner Stand to the left (NE corner of the shop) has two Rock-Steady Work Stands attached.  The Corner Stand to the right (SE corner of the shop) also has two Rock-Steady Work Stands attached, plus a third Rock-Steady Work Stand along the wall on the right, which is attached to the one from the Corner Stand.

It was warm in the shop, even with a box fan running, so I got a bit sweaty and took a shower before dinner.  Having only had a muffin for breakfast, and skipping lunch, Linda made a large salad and we had an early dinner around 4 PM.

As we were eating, Linda noticed a lone Wild Turkey resting at the base on one of our large White Pine trees to the east of the valley for our walk-out basement door.  We thought that was odd, but it seemed to be okay.  As we were clearing the table, I saw a small turkey (jake) drop out of the tree, and then another one.  I called Linda over, and we watched the entire flock, including the other adult, drift down out of the tree.  So, it wasn’t a lone turkey after all; it was our usual flock of 10.  It was the second time this week that I had seen them in a tree, and the first for Linda.


Friday 02 August … Boondockers, bus chat, and financial chat
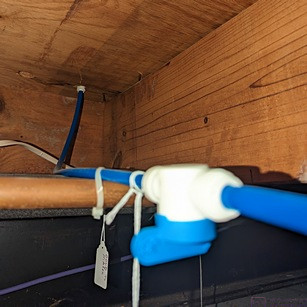
Rick (BdW PeachyTravel) was out this morning with their dog, Barkley, and we had a nice chat.  They pulled out before I left to meet Chuck S. at 11:30 AM for lunch at Leo’s Coney Island in S. Lyon.

Chuck and I had a lot to catch up on, and occupied a booth for three (3) hours!  The restaurant was busiest from noon to 1 PM, but had open seats the whole time there, and no one suggested we should move on.  It rained off and on while driving there, while we visited, and on the drive home.  By 5 PM we had a lot of standing water in the usual low spots around our property.

During the afternoon, I got a call from Kishen, one of our financial advisors at Stifel-Nicolaus.  We had a nice chat and made an investment decision.  We have been 100% satisfied with this company and the specific team of people we work with directly.  Sometime during the day, Linda also talked to Nan (of Paul & Nancy) regarding the cruise we are all taking in early December.

BdW guest Marcia B was supposed to arrive today for a 2-night stay, but cancelled last night.  It happens, and cancelations are never a problem for us as long as we know.  We are also RVers, and we understand that things can happen, even at the last minute, that change travel plans.


Saturday 03 August … A birthday and party planning

Today was our son’s 46th birthday (1978).  Linda wanted to have the family over to celebrate, but today was not convenient, so it was set up for tomorrow.   I do not recall what I did today, but it probably included a trip to Recycle Livingston to get rid of our household recyclables, doing laundry, and working at my desk.  The mosquitos have been very bad, so we have temporarily eschewed working on the property.  Linda spent a good part of the day preparing for the family get-together.  That included cleaning the house, a trip to the grocery store, and preparing food.  At some point, I brought chairs up from the basement and we put the expansion leaf in the dining room table.


Sunday 04 August …  A family gathering and a birthday celebration
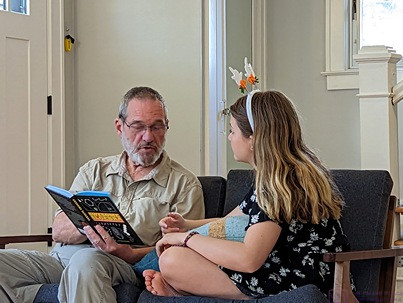
Linda arranged a family gathering for today at our house to celebrate our son’s birthday.  Brendan was there (of course) with his daughters (Sadie and Madeline) and our daughter, Meghan, was there with her husband, Chris.  Brendan’s wife, Shawna, whose birthday was in 11 more days, had previously made plans to go out of town for a weekend with her girlfriends.  She was missed, but everyone still enjoyed themselves.  Our daughter made a vegan peanut-butter chocolate cake for dessert; vegan for us and peanut-butter/chocolate for her brother.  It was amazing.

When everyone had left, we just relaxed.  In the evening, we continued watching the NBC recap of the Paris 2024 Olympics.

20240729-30_Penultimate-July

NOTE:  There is one (1) photo with caption in this post, taken by me (Bruce) with a Google Pixel 6 Pro.


MONDAY 29 thru TUESDAY 30 July 2024 — Heat, rain, mosquitoes, and a busy week (BdW guests)


Monday 29 July … An anniversary, more BdW guests, and more rain

Our good friends Paul and Nancy were married on this date in 1989.  We didn’t know them back then, but having eventually made their acquaintance (through RVillage), we wish we had.  Linda sent them best wishes for a Happy 35th wedding anniversary.

Our current BdW guests, Ted & Peg H., pulled out around 10:30 AM this morning, but not before taking the time to sit and chat with us a bit.  Other than a certain “pay it forward” spirit, we like being Boondockers Welcome (BdW) hosts because we get to meet fellow RVers traveling to/through our home area; we get to hear their stories, and share some of ours.  We also get BdW guest privileges in exchange for being hosts, but we have made very limited use of the program as guests since we joined.  We are also Harvest Host guest members, but have only used the program a few times.  We like both programs, but have found that host sites (that can accommodate us) are often not on our travel routes.

Four hours later, Dan & Marsha T. arrived in their Class A MH with a car in tow using a tow dolly.  I met them in the street and directed them into our guest RV site.  They were a repeat visitor, last here in 2020 at the beginning of the CoVID-19 pandemic.  They were only here for one night, but took the time to chat with us, which we appreciated and enjoyed.  We have not had a lot of repeat visitors, nor do we expect very many, but we have been hosting long enough that we are seeing a few of them.  We appreciate that folks liked their stays here, for whatever reason, enough to want to come back.

We have been watching the recap of the summer Olympics every night on NBC since the opening ceremony.  We have watched most of the Summer and Winter Olympics coverage since we were adolescents.  (According to Wikipedia, world-wide TV coverage began in 1956.)  It’s been a nice change from all of the shows we have been streaming.

Rain was in the forecast for this evening and overnight into tomorrow.  It started raining around 9 PM and was very heavy for quite a while.  I’m sure we got at least 2” of rain, but never saw an official measurement for our exact area.


Tuesday 30 July … 

Given the rain last night, there was no way Keith would be able to mow our property today.  We exchanged text messages, leaving open the possibility of him stopping by and checking the situation.  In case he decided to try mowing, I picked up some small branches that had come down in the storm and rearranged a few large branches that were over-hanging the firepit.  By early afternoon, however, he waived off on today and eventually texted that he would be here tomorrow.  The rain had pushed his schedule for the entire week back by one day.

While picking up sticks, I noticed that most of our resident Wild Turkeys (2 adults and eight jakes, as I think they are now too old and too big to be poults) were roosting in one of the Blue Spruce trees near our north property line, just NW of our firepit.  These recently pruned trees are now much more open in their lower portions, and cleared underneath, making it easier (possible?) for the Turkeys to fly up to these branches.  Or perhaps they have been doing this for a while now but we just could not see them.  Either way, we know that Wild Turkeys roost in trees at night (and on fences, roofs, and anything else they can get to, including the railing of our deck, our grill, and the roof of our house), but this was the first time we had seen this flock of two adults and eight young actually in a tree.

In-between other events, I worked on blog posts, and finally uploaded a few.  With as busy as we have been, I am doing well if I can even make notes about our activities and get those written up in at least a draft form in a timely manner.  And I have apologized repeatedly for constructing posts my memory long after the fact.  Selecting and processing photos, deciding where they go in posts, and then writing captions, all take additional time.  The actual uploading/publishing in WordPress is the least time-consuming part of the process, but it can’t happen until everything else is done, checked, and checked again.  This is not a complaint—if I didn’t want to do this I would stop—just a statement of fact.

BdW guests, Dan & Marsha T. left mid-late morning after a nice chat, and arriving BdW guest PeachyTravel (Rick & Vivian, and family) messaged me with an ETA for mid-afternoon.  They needed to stop and dump, which took extra time, and encountered heavy traffic enroute to us, which pushed their arrival to 3:30 PM.  They were schedule to stay four (4) nights, so needed to top up their fresh water tank.  I had them stop in front of the house (where the water spigot is located) and take care of that before proceeding into our guest site.

Given the hot, humid weather we have been experiencing we worked inside.  I worked at my desk, finalizing and uploading several blog posts, and Linda worked at her desk on bakery-related accounting tasks.

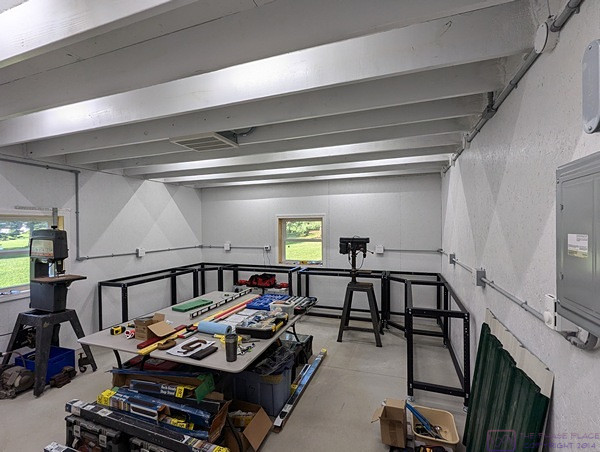
A view of the workshop (in the barn) looking east from near the entry door in the SW corner.  One of the two Rockler Rock-Steady Corner Stands is in the SE corner of the shop, with 56” x 20” by 32” Work Stands attached as wings.  Another Work Stand (same size) will be attached to the one along the wall on the right (once I have all of the needed components).

Sometime during the day, UPS delivered the one remaining Rock-Steady Leg Set that I needed to assemble the last (for now) Work Stand.  It had been mis-routed from the 27 July delivery, but was eventually located and made its way here.  Rockler customer support was VERY helpful in resolving this, which I really appreciated.  I am certain that their C-S is based in the USA.  While talking to them, I also let them know about the bag of missing bolts (qty 32).  They forwarded that to their technical support team, and few days later they arrived.

20240722-28_A-typical-week-plus

NOTE:  This is a long post that includes four (4) photos with captions.  Photos taken by me (Bruce) with a Google Pixel 6 Pro unless otherwise indicated.  (Photo by Linda taken with a Google Pixel 6.)


MONDAY 22 thru SUNDAY 28 July 2024 — A busy BdW week and then some; laundry appliances, more yard work, and a gathering of neighbors


Monday 22 …  An anniversary, laundry appliances, and a new pair of glasses

The younger of Linda’s two older brothers (Ron) and his wife (Mary) were married on this date in 1995, so today they celebrated their 29th wedding anniversary.  They life near Hershey, Pennsylvania, so we do not see them as often as we would like.

While we were enjoying our coffee and using our iPads, our neighbor, Gail, stopped by to chat.  Linda had sent out invites to our neighborhood friends for a get-together on Sunday (28th) and Gail let us know that she and Mike would attend.

We worked fairly hard on our yard this past weekend, and were satisfied with what we accomplished, so we decided to give yard work a pass today.  We spent the mid-morning looking at laundry appliances online—washers and dryers—as our current ones seem to no longer be performing at their best.  We bought them almost exactly 20 years ago, and moved them from our previous home when we moved to our current location 9 years ago.

The dryer, in particular, seems to be under-performing, failing to get a load completely dry by the end of a cycle, even through it has a moisture sensor feature.  It also has an annoying (lack of a) feature, in that I cannot tell it to just run for a fixed amount of time at a set temperature.  The moisture sensor seems to always be in play.  This has been true since it was new, but perhaps it no longer senses moisture as well as it should.  The washer still works, but the tray that holds the detergent (softener, bleach, etc.) is sometimes full of water at the end of a cycle.  That was never the case until recently.  We could probably have them repaired, but newer/better technology is now available, especially as regards efficiency.

I have been intrigued for a while by heat-pump (ventless) dryers.  They claim to be 3 – 5 times more efficient than electric dryers, but I have not seen a comparison with gas dryers.  While all variety of home appliances seem to be moving away from natural gas (or propane) we have natural gas to our house, and use it for heating (space and water), cooking (including an outside grill), and for our whole-house generator.  Gas is, therefore, an option for us, but it has two downsides:  1) It would still be a vented dryer.  Even if the dryer is more efficient than an electric model, it still draws air from inside the building and vents it to the outside.  That air gets “made up” with air from outside the house—cold air in the winter and hot air in the summer—which puts an additional load on our HVAC systems;  2)  We might want to move the laundry from the basement to the main floor of the house someday.  Our pantry is already plumbed and wired for a laundry (water, drain, and power for a washing machine), but does NOT have a dryer-specific electrical receptacle and does NOT have a vent.

From prior research and recent reviews, the dryers of most interest to us are made by Miele.  It’ a premium brand, and the one most seen in high-end boats and yachts, both kitchens and laundries.  That means they are pricey, but because they are a European company, they also tend to be smaller than standard USA units, with approximately 1/2 the capacity.  While that might be considered a negative, it would allow them to fit easily in our kitchen pantry space, and adding a dedicated 120V/20A circuit for it would be relatively straight-forward.  I would need to do smaller loads more often, but I sort of do that already.  Not a deal-breaker in any event, but something to consider in making this decision.

For breakfast, we had a Just Egg scramble with plant-based sausage in it, served on a piece of toast, with half of a “cutie” orange and half of a banana on the side.  A right-sized, tasty meal.  After breakfast, Linda did the menu planning for the rest of the week and made a grocery list.  I suggested that before going to the supermarket we go to the SVS Vision Center in Brighton and have her order a new pair of glasses.

She selected a FLEXON frame (just as I did, but not the same one) with progressive lenses that darken with exposure to sunlight.  With the order placed (and paid for), we stopped at the Brighton Meijer’s for groceries.  The store is undergoing a major renovation, but parking was not a problem and it was easy to navigate the store and find what we wanted.  As part of the renovation, they are installing new upright refrigeration (and freezer) units; the ones with doors that open out.  We don’t know what else the renovation will involve, but we suspect it will be extensive.  Being in the heart of Brighton, this particular Meijer’s does a LOT of business

Once home, with the groceries put away, Linda went for a walk while I went to my desk to work on blog posts and clean up e-mails.


Tuesday 23 …  A Funeral

Earlier this month, our Friend, Diane’s, mother (Helen) had her 100th birthday.  She had a good, long life, living independently in an apartment until her late 90’s.  She was in a care facility not far away from Diane and John’s house, so they had a party for her at a facility nearby so she could attend.  Much of her very-extended family made it to the party, even those who had to travel some distance.  She passed away last week, and today was the funeral mass, celebration of life, and luncheon.  We were invited, and of course we attended.

Many years ago, when our children were still at home, John and Diane would host large family gatherings that included relatives from both of their families.  We lived nearby, and had become good friends, as had our children, and we were often invited to these gatherings.  Being from out-of-town, and not having any relatives or long-time friends in the area, we appreciated being included and always had a good time.  As a result, we met most of their siblings and their spouses and children.  We even got to know a few of their “clan” members.  With everyone’s children grown and off making their ways in the world, they no longer host these large gatherings, so we had not seen most of the people in attendance at the funeral for quite some time.  There was mutual recognition with the ones we had known best, and a chance to meet and chat with some that we had only heard about over the years.


Wednesday 24 …  A right, and a responsibility, and something unhinged

We recently received our mail-in ballots for the upcoming August primary elections.  We filled them out this morning and dropped them off at our Township office.  We have voted in almost every local, state, and federal election since we became eligible to vote.  I say “almost” as we might have missed a library or city council election somewhere along the way, but if so, it has been very few.  Indeed, we think that voting for the local library board is as important as voting for representatives, senators, governors, and presidents.  It is a right that is meaningless if it is not exercised, and we feel it is a responsibility of citizenship to do so.

Dan (Everlast Doors) stopped by mid-late afternoon to work on the garage doors.  I had discovered that one of the hinges on the smaller door was missing an attachment screw on its upper portion and that the other screw on that portion was not fully seated.  Since the doors are new, I did not want to take on the task of installing the missing screw, lest I not do it correctly.  While Dan was there, we discovered several more missing screws on the large door, and he installed them as well.  He checked both doors to make sure they would still open and close correctly, which they did.  Dan did a nice job with the installation, and has been quick to follow up on any issues, which have been few and minor.

During the evening, we watched the opening ceremony of the Summer Olympics, officially The Games of the XXXIII Olympiad, aka Paris 2024.


Thursday 25 …  Different day, same routine and chores

Linda met up with our daughter, Meghan, for a walk this morning.  There was nothing else on our calendar for today.  I failed to make any notes about what else happened today, although I suspect we worked in the yard.  Late in the afternoon, we got a text message that a pair of glasses was ready at SVS Vision Center in Brighton, but it didn’t say if they were for me or her (we both have pairs on order).


Friday 26 … 

BdW Members Patrick & Ruth W. left sometime during the morning and BdW members Ted & Peg H. (NatlParkEnthusiasts) arrived around 13:00.  As always, I met them in the street just before our first driveway entrance and directed them into our guest RV site.  We chatted briefly and then left them to setup while we ran errands.

We needed to pick up some things at Costco, so we stopped at SVS Vision Center on our way.  A sign on the door indicated they were closed today through Monday the 29th.  No further explanation offered, but none really needed either.


Saturday 27 …  Yard work, fire, and shop stands

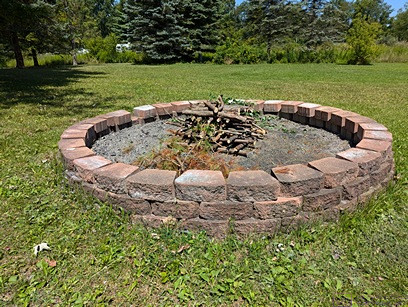
Our fire circle (burn pit) with pieces of branches and twigs neatly piled, ready to serve as the center of our next yard detritus fire.

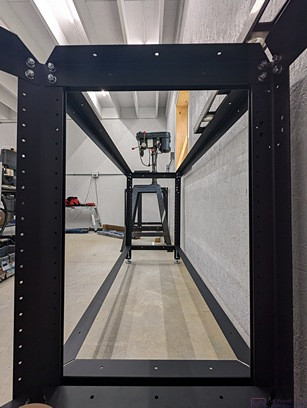
This photo was taken from inside the Rocker Work-Steady Corner Stand in the SE corner of the workshop (in the barn) looking north along the E wall through two of the Work Stands and into the Corner Stand in the NE corner of the workshop.

We had enough material in our burn pit to justify starting it on fire, but we prefer to do that on days when we can also work in the yard, either gathering up additional downed material or pruning dead branches from trees.  Well, today was one of those days, so we got to work sometime before mid-morning.

In the early afternoon, a UPS truck showed up and delivered 3 of the 4 Rockler Rock-Steady 32” 4-pack leg sets, still leaving me short one (1) set of legs.  Later in the afternoon, I decided to start assembling one of the two corner stand kits and opened the boxes of required parts.  To my dismay, the leg set I opened had two bags of nuts/washers (there should only have been one bag) but NO bag of bolt.  Thirty-two (32) bolts (size 5/16-18 x 3/4”) are required to attach a set of 4 legs to all of the upper and lower stringers.  I opened the other three leg sets and was relieved that they all contained the right parts.


Sunday 28 …  Chores, projects, and Friends/Neighbors

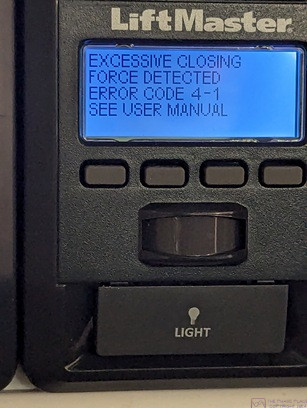
Error code and message on wired remote control for our smaller garage door.

When Linda left to go to the grocery store, the smaller garage door did not finish closing; it stopped, reversed direction to the fully open position, and displayed an error code/message on the wired remote by the door into our library “Excessive Closing Force Detected.”  I eventually texted Dan (Everlast Doors) to let him know.

Today was a partial laundry day, a partial shop work table assembly day, and a party preparation day.  They first two items were mine, the last one was mostly Linda’s.  The neighbors arrived around 6 PM.  Mike was not able to attend at the last minute, but Gail came anyway.  Linda had prepared some food (snack) items, and everyone brought sometime to add to the table, as well as their own beverages.  Marta and Gary were accompanied by Marta’s sister, and Rose and Jerry as came.  It’s a small circle of neighbors who are lively conversationalists, and we feel fortunate to have them as friends.  Everyone stayed until after it got dark.

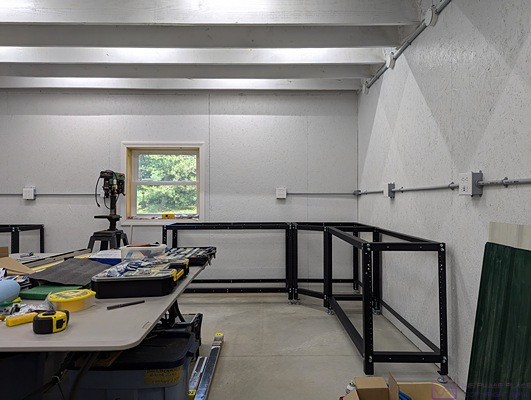
A view of the east end of the workshop in the barn with a Rockler Rock-Steady Corner Stand in the SE corner with two (2) 56” x 20” x 32” Work Stands attached to it.  None of the work stands have top surfaces, shelves, or drawers yet as I was still pondering configurations and materials.

20240719-21_3-days_lots-of-stuff

NOTE:  This is a longer post that contains one (1) photo with caption, taken by me (Bruce) with a Google Pixel 6 Pro.


FRIDAY 19 thru SUNDAY 21 July 2024 — Vision, cruises, SW licenses, yard work, Boondockers, and a Buck Moon


Friday 19 … More vision, a cruise dream, and a software license

Yesterday was a hard day so today was an easier day, by comparison.  Linda had a 1 PM follow-up visit with Dr. V, her ophthalmologist at the KEC-BCSC.  She got an excellent report; both of her eyes are healing well.  Dr. V tested her vision and gave her a prescription for bi-focal glass lenses.  Linda can actually see fairly well now without glasses, both for reading and distance.  She is far-sighted in one eye and near-sighted in the other, and Dr. V inserted lenses that work with that difference.  But she still does not see quite well enough for extended work at her desk, staring at her laptop computer and working with our personal financial and travel records, or reams of accounting printouts from the bakery.  And while her distance vision is okay, the glasses will make it better, especially in her near-sighted eye.  This will allow here to see better while in a vehicle, whether driving or as a passenger helping to read road signs.

We got a brochure in the mail today from Oceania Cruise Line (OCL).  Oceania is a wholly-owned subsidiary of Norwegian Cruise Line Holdings (NCL-H).  Having sailed twice on NCL, they know who we are and they know where we live.  OCL is a luxury cruise line featuring smaller ships than the ones we have been on (so far).  Their cruises are commensurately pricey, so not something we have seriously considered.  But just like the Sears and Montgomery Ward catalogs at Christmas (when we were kids), we went through the brochure to see what was on offer.  They offer a lot of cruises in the Far East, including Australia and New Zealand, the Caribbean, and the Mediterranean.  But the one that caught our eye departed from Buenos Aires (Argentina) and ended in Santiago de Chile (Chile) with a 2-day stop in Antarctica and a trip around Cape Horn through the Drake Passage.  The sailing dates were northern hemisphere winter, so southern hemisphere summer, when the Southern Ocean is not quite as fierce as it is in the southern winter.  And it was on sale for what seemed to be a relatively good price.  Setting foot on Antarctic continent is a true bucket list item for me, but it won’t happen in 2025 (we already have two big trips planned) and probably not in 2026 (when we plan to RV to Alaska).  The 2025 trips are set in stone (as much as any trip can be) but 2026 is still just an unplanned intent.

I have been using the QCAD software package for a few years now.  I made extensive use of it to design the barn, but I use it for other things as well.  The basic version is open source and free to download and use, but the professional version unlocks some important features and provides access to updated versions as they become available.  For $39 a year, having the professional version is a no-brainer for me.  My current license expires this coming Sunday, so I went ahead and renewed it tonight.  I always use PayPal for things like this, and it will be interesting to see how this hits my credit card.  I selected $USD on the website/store but the invoice came up in $EUR.  I don’t know if this was related to the worldwide CloudStrike/Windows outage, but the transaction completed successfully using PayPal.  While processing this transaction, I discovered that my password app on my phone would not allow me to log in with my fingerprint.  Humm; that was strange and annoying as this is how I usually open the app.  I got the password from one of our other devices and logged in that way.  In the app settings on my phone, the ability to biometrically authenticate (face scan or fingerprint) was turned OFF.  I did not turn it off, so it probably got reset as part of an update.  I really hate it when that happens.

Last, but not least, UPS delivered most of the Rockler Rock-Steady work stand components and kits.  I knew these weighed quit a bit as all the pieces are steel and the driver confirmed this immediately upon arrival.  I asked if would deliver them to the barn, and he was more than willing to do so.  I helped him unload everything and get it into the barn.  The delivery included two (2) Corner Stand kits (complete), and the following components for the five (5) 56” x 20” x32” Work Stands:  5 x 4-packs of 56” Stretchers, 5 x 4-packs of 20” Stretchers, 5 x 2-packs of 32” Center Supports, 5 x 4-packs of Stand Connectors, 10 x 2-packs of Drawer/Shelf Brackets, and 1 x 4-packs of 32” legs.  Missing from the delivery were 4 x 4-packs of 32” leg sets for the five (5) 56” x 20” x 32” Work Stands.  We checked the order on Rockler’s website and verified that they were still on backorder.  Also, that we had only been charged for the pieces that actually shipped.


Saturday 20 … More yard work

I knew the refill date on my blood pressure medication was coming up soon, so I logged into my online pharmacy to check.  I quickly discovered that they were going to automatically refill it, so nothing for me to do except wait for it to show up.

After coffee and breakfast, we got dressed to work in the yard.  I had previously added enough material to our firepit to justify lighting a fire, and we knew there were enough tree limbs on the ground in the west yard to keep us busy for a few hours.  Linda eventually turned her attention to weeding under the large stand of pine, and fir trees just NW of the house, which included cutting out saplings.  We worked from 10:00 to 13:00 and put our tools away.

A shower and some lunch and we were good as new.  I then settled in to work on blog posts and launder the bed linens while Linda made a new batch of her amazing granola.  Our middle grand-daughter was due back today from a two-week stint at the YMCA camp, but we did not get a chance to Facetime with her.  Dinner was the second go-around of the Mexican corn salad, and it was just as good as the first time.  After dinner we settled in to watch our usual Saturday evening TV programs on our local PBS station.

The “Buck Moon” about 8 hours before it’s precise occurrence.  This photo was taken a 10:20 PM, about 20 minutes after moonrise.  The view is southeast from the end of our first driveway, the only place on our property that afforded an unobstructed view of the orb, and I had to wait for the disk to be above the tree line of the properties southeast of us.  This is a long/night-mode handheld exposure that received more than my usual post-processing.  In particular, I tried to make the details on the surface of the moon at least a little bit visible, while also bringing out some details in the surrounding clouds and the trees along the bottom of the image.

I had noticed for the past week that the moon was near full.  A news headline popped up this morning about tonight being the “BUCK MOON,” the name given to the full moon in July.  Online research indicated that in North America the name is ancient and spiritual, and refers to the time of year that male deer start to grow their antlers.  The actual time of the Buck Moon was tomorrow morning, but we had an excellent view of the moon this evening, low in the southeast sky but above the trees.  The weather was clear and the moon appeared very large and very bright.


Sunday 21 … Another BdW guest arrives

The exact time for the “Buck Moon” was 6:17 AM EDT, but we did not see it this morning; I was up, but the weather was cloudy.  We also have trees in our yard, as do adjacent properties to the east and southeast, that obscure the eastern horizon, so we often cannot see a moonrise.

We continued our work on the property again today.  Linda pulled weeds while I cut down one of the four (4) “bushes” that grow in the northeast portion of our yard.  They are not attractive, consisting of a tangled mix of samplings, vines, and wild raspberries with plenty of thorns.  Even mowing the grass near them requires some care.

When we had a sufficient pile of material in the burn bit I started the fire.  I then switched my attention to the stand of large pine trees in the northeast corner of the property.  I removed limbs and branches that were already on the ground, and then cleared a path around the east side of the stand.  I then pruned a few of the lower/dead branches from the trunk of one of the trees.  I hadn’t planned on pruning today, but we needed more/larger wood for the fire, and these were easy to get to and relatively close to the fire pit (compared to material from the western portion of the property.)  We worked for about 3 hours and then called it quits.

BdW members Patrick & Ruth W. notified me around 17:30 that they would arrive at 20:30.  Our preferred arrival window is between 13:00 and 17:00, but later times are okay as long as we know.  Knowing they would not arrive for a while, we opened our BdW Hosting Profile in the HH-BW app and reviewed our information.  We confirmed that our profile does state a preferred arrival window of 1 – 5 PM.  As long as we were logged in, we made some minor edits to our information.  I tend to error on the side of TMI, the error being that the more words you use the less likely most people are to actually read and retain all of them.  Still, there are things guests need to know about our site and expectations.  Linda then prepared a dinner meal of mushroom root steak, corn, baked sweet potato, and a small green salad with plant-based “blue cheese” dressing.  Yum.

After dinner, we watched an episode of Agatha Christie’s Poirot on PBS at 19:00 and then the latest episode of Martijn Doolard on Youtube at 19:50, which filled the time until 20:30 rather nicely.  That meant we missed this week’s episode of Professor T (PBS) but we can stream that sometime this coming week.  Our guests arrived on our street right at their ETA and phoned me.  Linda came out with me and after I got them parked we had a brief welcoming chat before leaving them to make camp.  We returned to our Sunday evening PBS TV programs and watched Grantchester at 21:00 and DI Ray at 22:00, both of which appeared to be the concluding episodes for this season.  That might also be true of Professor T, but we won’t know until we watch it.


202307_01-31 – Summer Days

Blog Post for July 2023.

This post consists of 18 photos with captions.  It covers some additional electrical work in the barn, along with setting up shelving in the store room, moving stuff from the garage to the barn, fixing the screen doors on the house doorwalls, and hanging out with family.


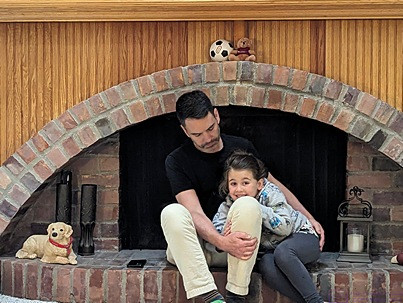
Our youngest grand-daughter (SRF) with her dad sitting on the hearth of our fireplace.  (Photo by Linda)


Our middle grand-daughter (MEF3, right) and daughter (MEF2, left) at our house.  Bruce’s mom was MEF.  (Photo by Linda)


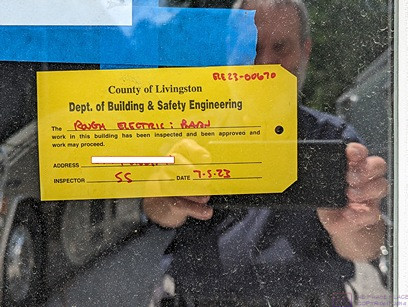
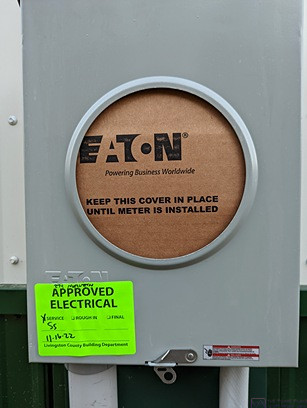
Bruce snaps a self-portrait with the approval tag for the rough electrical inspection on the barn.  No changes were needed.  It’s just a yellow piece of cardstock, but it was a big deal for him and a significant milestone for the barn project.


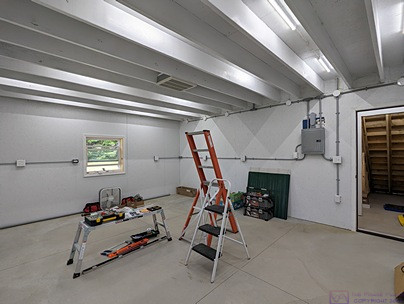
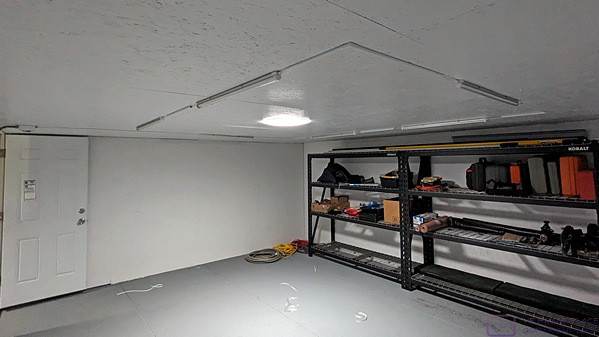
Linear LED light fixtures installed in the barn shop.  Light switch in the white outlet box between the door and the subpanel.  Bruce worked out the lumen calculations for a detailed work area ahead of time and these fixtures appear to produce sufficient light intensity with a daylight white (5000K) color temperature.  As shown, they are installed in every other joist space—three in some and two in others (alternately)—which distributes the light nicely and protects them from physical damage.  More fixtures could be added in the unused spaces if needed in the future.  Note that the underside of the storeroom floor is the visible ceiling in the shop, and is painted white along with the joists and all of the walls.  It’s a well-lit space.  Note also that there is no insulation between the shop and the storeroom above.  By design, the electric heater in the shop should also provide enough heat to the storeroom to keep it above freezing in the winter.  If needed, Bruce will cut in a couple of floor vents to allow air to circulate, and possibly add a fan to one of them to draw cold air down from the storeroom to the shop.  Winter 2023-24 will be a test to see what else, if anything, is needed.


It did take very long after the rough electrical inspection to complete the work needed for the final inspection.  Again, no corrections were needed, and the work was approved.  Here is the final electrical inspection approval tag (left) along with the rough electrical inspection approval tag (right).  This was a major milestone for the barn project, and the culmination of a lot of work that included planning, specifying, purchasing, and installing many different components.


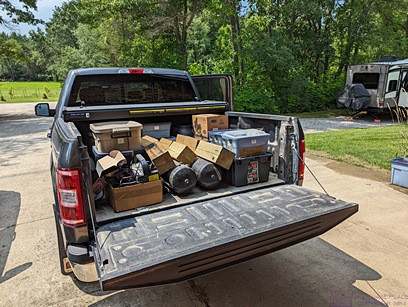
Although we did not yet have our Certification of Occupancy (CoO), we needed to start getting some things out of the garage.  The Ford F-150 has been an excellent vehicle for us, providing excellent passenger comfort, great performance and fuel economy, and a lot of very versatile utility, including hauling things, towing our trailer, and being equipped to tow behind our bus.


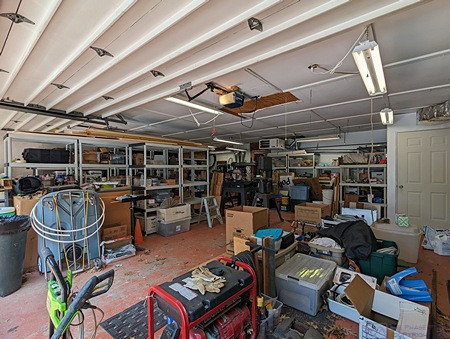
There was still a lot of stuff in the garage, but a space was starting to appear where we could get Linda’s car inside.  Much of what is visible in this image, including the plastic shelving units, will get moved to the barn, some in the storeroom, some in the shop, and some in the RV bays (but not too much).  Some of it will also end up in the shed.


Our youngest grand-daughter shares a bench with a couple of book-reading statues at the local public library.


The local public library as a great children’s room that includes this reproduction tree truck and with child-sized hollow.  Our youngest grand-daughter seems to fit in this space just right.


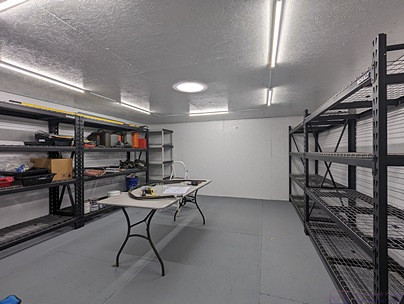
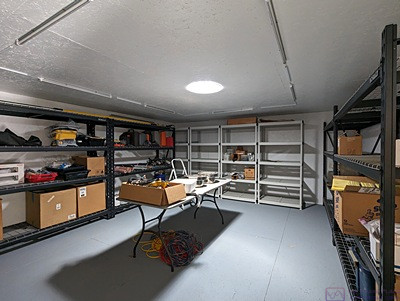
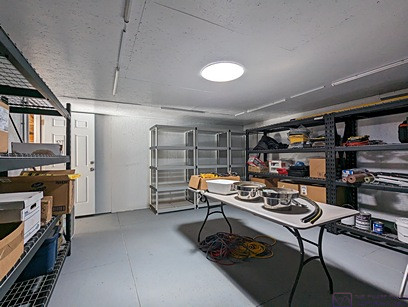
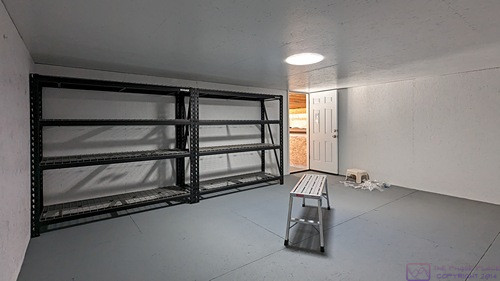
By this point in July 2023, we still had a lot of work to do to get the shop and storeroom in the barn set up to use efficiently.  The heavy-duty Kobalt metal shelving is set up on the front and rear walls of the storeroom.  The shorter east and west walls will get some of the full-height plastic shelving units from the garage.  The table in the center of the room is temporary, and will be replaced with shorter (3-shelf) plastic shelving units and capped with a sheet of plywood or other suitable counter-top surface.


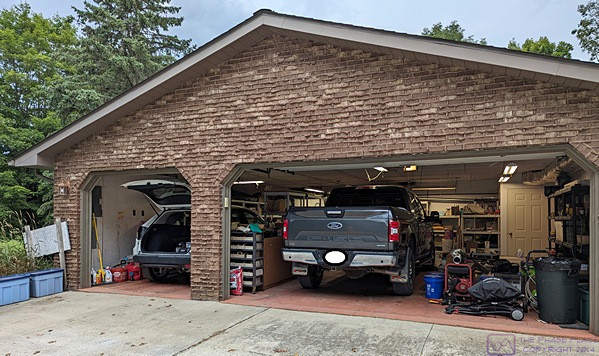
It might not look impressive, but we could not ever recall getting two vehicles in this garage since we bought the house 10 years ago.


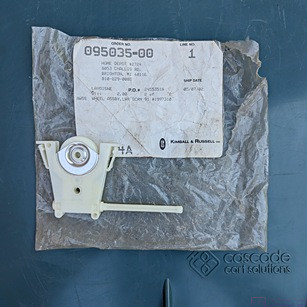
This little device might not look like much, but it is an important part.  It’s the combination roller / height-adjuster for the screen doors on our house doorwalls.  The doorwalls (and Windows) are Renewal by Andersen, and I could NOT find these adjusters at any of the local big box / hardware stores.  We found this one in the garage, left behind by the previous owners.  With the part number in hand, I was able to order additional ones.  We have five (5) doorwalls, each screen requires two of these devices, and most of them were broken or just plain worn out, and needed to be replaced.


Plastic shelving units in place along the east wall of the storeroom in the barn.  And yes, we are putting things on them because we have to.  But everything in this storeroom will be reorganized once all of the storage units are in place.  Really, it will.  Promise.


The west wall of the barn storeroom, with plastic shelving units in place.  A unit with parts bins will eventually occupy the space by the door.


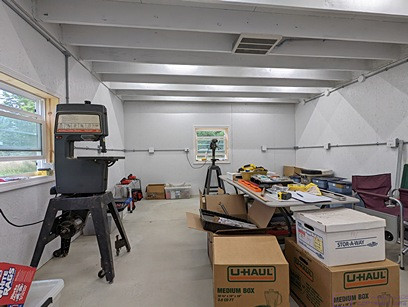
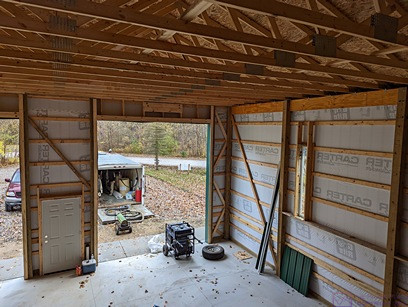
The barn shop looking east from the west wall.  The band saw (left) and drill press (far end) are positioned in front of the two windows where wall storage isn’t possible.  Both of these will eventually be mounted in/on custom designed/built workbench/storage units.


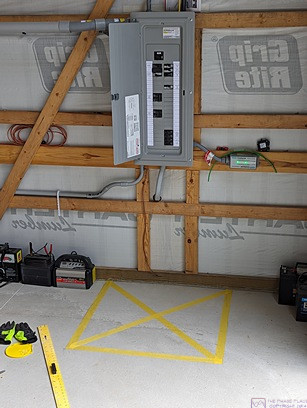
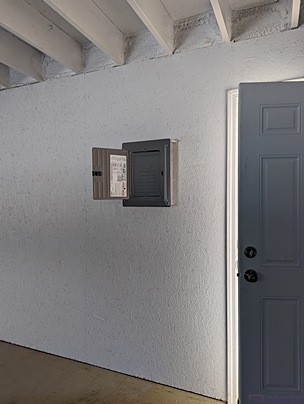
The National Electrical Code requires a clear space in front of load centers and other electrical equipment that require access for facility operation and maintenance.  Minimum depth, width, and height of this space is specified.  Bruce has taped out this area on the floor for the main load center, but will eventually mark it permanently with paint or more durable tape.


What’s good for the goose is good for the gander.  The sub-panel in the barn shop gets the same “no go” floor treatment as the main load center.  It might seem silly, but we will be moving a LOT of stuff around, and it’s just too easy to forget that we can not store anything in these spaces.


And last, but not least, for this month, work begins on replacing the roller / height-adjusters on the doorwall screen doors.


202306_01-30 – Summer Solstice

Blog Post for June 2023

This post consists of 23 photos with captions.  It continues the wiring of the barn, but also includes some family, friends, and home photos, including a new refrigerator for the house.  The term “conduit” refers to Schedule 40 PVC electrical conduit.  All photos by Bruce unless otherwise attributed (Linda).


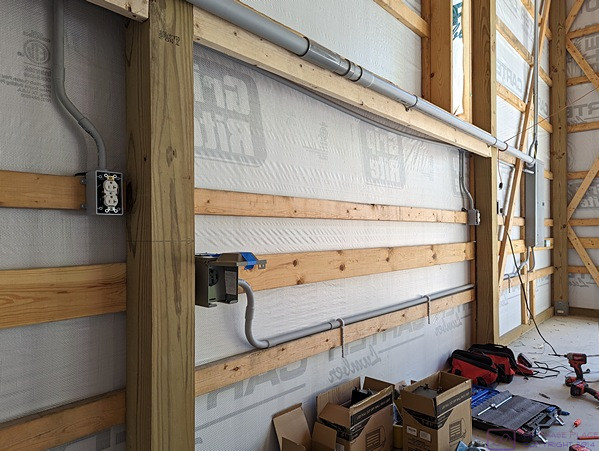
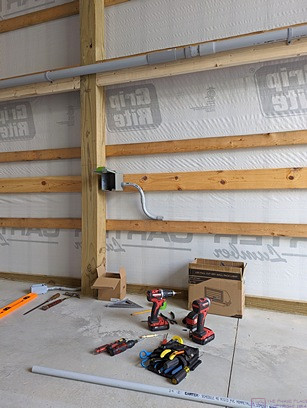
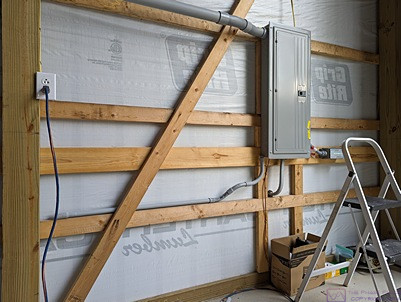
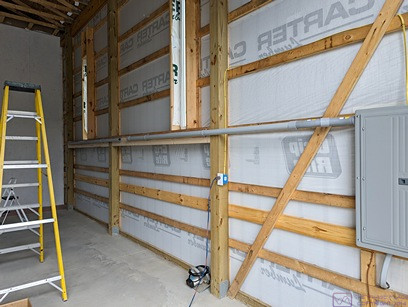
The east wall of the barn (RV trailer bay).  Main Load center (electrical distribution panel) right-center.  Large horizontal conduit carries the 100A feeder cable to the sub-panel for the shop/storeroom.  The mounting board for this large diameter conduit conceals a smaller diameter horizontal run for the utility receptacles, one of which is visible left-center (left side of the 6×6 post) along with its conduit drop. On the right side of the 6×6 post is the 120/240VAC / 50A RV receptacle for the travel trailer and the conduit that carries the wires from the load center running along the top edge of the bottom girt.  Conduit also runs vertically out of the top of the load center and up to the roof trusses, but is difficult to see in this photo.


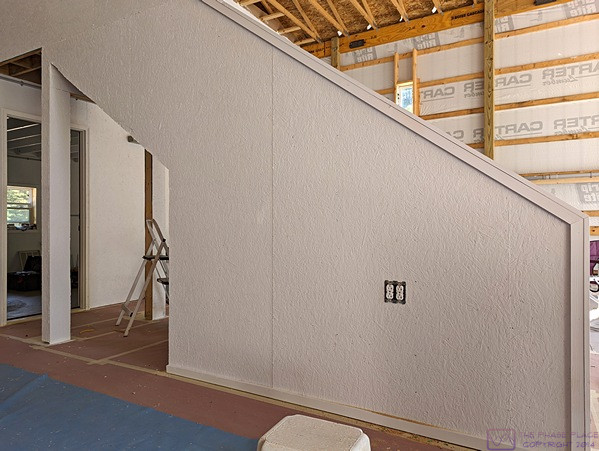
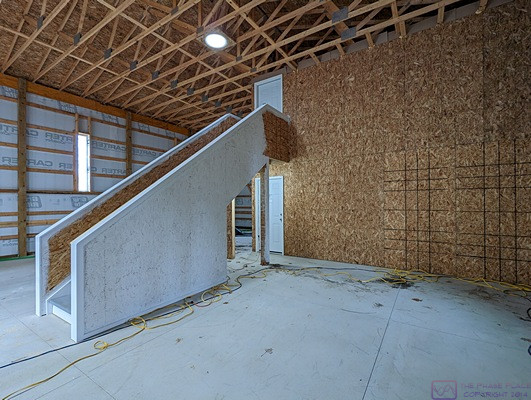
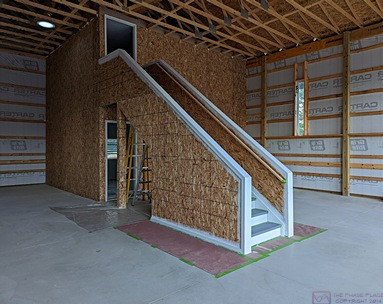
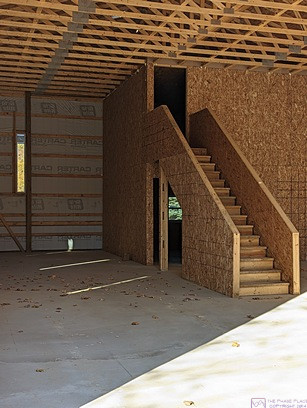
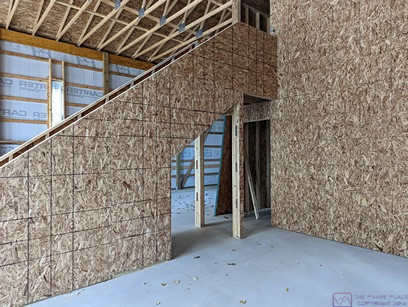
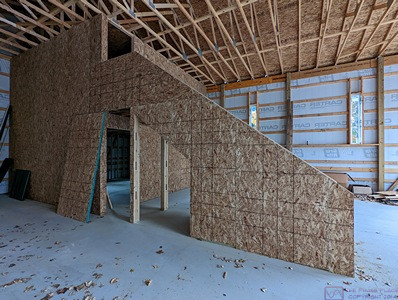
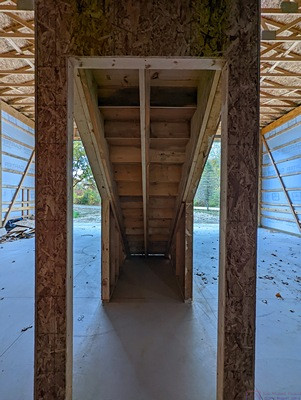
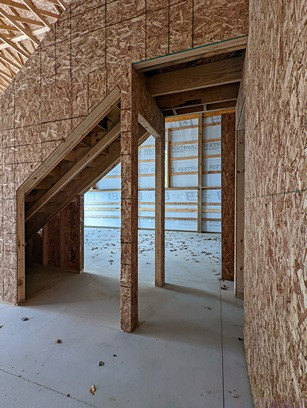
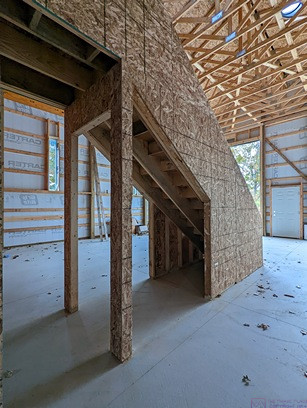
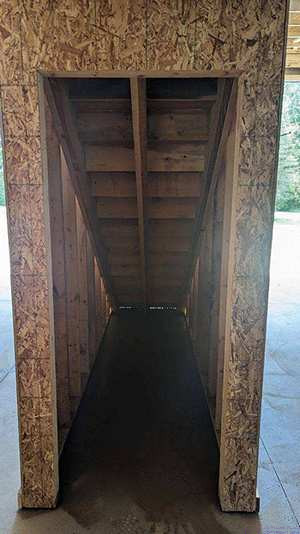
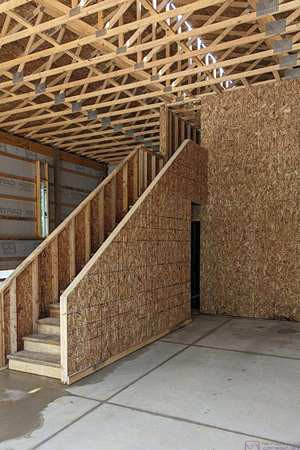
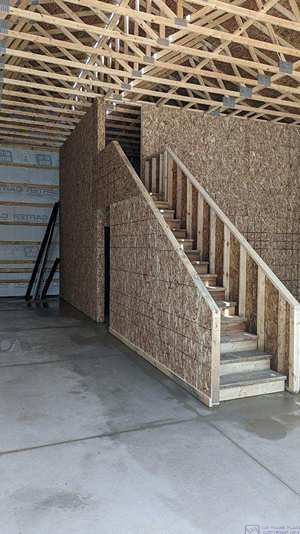
The left/west side of the staircase to the storeroom above the shop.  An outlet box opening with a pair of duplex 120VAC/20A receptacles is visible in the staircase sheathing.  A matching outlet box and receptacles are installed on the other right/east sidewall of the staircase.  The wires for these receptacles come in from a T-body above the shop door.  The two RV bays are really one continuous space, except for the staircase, so this was the only practical way to get power to the center-middle part of the barn.


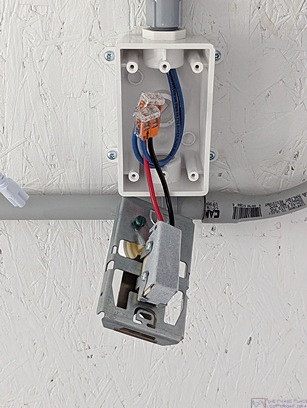
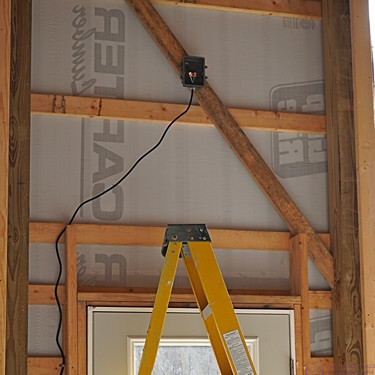
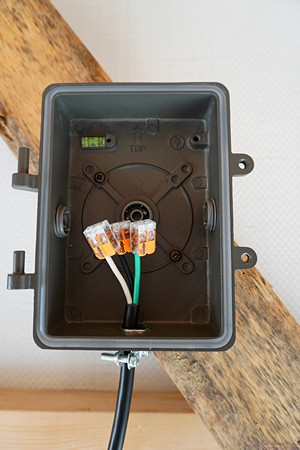
The outlet box and thermostat for the electric shop heater.  The heater and Tstat are 2-pole, 240VAC devices.  This photo shows a WAGO snap connector suitable for the 10AWG wire used to supply the heater.


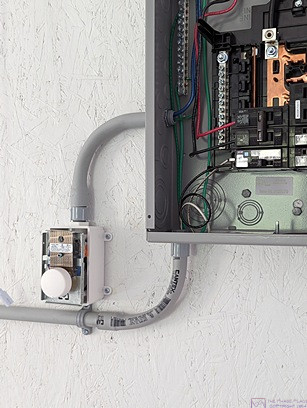
The thermostat for the shop heater installed in its outlet box at a little over 4’ above the floor, and conveniently close to the shop sub-panel.


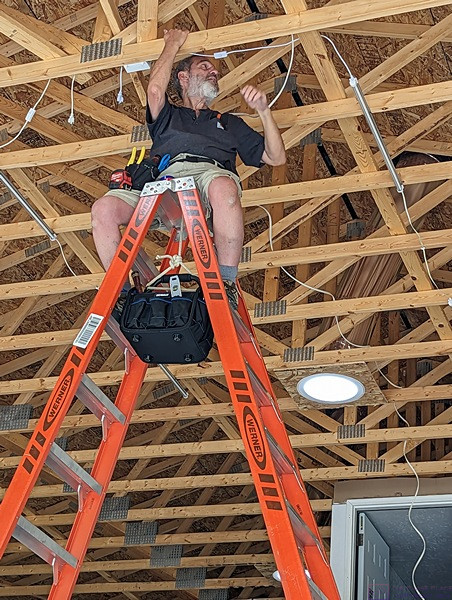
Bruce straddles the 14’ step-ladder so he can sit and work comfortably on the outlet boxes / receptacles for the LED linear light fixtures for the front center part of the barn.  The white disc behind him is one of the four VELOX Sun Tunnel’s in the barn ( three in the RV bays and one for the storeroom).


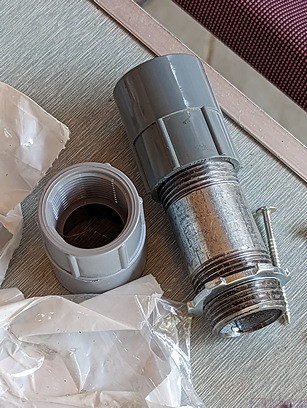
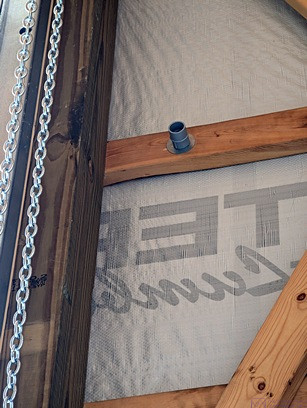
A short galvanized steel “nipple” (threaded on both ends) and threaded PVC conduit adapters.  There use will be more obvious (?) in the next three photos.  Bruce had to drill holes through horizontal girts to get wires to the four outdoor flood lights on the front of the barn.  (A girt is a 2×4 installed “on the flat” for lateral structure and steel siding attachment).  These nipples and fittings attached to the light fixtures, sealed the hole, and protected the wires.


Bruce is working on one of the access/mounting holes for one of the four exterior flood lights on the front of the barn.  The lights are being installed at the 12’ level up from the floor, in part because there were girts at that level which made the installation more convenient than putting them higher up.  It was also high enough to provide good coverage at ground level for the entry door and both RV bay rollup doors.  (Photo by Linda)


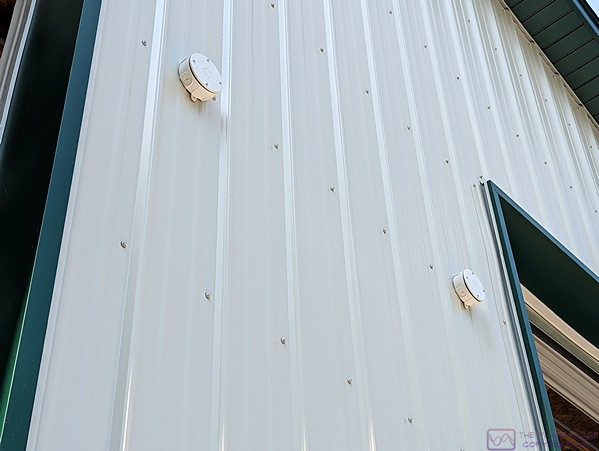
Shown here are the two exterior (weatherproof) outlet boxes between the large bay doors and above the entry door.  The flood light fixtures will attach to these outlet boxes.  Both boxes and the fixtures are white, to blend in with the white siding on the barn.


One of the nipples with the conduit adapter installed in the girt just to the west of the east RV bay door.  The chain at the left edge of the frame is the operator for the rollup door.  These doors can be motorized later, if we wish, but they are easy enough to operate manually.


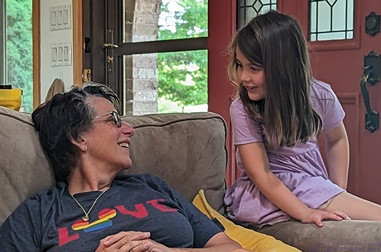
Our youngest grand-daughter having a conversation with her “grandma N” (our close friends and travel companions).  (Photo by Linda)


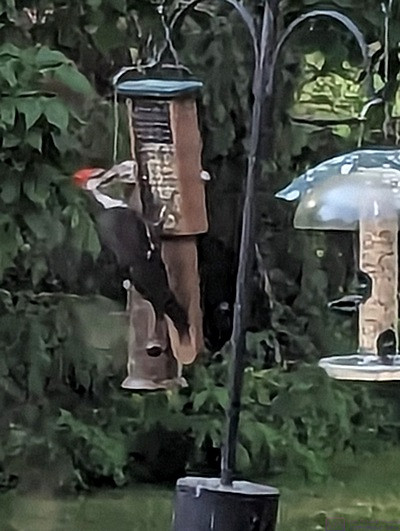
A Pileated woodpecker visits our larger woodpecker feeder.  We know they are in the area as we often hear them “drumming” but they are rarely seen, and only very briefly when they are.  Linda was lucky to get this photo.


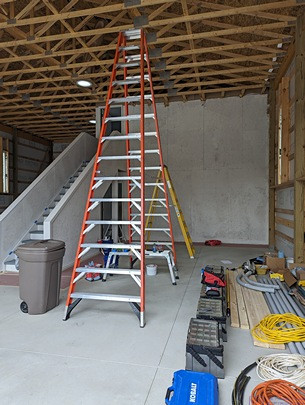
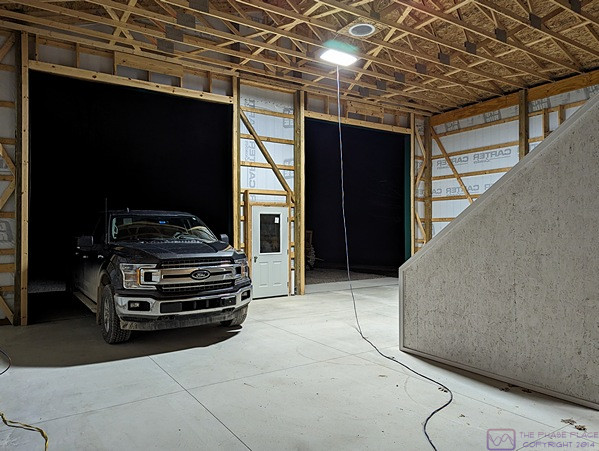
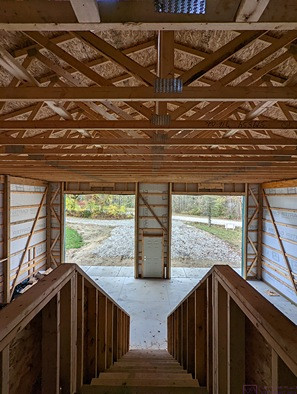
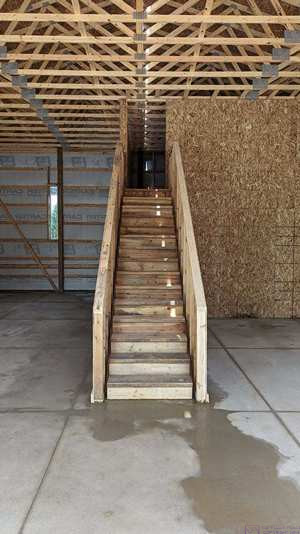
A view to the rear of the large/west RV (bus) bay in the barn.  Tools and materials are lined up down the center to make space for the 14’ step-ladder around the edges so Bruce could install and wire the lights (which are on in this photo).  Stairs up to the storeroom are partially visible along the right edge of the image.


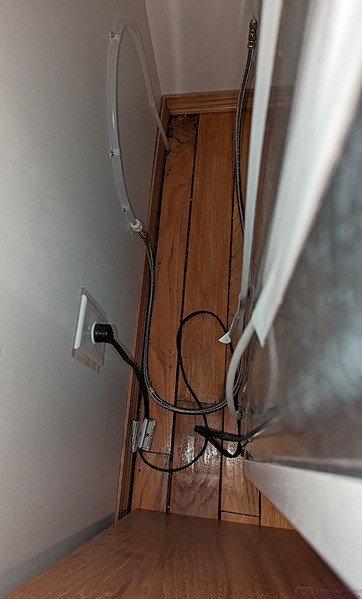
This PEX cold water line and shut-off valve T’s off of a main run in the basement of the house and up to a coupling (the white thing that is partially visible in the floor board) for a water line to the refrigerator.


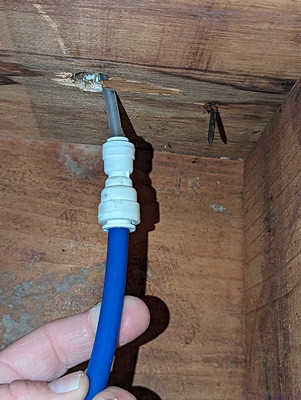
This photo shows the water line coupling pulled down out of the hole in the floor board.  The translucent line going up through the floor board is the water line to the old refrigerator.  The fridge is being replaced, and this line needed replacing too.


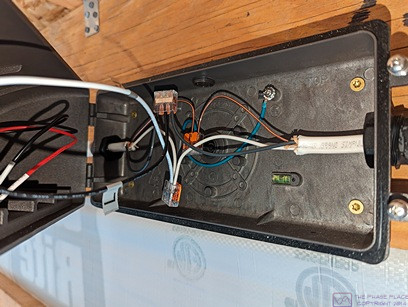
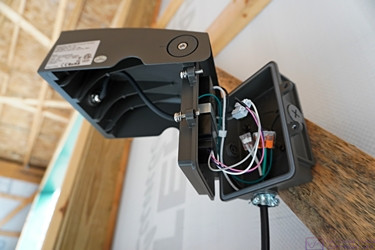
One of the 10 or so area/downlight fixtures installed around the top frame members of the barn side walls in the RV bays.  They are outdoor rated, 2-part fixtures, with the LEDs and driver module in the removeable cover, while the base plate has openings for wire glands, mounting screws, and a ground screw.  Towards the lower right of the base is a small horizontal green “thing”.  It’s a bubble level, which made it easier to get each base installed parallel to the floor.  Because these are over 15’ from the floor, out of reach of anyone (except someone named “Bruce” working on the roof of the bus) Bruce used NM-2 (non-metallic 2-conductor + ground) shielded cable (generically referred to as “ROMEX”) instead of running conduit.  He ran pieces of cable between adjacent units, securing it to the top frame members with cable stapes, and used weather tight strain-relief glands at the entry points into the units.  There is a rubber seal between the two pieces of the unit, making the unit weathertight when properly installed.  WAGO wire connectors were used to tie the NM-2 wires and the fixture wires together, placing all of the fixtures in parallel on the circuit.  The lights for the east and west bays are on separate circuits and are switched using their respective SD (switch duty rated) circuit breakers in the main load center.


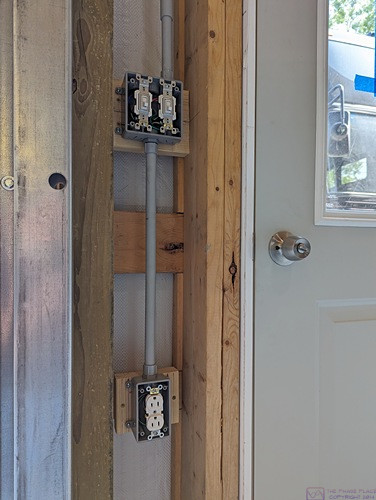
The inside of the front wall of the barn on the east side of the entry door.  The outlet box at the top has two single-pole, single-throw (on-off) switches.  The one nearest the door is for the four outside floodlights on the front of the barn.  The other switch is for the interior center lights.  These lights illuminate the open area between the entry door and the staircase to the storeroom, as well as the stairs and landing, and the floor on either side of the staircase.  This ensures safe/lighted entrance to the barn, the storeroom, and the shop door under the staircase landing.  Also shown is an outlet box with duplex receptacle towards the bottom of the frame.


This is still the old refrigerator in the house kitchen, but Bruce has installed a new/clean translucent water line and replaced the old duplex electrical receptacle with a new, single one.  We had not used the automatic ice-maker in this fridge since we bought the house and the water line was shut-off at this point.


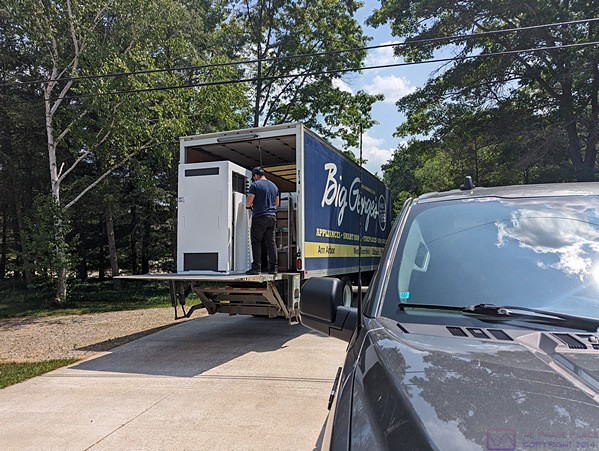
We bought the new refrigerator from Big George’s in Ann Arbor, Michigan.  This is our old refrigerator being loaded into their truck.


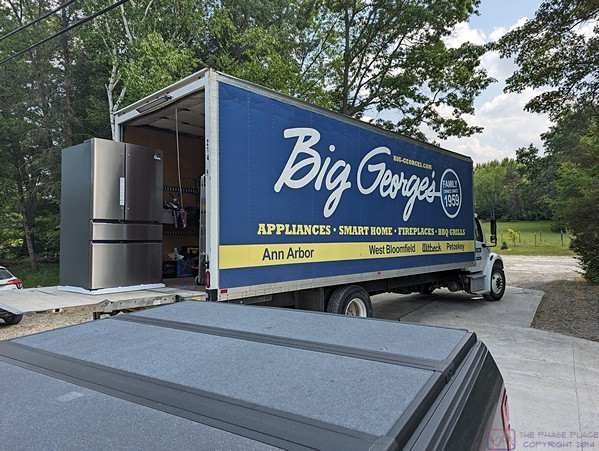
Our new refrigerator being unloaded from the delivery truck.  The Big George’s crew did a great job of removing the old refrigerator and installing the new one.


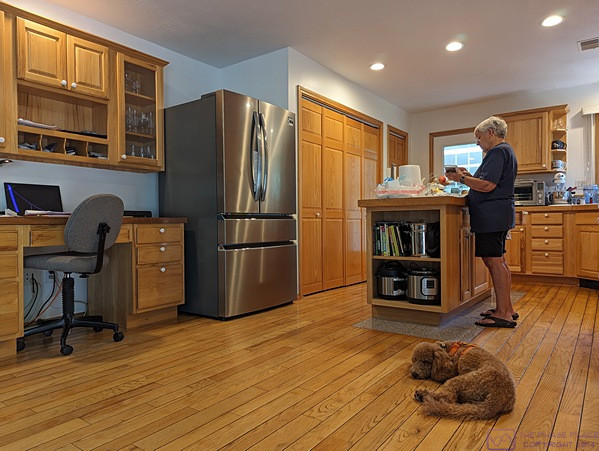
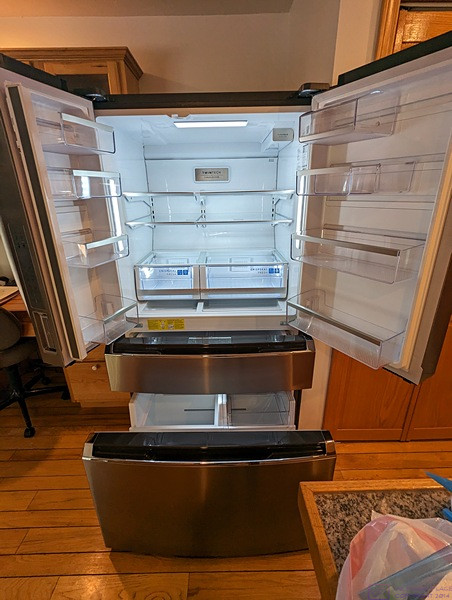
Our new refrigerator takes center stage in our kitchen.  Linda studies the directions for getting the interior ready to use while Bella (Paula and Nan’s dog) chills out on the floor.  (We took care of Bella while they went on a family vacation.)  Although not obvious from this photo, the new refrigerator is wider than our old one.  As part of the preparation for getting it installed, we had to move the wall cabinet over the desk ~8” to the left.  We also had to move the desk, but that was easy.  Up to this point, all of our appliances have been white, but we had to go with something else in order to get the model/features we wanted.  In time the other major appliances might get replaced/upgraded to stainless steel, but the fact that everything doesn’t match does not bother us.


The new refrigerator is a French door model with two pull out drawers.  The lower/larger drawer is the freezer, and has a sliding tray inside it.  The upper drawer can be a fridge or a freezer.  We decided to use it as a fridge as we do not typically stock a lot of frozen items.


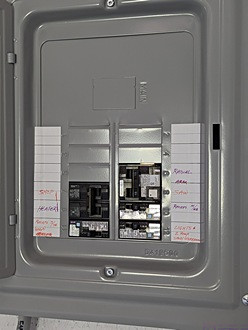
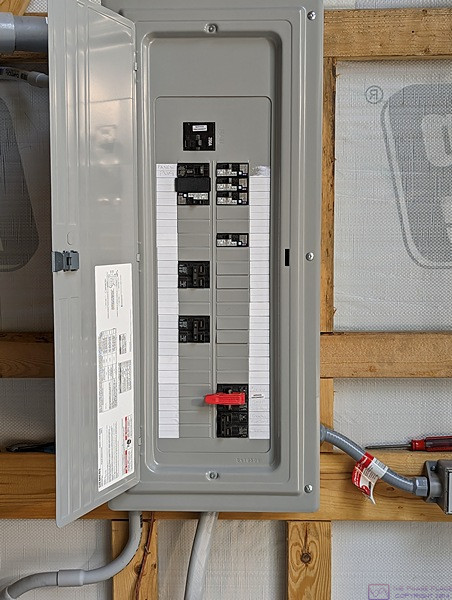
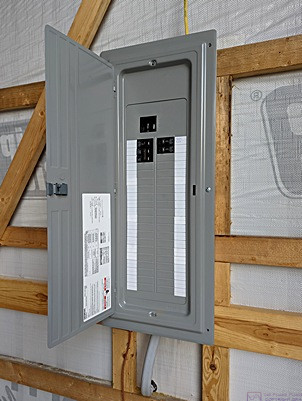
The sub-panel in the barn shop with the cover on and the labels in place.


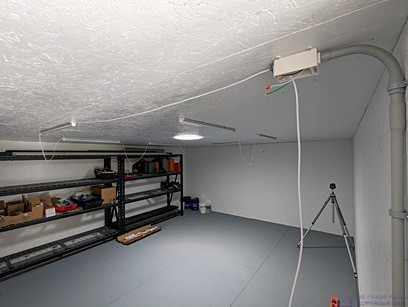
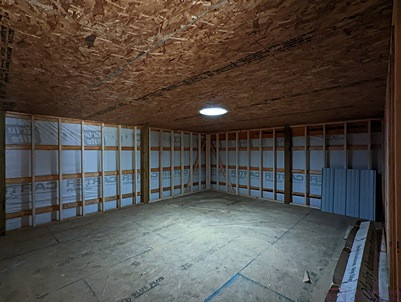
Another look at the barn storeroom showing the ceiling lights with the interconnecting wiring nicely secured and dressed.  Entry door is at the left.  Some of the Kobalt (Lowes) heavy-duty shelving across the rear wall.


202305_01-31 – The Merry Month of May

This post consists of 21 photos with captions.  It is mostly about the installation of the barn electrical system, with a few family photos thrown into the mix.  The term “conduit” refers to Schedule 40 PVC Electrical Conduit.  Photos by Bruce, unless otherwise indicated.


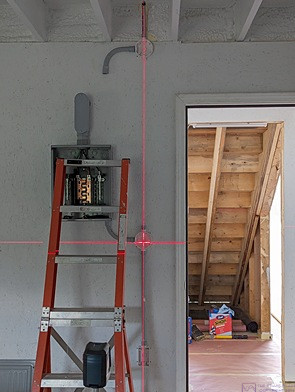
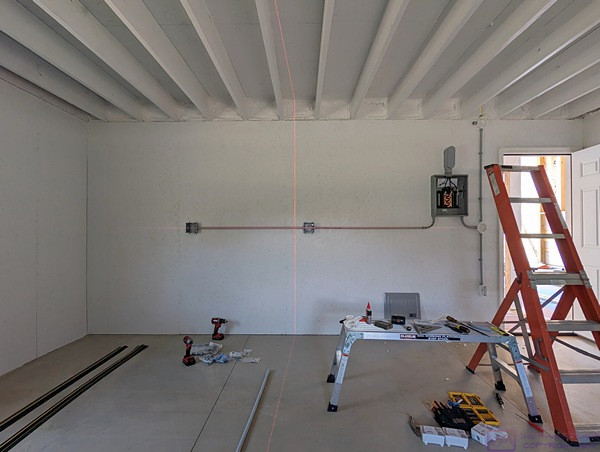
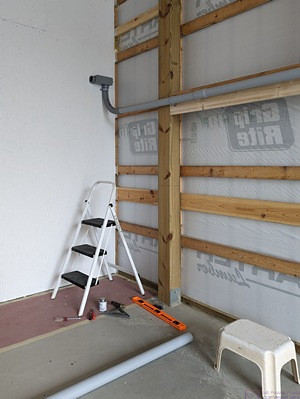
Barn shop looking south towards door.  Shop sub-panel center left.  Laser Level (bottom left) being used to align PVC electrical conduit vertically and horizontally.

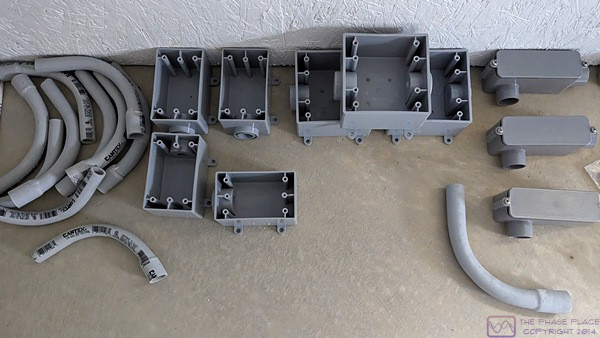
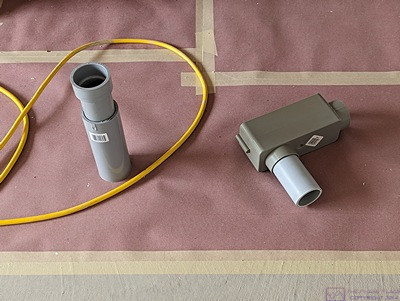
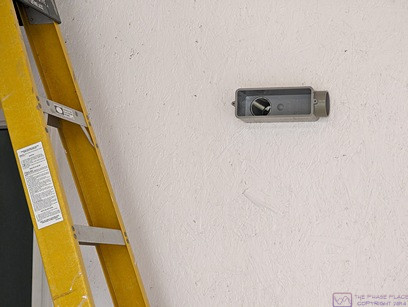
Some of the conduit components used in the wiring of the barn; shown are elbows/sweeps, outlet boxes, and conduit bodies.

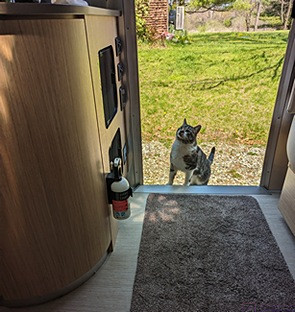
Cabella (who is not our cat but hangs around our house) checks out the entry to our Airstream travel trailer while it is parked in front of our house.  (Photo by Linda)


A view of the south wall of the shop in the barn early in the process of installing the conduit.


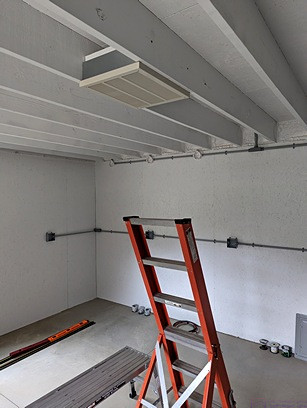
The barn shop looking SE with a bit more conduit installed.  Note the electric heater mounted between the ceiling joists.


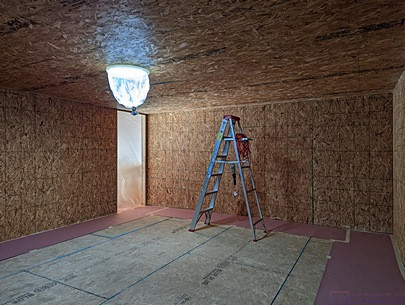
A view of the storeroom above the shop in the barn as seen from the door in the SW corner looking NE.  The vertical conduit at the right edge of the image comes up from the shop sub-panel to an outlet box for a 120V/20A duplex receptacle (not visible), then to an outlet box for a light switch (also not visible), and then to an outlet box on the ceiling where the wiring for the ceiling mounted LED lights ties in.


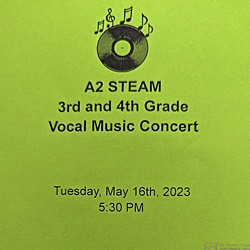
The program cover for the A2 (Ann Arbor) STEAM (Science, Technology, Engineering, Arts, and Mathematics) end-of-year 3rd and 4th Grade Vocal Music Concert. In addition to singing, the concert involved a lot of recorder playing. Our middle grand-daughter attends this school. (Photo by Linda)


The 4th grade vocal group for the A2 STEAM Vocal Music Concert.  Our middle grand-daughter is front/left in the photo (highly patterned dress).  (Photo by Linda)


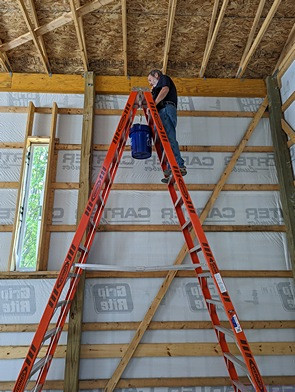
Bruce working at ceiling height (16’) in the barn using the 14’ step-ladder.  He is probably working on the wiring, as there is no other reason to be at ceiling height in the NW corner of the barn, but it’s not obvious what he is actually doing.  This photo is mostly to show the ladder. (Photo by Linda)


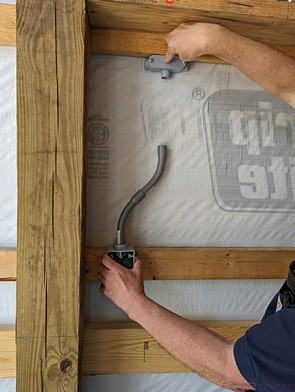
Bruce holding some conduit components in position to show how they will fit.  Conduit will run horizontally to the upper T-body and then down through the double 45-degree elbows into the outlet box.  The horizontal conduit will pass behind the 6”x6” posts, penetrating the vertical 2”x4” spacer blocks located there (that space the horizontal girts).


A view of the E wall of the smaller (east) RV (trailer) bay.  The large conduit near the top of the image will carry the large (100 A) cables from the main electrical distribution panel (out of the frame to the right) to the south wall of the shop (out of frame to the left), and then across the wall to the entry point into the shop, just above the shop sub-panel.  The outlet box (center/left) is a special metal RV outlet box with a 120/240V / 50A RV shore power receptacle.  The conduit that supplies this outlet box will run along the top of the lower (horizontal) girt before sweeping up and into the box as shown.


A view of the SE corner of the barn showing the main electrical distribution panel.  The large conduit for the feeder cable to the shop/storeroom sub-panel comes out of the left side of the panel at the top.  The smaller conduit for the 50A RV receptacle comes out of the bottom left of the panel and sweeps down to the horizontal girt before running aft.  In-between these two conduit runs will be another one to supply the utility receptacles for this bay.


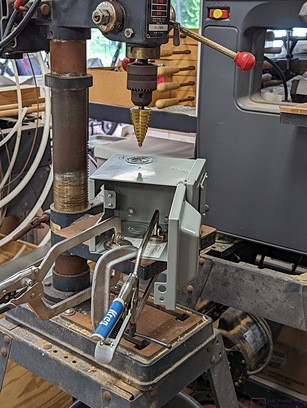
Bruce needed to bring the conduit and wires for the RV outlet boxes into one of the sides but the RV outlet boxes did they not have pre-punched holes for this fitment.  In this photo, the box for the west (bus) RV bay is clamped to the drill press table and a step drill is being used to drill the correct size hole.


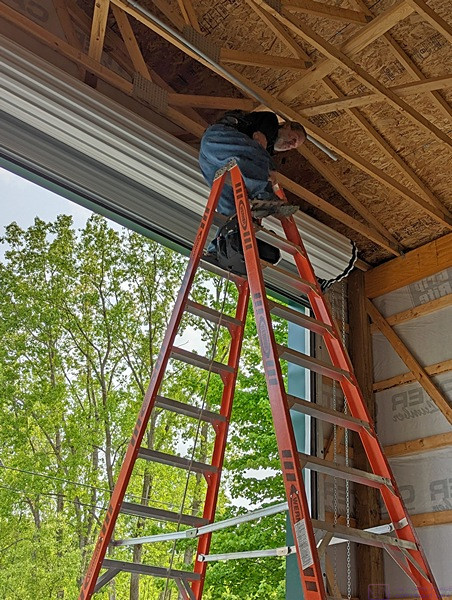
Bruce maneuvers around the top of the 14’ step-ladder near the 14’ rollup door for the west (bus) RV bay.  He is installing conduit along the faces of the bottom cord of a roof truss to get power from the electrical distribution panel on the east wall (to the left in the photo) to the front and the west sides of the barn (to the right in the photo).  (Photo by Linda)


Our friend and fellow busnut, Marty, agreed to help Bruce run the wires through the conduit, much of which proved to be a 2-person job.  Here he is using the 7’/14’ Little Giant step/extension ladder in full extension mode to work at ceiling height directly above the main electrical distribution panel on the east wall (SE corner) of the barn.  The roll-up door for the east RV bay is visible.  The clear opening is the same as the west RV bay; 14′ high x 12′ wide.


Bruce (left) and Marty (right) pulling wires through conduit on the west wall of the barn. The vertical piece of conduit in-between them runs down the wall and then sweeps towards the rear of the barn (to the right) to carry the wires for the west (bus) 50A RV receptacle.  (Photo by Linda)


Linda’s sister (Sr. Marilyn, on the left) came up to visit and joined Linda for a walk at one of the Metroparks with our daughter (on the right). (Photo by Linda)


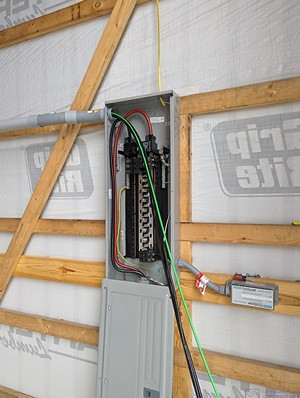
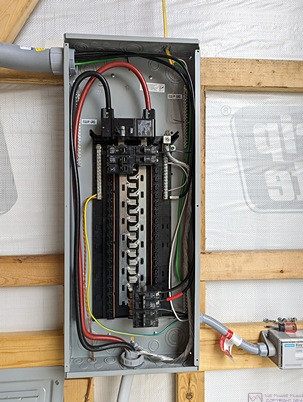
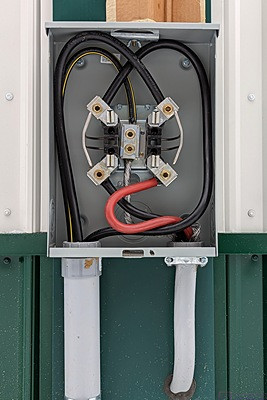
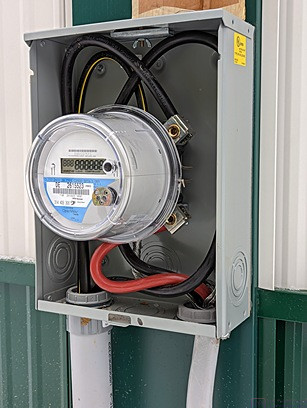
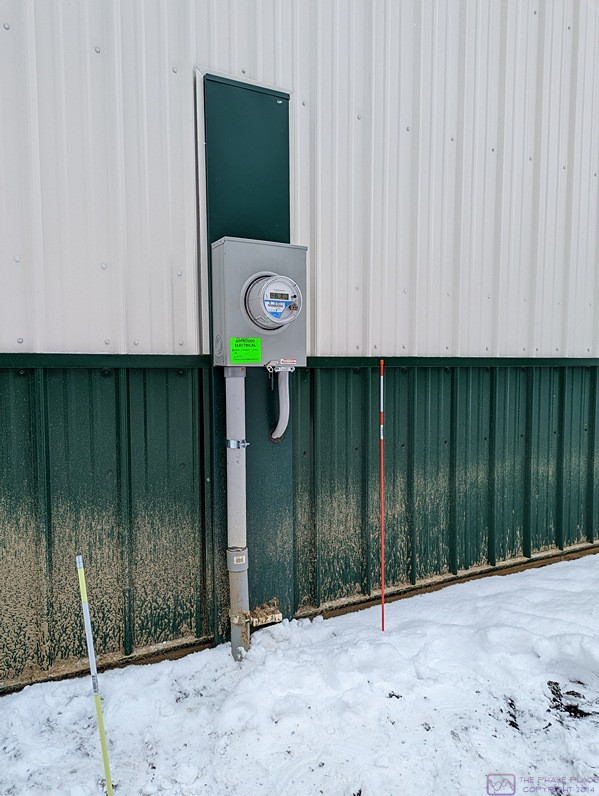
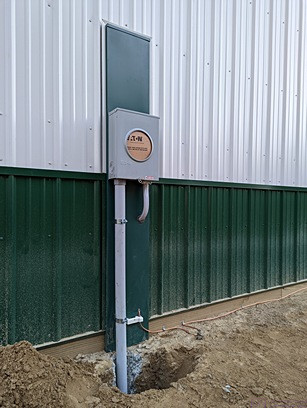
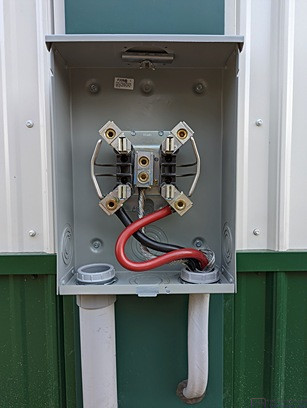
The main electrical distribution panel for the barn showing all of the wires terminated to appropriate circuit breakers.  The two large wires at the top are the 240VAC service entrance cables from the meter, which is on the outside of the wall behind the panel.  The large, light grey cable entering the center bottom of the panel is the service entrance cable from the meter.  There is also a large bare aluminum neutral wire terminated to the neutral bus just to the right of the red wire (not as easily seen in this photo).  The black and red wires are “live” (energized) at all times as an external disconnect was not required by the electrical code revision currently in use in our county and so the builder’s electrician did not install one.  Had I been paying closer attention when the electrician was on site, I would have asked for this external disconnect as an added cost feature.  The red and black wires feed a 200 A main circuit breaker that serves as the “main disconnecting means” for the entire barn.  When the panel cover is off, as shown here, this main breaker is usually open so that nothing else in the panel is energized and work can be safely performed.  The exception to the rule is when Bruce needs to perform diagnostics by taking voltage and/or current measurements.


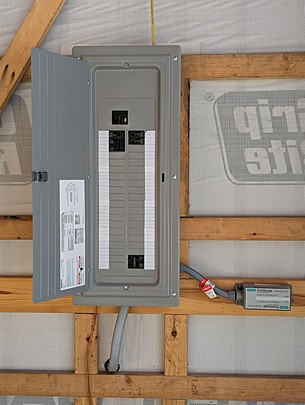
The main electrical distribution panel with the cover installed and the door open, showing the circuit breaker labels along the left and right edges.  The device at the lower right of the image (the left edge is just barely visible) is the Type 2 Whole House surge protector.


Although most of the power to the west (bus) RV bay is fed overhead near the front of the barn, it made more sense for this outlet box to be fed from the east (trailer) utility receptacles circuit.  Although probably hard to see, an “outside corner conduit body” is used at the top/left to bring the conduit around the corner.  As will all of the conduit bodies, this one has a removable/gasketed plate which allows wires to be fed around the sharp 90 degree corner. 


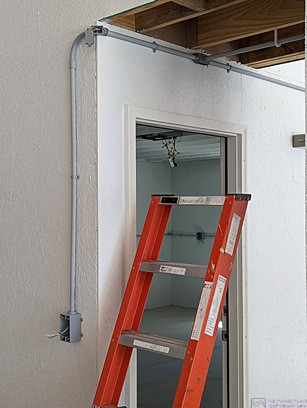
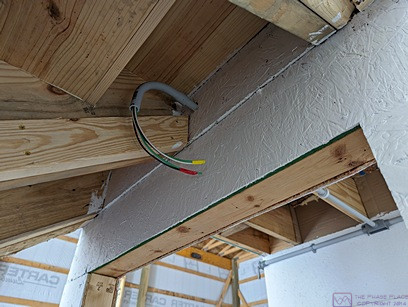
The conduit for the east (trailer) RV bay utility receptacles runs across the south wall of the shop over to the east wall of the west (bus) RV bay (see previous photo).  Above the door to the shop, a T-body allows wires to branch off to the space under the storeroom stairs before continuing on to the west bay.  The wires under the stairs will feed under stair lights and utility receptacles on either side of the staircase.


202304(16-30) – More barn work; painting, conduit, and wires, oh my!

This post contains some narrative but consists mostly of 17 photos with captions.  ]

SUNDAY 16 April

I finally started painting inside the barn today.  Priming actually, but first I finished masking off areas of the concrete floor where I would be painting, using a combination of red rosin paper and masking tape.  Before starting on the interior of the staircase, however, I removed the handrail leading up to the storeroom, removed all of the hardware, and set it across a pair of sawhorses in the driveway.  There was rain in the forecast, but initially the weather was okay, with a high temperature forecast of 74 degrees F.

I rubbed down the handrail with 0000 steel wool, and then opened a container of Kills2 primer that I had left from this past fall.  I gave it a good stir, and used a tapered trim brush to apply it the bottom and sides.  I then moved inside and did all of the “cutting in” in preparation for eventually using rollers for the large surface areas.  I used up the remaining Kills2, and opened the new 5-gallon pail.

These pails have a 3” (approx.) screw off cap, and I have screw on spouts that replace them to allow pouring the contents without removing the entire large snap on cover.  Not that it’s easy—these pails are heavy when full—but it is much less messy than removing the large lid and then trying to pour the contents.  I transferred a small amount of the primer into the old, smaller (~ 3 gallon) pail, and set about the work.

The rain did eventually come, and I had to move the handrail and sawhorses inside along the west shop wall.  As mentioned yesterday, Linda and I had already placed red rosin paper ~3’ wide, along the base of the two large walls that are inside the barn but form two of the exterior walls of the shop/storeroom in the NE corner of the building.

MONDAY 17 April

As forecast, a cold front came through yesterday, with high, gusty winds, and the temperature started falling noticeably by mid-afternoon.  The overnight low dropped below freezing, and we awoke this morning to snow.  In anticipation of this, I had moved all of the primer and paint into the shop portion of the barn yesterday, as it is well insulated and had warmed up nicely with the very warm weather of recent days.  The forecast was for three nights below freezing, but not by much, with highs above freezing, so I figured the paint should be okay.  Overnight lows in the 30’s were forecast again for four nights starting this coming Saturday, but from tomorrow on the weather should be amenable to the work I need to get done in the barn.

Given the weather forecast, today was a good day to work on blog posts, including the processing of photos.  I shot over 1,500 frames on our 15-night/16-day Panama Canal cruise, around 500 of them just on the day we did the transit of the Canal.  It takes a lot of time to go through that many images, select the ones I want to use (that support the narrative or tell a story in their own right), and post-process them.  It also takes a lot of time to craft the narrative, especially more than a month after the events.

TUESDAY 18 & WEDNESDAY 19 April

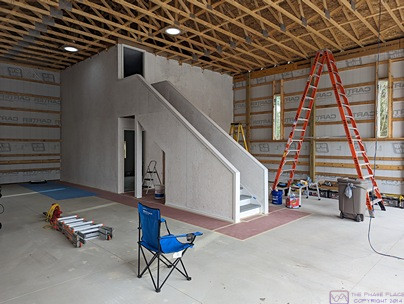
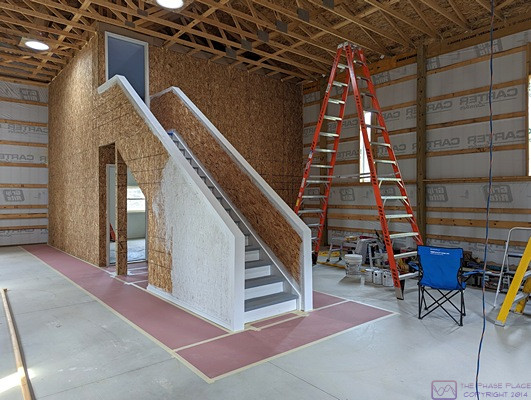
A view of the East (small RV) bay with equipment and supplies.  The wall behind the step-ladder and the walls of the staircase have been painted and primed.  Not yet done, and saved for later, is painting all of the staircase trim in a contrasting color, probably a green to match the lower exterior siding,


I managed to complete all of the cutting-in except for the a few spots high up at the exterior barn walls, as I need the 14’ stepladder to reach these, and I need someone to help me move it.  Linda was working on accounting for the bakery, and did not need to be interrupted.  The handrail dried, so I was able to turn in right-side-up and finish the first coat of primer.


This is another view of the painted walls and staircase as seen from the SW corner the West (large RV) bay looking NE.


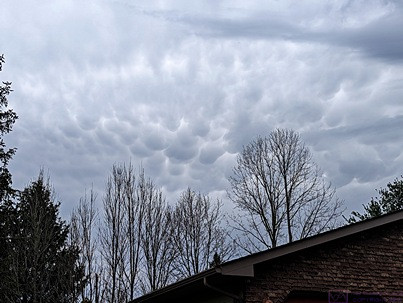
Mammatus clouds as seen from our center driveway looking N over part of the garage.


THURSDAY 20 – SUNDAY 30 April

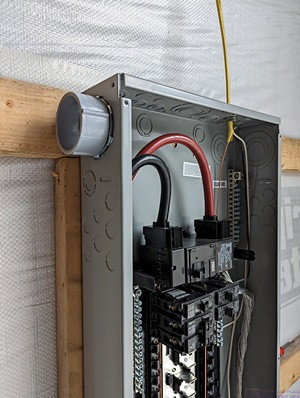
The box adapter has been installed in the upper left corner of the main panel.  The inside of the outer portion is smooth to accept the conduit tube.  The inner portion is threaded, and retained by a conduit lock-nut.  Note that in any photos of the main panel with the cover removed, the main breaker/disconnect is OPEN, so the bus bars are NOT energized.  The very large black and red cables at the top, however, are energized but the terminating lugs have safety covers.  Still, this is no place to get careless.  I am always extremely mindful of the location of these “live” terminals.


During this time period we installed the 2” Sch 40 PVC conduit from the main panel to the sub-panel in the shop, and ran the feeder wires.  It might not sound like much, but it was our first attempt at installing the conduit.  It was  a lot of work, and we took out time to figure things out as we went.  Here are some highlights of that work in photos with captions.


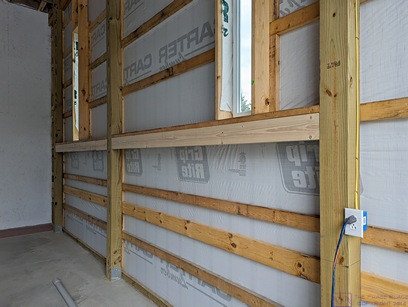
Starting from the post at the right of the frame, we installed a 1×6 board horizontally to the 2×6 boards that are on the flat just underneath the windows.  The 2×6 boards support the vertical framing for the windows and extend back for two more posts.


This is almost the same photo as the previous one, except that some of the 2” Sch 40 PVC conduit has been mounted to the 1×6 boards and tied into the main panel box adapter.  There is a gap in the conduit about mid-run.  An expansion coupling will eventually be installed there.


This panoramic image is 1024×334 pixels.  Clicking on the image might allow you to see it full size.

A 90-degree bend (elbow, sweep) has been used to turn the 2” Sch 40 PVC conduit up onto the wall of the shop and terminate it in a 2” PVC LL conduit body at the correct distance from the floor.


On the left is an expansion joint and on the right is an LB conduit body with a short piece of 2” conduit coming out of the back connection.  Two expansion joints were used for this run, one in the middle of the tube from the main panel to the shop wall and the other in the middle of the tube on the shop wall.  The stub in the LB conduit body will go through a hole in the wall and connect to another LB conduit body just above the top of the sub-panel in the shop.

The LB conduit body positioned in the hole through the wall of the shop.


Another 2” PVC LB conduit body inside the shop above the sub-panel.  Light is coming through the connection on the back of the LB.  A short piece of 2” conduit connects the LB body to a box adapter in the top of the sub-panel.  The box adapter is secured from inside the sub-panel with a conduit lock-nut.


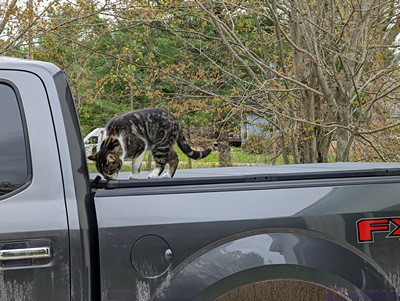
Time out for a cat photo!  On this particular day, Cabela decided to visit the barn while we were working and hang out on the bed cover of the F-150.  She was exploring at this point, but spent most of her time lying down and sleeping.


We fed a “fish tape” from the LL conduit body back into the main panel, being careful of the “live” terminals at the top of the enclosure.  We had already unwound and straightened the stranded copper feeder conductors—three #4 AWG (red, black, white) and one #6 AWG (green)—and laid them out in the driveway parallel to one another.  We attached all four wires to the end of the fish tape.  Linda pulled them into the 2” Sch 40 PVC conduit while I fed them in from the main panel.  Not shown is that when the wires emerged in the LL conduit body, we: 1) disconnected them from the fish tape, 2) fed the tape from the LB conduit body on the outside of the shop wall back to the LL conduit body, 3) reattached the wires to the end of the fish tape, 4) pulled the wires through the 2” conduit to the LB conduit body while guiding them in from the LL conduit body, and 5) detached them from the fish tape when they emerged form the LB conduit body.  This sequence of events would get repeated quite a few times before all of the wires were installed.


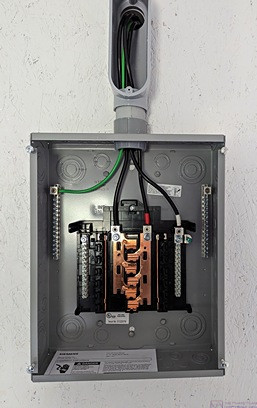
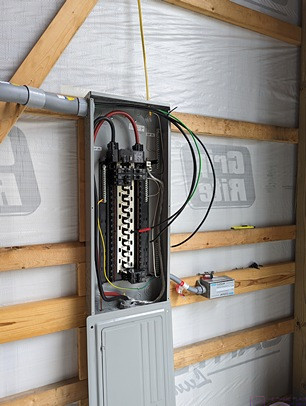
The feeder cables terminated in the shop sub-panel, from left to right: Equipment Grounding Conductor (EGC, Green), L1 (Black), L2 (Red), and Neutral (White).  All of the conductors have black insulation except for the EGC.  The L2 and Neutral conductors are color coded with tape near the lug connector ends.  Note that there is NO connection between the equipment grounding bus and the neutral bus in the sub-panel.  Neutral and Ground can only be bonded at one place in the system, and that is at the first disconnect, which in our barn is the main panel.  Note also that there is no main circuit breaker in the sub-panel.  The L1 and L2 feeder circuit conductors are protected by a 100 Amp, double-pole circuit breaker in the main panel.  This circuit breaker also serves as the disconnect for the sub-panel in the even that it needs to be opened and worked on.  Until we have final approval of the electrical installation, this circuit breaker has a lock-out device on it to prevent it from being accidentally closed and energizing the sub-panel.


The feeder cables have been cut to the required length to be terminated in the main panel.


The L2 (Red) and L1 (Black) shop feeder conductors have been “landed” on a double-pole, 50 Amp circuit breaker (3rd and 4th from the bottom in the lower right of the panel).  The Neutral (White) feeder conductor has been terminated at the bottom of the neutral bus bar on the right side of the panel, approximate mid-way between the top and bottom of the enclosure.  The EGC (Green) has also been terminated in the ground bus, but is under other wires and not really visible.


The shop sub-panel with its cover reinstalled.


As of April 29th, the conduit and conductors for the shop feeder circuit were installed and I could finally move ahead with the rest of the conduit and wiring.  I decided that the best/easiest thing to do next was the shop and storeroom as I could do most of the work by myself standing on the floor or a short ladder.


202304(01-15) – Barn Project and General Update

In addition to the narrative, this post contains 17 photos with captions.  ]

MONDAY 3 – TUESDAY 4 April

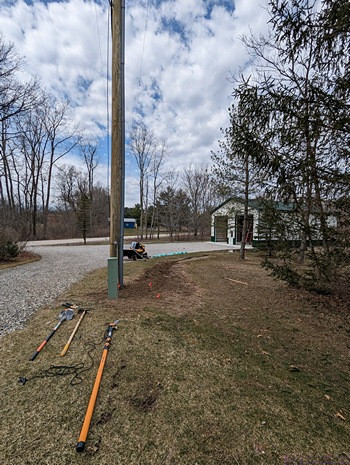
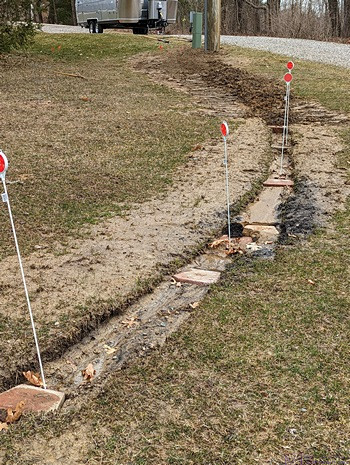
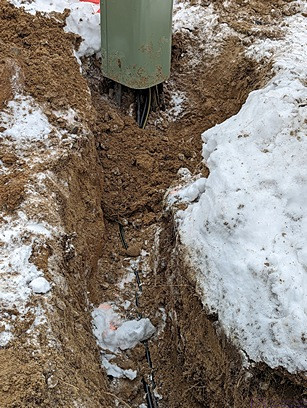
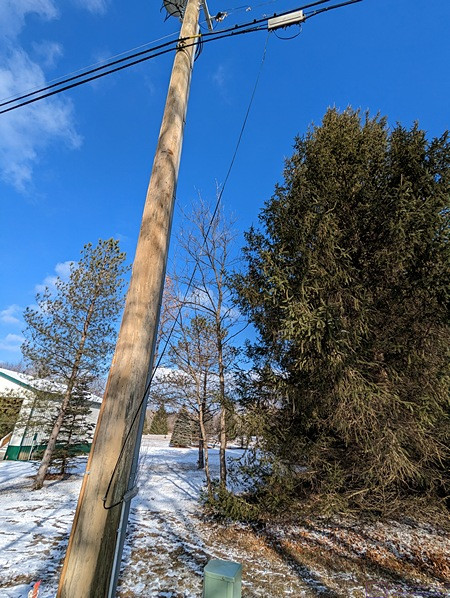
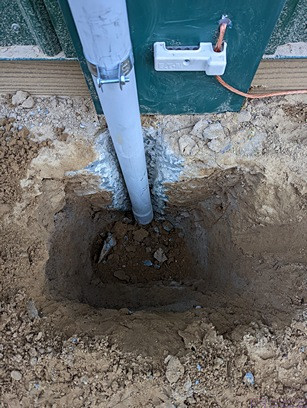
The conduit trench that runs form the new utility pole along the inside curve of the driveway to the meter box at the SE corner of the barn.  Various tools are out as I get ready to move some dirt around to better fill-in the trench.

With all of the rain that came in March I finally had a day to continuing working on the trench for the conduit carrying the large electrical conductors from the pole to the barn meter box.  The soil was damp, so it was easy to dig but heavy to move.  I placed some of our surplus stacking landscape blocks in the trench every 5 feet of so to help retain the soil that I moved into the trench from either side.

The green bags in the following photo are 40 lb. topsoil, but I had been advised against using them as fill as it just washes downhill.  At some point I will probably get out the garden tiller and try to work this soil into the clay, but I would really like to wait until Phil can get back here and correct some of the grading.


I have managed to shovel/scrape most of the soil (clay dirt, really) from along the sides of the upper end of the trench into the cut, leaving it mounded up somewhat as it will eventually settle.

The stackable landscaping blocks are visible in the trench.  I used them as partial fill and to stop erosion of the newly place soil in the trench.

WEDNESDAY 05 – WEDNESDAY 12 April

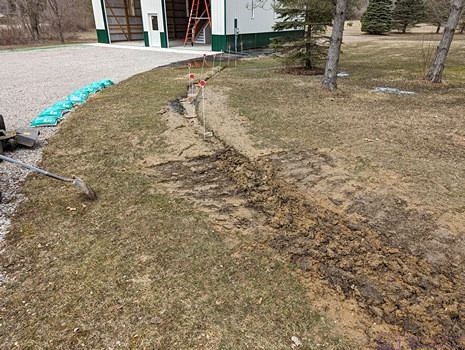
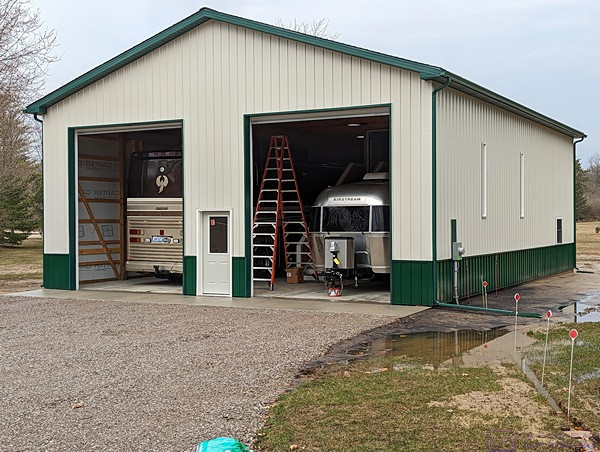
The converted coach and the travel trailer in the barn.  We put them inside because the weather forecast included the possibility of large/damaging hail.  “Technically, they should not be in there as we do have the occupancy certificate yet (I need to finish the wiring first), but any fine we might get would be miniscule compared to the damage that large hail could do to either/both of our RVs.  We did get pea-sized hail, along with lots of rain and wind, but south of us there was ping-pong ball sized hail that destroyed fields of crops and badly damaged vehicles.  Note the standing water just off the right edge of the driveway at the SE corner of the barn.  I am waiting for our grading and excavating guy to squeeze us into his incredibly busy schedule and take care of the drainage.

Linda (Ama) was away from the house from mid-day on the 5th until late evening on the 12th.  She was providing live-in child care for our two younger grand-daughters while their mommy and daddy took a 1-week adult vacation to Iceland.  I drove down on the 5th to help get the 10-year-old to her rock-climbing class and then back home for dinner, before returning home myself.  I went down again on Saturday the 8th in time for dinner and stayed the night.  What fun that was!  Finally, I drove down on Wednesday the 12th to pick the 10-year-old up from school, take her to her rock-climbing class, and then get the two of us to the Ann Arbor area Buddy’s Pizza to meet up with Ama and the 4-year-old for dinner.  When I wasn’t doing those errands, I was home working on the barn, and other things.  I will get to those momentarily, but first, some highlight photos of the Ann Arbor events.

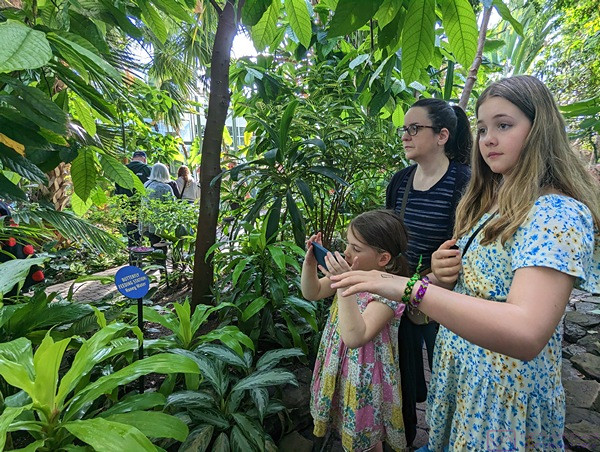
Sadie (L) and Madeline (R) with their aunt Meghan (C) at the butterfly exhibit at Meijer Gardens in Grand Rapids, Michigan on Friday, April 7.  (Photo by Linda.)


PXL_20230407_145529564_307x408(L)…  A lovely photo of a beautiful butterfly.  (Photo by Linda.)

A lovely photo of a beautiful butterfly.  (Photo by Linda.)


Saturday morning means ice skating lessons.  “Mads” (with her arms and one leg extended) seems to be doing pretty well.  (Photo by Linda.)


Easter weekend was upon us so on Saturday afternoon the girls decorated ceramic eggs.  (Photo by Linda.)


On Easter Sunday, aunt Meghan came over and the girls decorated actual eggs.  The Easter Bunny showed up while the girls were not looking, and the eggs got hidden in the back yard.  (Photo by Linda.)


Here I am with the crew after a successful egg hunt.  Note that one or two eggs disappeared between the time the Easter Bunny hid them and the girls went looking for them.  A squirrel was spotted from the house carrying at least one of them away.  (Photo by Linda.)


The Easter bounty on full display.  (Photo by Linda.)


Apa (me) and “Mads” discussing something in the her recently acquired book on the history of Algebra.  She’s 10-1/2 years old.  (Photo by Linda.)

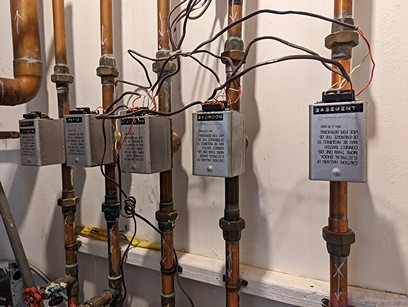
The main “other thing” of particular note, was that the basement zone of our hot-water baseboard heating system quit working.  Our system has three zones, and the other two were working normally, so that strongly suggested that the zone valve had failed.


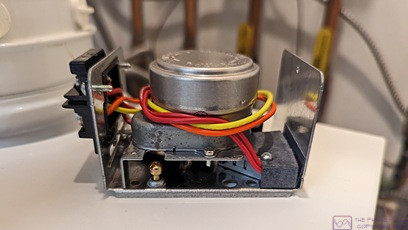
The hot-water baseboard heating system originally had 5 zones, each controlled by one of the zone valves shown in this photo.  The basement zone valve is on the far right.  The next two are for the main part of the house and the bedrooms.  The last two originally served a zone for the breezeway (now our library) and the water-heater, which is just out of the photo to the left.  The library zone was decommissioned when we had the new natural gas furnace installed in early 2016.  The water heater zone was also decommissioned at that time as the Bosch furnace controls the hot-water tank/function directly.

The zone valves are a Honeywell Home V8043F1036/U Motorized Valve.  It has a 24VAC 50/60 Hz motor with an integral end switch and the 1/4-turn brass valve has 3/4″ sweat fittings assembly.  The motor-actuator engages a small shaft that protrudes from the valve.  There is also a lever on the motor actuator that is supposed to allow the valve to be opened manually and secured in that position, but the lever would not budge.  Either the motor or the valve had seized, but I wasn’t sure which one.


This is the motor-actuator portion of the spare assembly removed from the valve body.

Well … it so happened that I had a complete spare zone valve on the shelves in the furnace room.  It was still in a box with directions, albeit the box was a bit tattered and the directions were in pretty rough shape.

The valve assembly came with the house, and had probably been there for many years before that.  Fortunately, it was fairly obvious that the motor-actuator could be separated from the valve by removing two small screws.

I shut of the furnace (“boiler”) and then shut off the power to the entire system, which is both 120VAC and 24VAC.  I took a photo of how the wires were currently connected to the existing motor-actuator and then carefully removed them from the terminal screws.  I removed the retaining screws from the existing unit and slid it off, with some difficulty.  I was able to turn the valve shaft easily, but I could still not move the manual lever on the motor unit.  Problem isolated.

I separated the motor-actuator on the “new” zone valve from the valve body, checked that I move it by hand (I could) and attached it to the existing valve body.  I was able to open it manually, so I reconnected the wires, turned the power back on, and then turned the furnace on.  I then turned the basement thermostat on and went away to do other things, one of which was to see if I could purchase replacement valve assemblies to keep on hand.  As it turned out, I was able to order two spare valve units on Amazon.

The reason for the wait was that this particular Bosch unit has an outside temperature sensor, which results in a strange system behavior during the spring.  At this time of year the sub-surface temperature of the earth around the house is still cool and thus the basement tends to be cool as well (most of it is not very well insulated).  But because the temperature outside is above some limit, the furnace refuses to operate any of the space heating zones.  It still makes hot water; it just won’t heat the house.  That’s not a problem upstairs where it tends to be warmed and we also have a forced-air heat pump, but for a period of time each spring the basement just ends up colder than I would like.  Worst case, I have been known to close the doors to my office and run a small fan-heater.

Another important “other thing” was that I finally had a chance to talk to the neighbor (Rebecca) across the street about Cabela (the cat).  Cabela is a lovely female cat that belongs to Dave and Rebecca (and their kids) but Cabela is afraid of their dog, Kenai, and will not go in their yard when the dog is outside, which is most of the day and evening.  (Cabela was actually hanging around our house all winter, and it was then that we learned she belonged to the neighbors).  As a result, Cabela spends most of her time around our house and in our yard, but (supposedly) goes home at night where she is fed and has shelter on their back deck.

Cabela does not come in our house and we are not adopting her.  She is not ours, and we have no plans to get any more pets unless/until we are no longer doing any extended traveling.  The main reason for the conversation was to make sure they were aware that Cabela was hanging out at our place, and that both we and they were OK with the situation.  I also let her know that I give Cabela some food (dry kibble) in the morning and wanted to make sure that was OK with them.  It was a very friendly chat, and yes, they had seen her over there, and no, it was not a problem.  If anything, they did not want us to feel like we had to take care of her.  I assured her that we did not, and since we were now kitty-less, we enjoyed being able to interact with her, without really being responsible for her.

Back on the barn project, the major tasks facing me were the wiring, and then the relocating of “things” (many things) from the garage to the barn shop and storeroom.  A “minor” task was that I wanted to paint the two exterior walls of the shop/storeroom that are inside the barn, but this had to be finished before I could run some of the conduit.  (I hope that makes sense.  The shop and storeroom are a 2-story enclosed space in the right rear corner of the barn.  The east and north walls are part of the shell of the barn.  The other two walls (south and west) are inside the barn.  All four walls are insulated with closed-cell foam.  There is also closed cell foam above the ceiling of the storeroom, and rigid foam under the portion of the concrete floor that constitutes the floor of the shop.)

I have been moving and staging tools and materials in the barn shop in advance of the painting and wiring work, and decided I needed to move all of it somewhere else as I will be doing a lot of wiring in the shop.  The storeroom was the obvious (?) place to move much of it, even if only temporarily.

This photo is out of sequence, but has the critical information about the heavy-duty shelving units.  With packaging they were more like 160 lbs. each.  I had to open each box and carry most of the parts up to the storeroom individually.

With that in mind, I checked around at Lowes and The Home Depot and decide to get two metal shelving units for the barn storeroom.  I bought two KOBALT, 4-shelf, black, units, each 77”W x 72”H x 24”D; 152 lbs. each including the box.  An associate at Lowes helped me load them into the F-150, but I had to unload them by myself.


As shown in this photo, I originally placed them against the south wall of the storeroom.  I eventually relocated them to the north wall.

The instructions indicated an assembly time of 20 minutes (not including the unpacking).  Yeah, right.  I had to unpack them and carry them up to the storeroom in pieces.  Unloading, unpacking, and transporting the pieces to the storeroom took about hour for each shelving unit (I did them one at a time).  My assembly time for the first unit was over two hours.  The second unit went a bit faster, but not that much.

A view of the staircase to the storeroom above the shop as I prepare the area to finish priming and painting the walls.  Note the red rosin paper on the floor to protect the concrete from errant paint.

A combination of illness, weather, trying to process photos and write blog posts about our Panama Canal cruise, and unexpected home projects had temporarily delayed getting work done on the barn, but by mid-April the pieces were finally falling into place.


202303(13-31) – Back Home & Back to Work

[  This post contains narrative along with 11 photos with captions.  ]

SUNDAY 12 March

We got back to our house on Sunday the 12th, but not without some minor issues.  Our daughter picked us up from DTW and drove us back to her house where we left our F-150 while we were away.  As soon as I turned the ignition switch ‘on’ I got a message on the info screen indicating that there was an electrical problem.  The engine started normally, but the battery icon remained on.  Linda Googled the issue and found information that indicated we might have an alternator failure along with some vague information about how far we might be able to drive before all of the electrical stuff stopped working.  We started for home anyway, but only a mile into the trip, decided it was an unwise decision, and returned to our daughter’s house.  She let us borrow her car to get home, and we transferred our suitcases to her vehicle, with the promise to return it in next couple of days.

When we got home we brought our suitcases into the house, but didn’t do much else.  I was still obviously ill, so we each took CoVID-19 tests.  Mine was positive, which was not a surprise given my symptoms, but Linda’s was negative, which was a relief.  Forthwith, all of my interactions with people outside the house included a face mask.  Paul and Nancy also eventually tested positive.

MONDAY 13 March

I returned to our daughter’s house the next day with my tools and multi-meter and tried again to resolve the issue, but the fault had not cleared on its own.  Okay then, something was definitely wrong.  I checked the voltage level on the battery, which was still okay, but decided to replace it and see if that was the problem.  The battery was original to the vehicle, which we bought in May 2019 (and was built some months prior to that), so the battery was approaching 4-years old, if not there already.  I drove to Varsity Ford in Ann Arbor, only 10 minutes from our daughter’s house, and got the correct replacement battery.  It was easy enough to do the swap, but it didn’t fix the problem.  Still, it never hurts to have a new battery.  I returned the old one for the core charge credit, and made an appointment to bring the car in the next day, figuring (hoping) it could at least make it that far.  I was not in the humor to have it towed.

TUESDAY 14 March

Linda drove our daughter’s car and I drove Linda’s Honda HR-V back to our daughter’s house.  I then drove the F-150 to Varsity Ford and Linda followed me in her car to pick me up and take us home.  I figured it might be several days before they could get to it, but I got a call back a couple of hours.  The service writer indicated that the alternator was okay, but an electrical cable had failed and needed to be replaced.  I approved the work, of course.  I got another call mid-afternoon that the repair was finished and I could pick up the truck.  Rather than wait until the next day, Linda drove us back down, I paid the bill, and we were on our way back home yet again.

WEDNESDAY 15 – SUNDAY 19 March

Given my positive CoVID-19 test, I didn’t do much else the rest of the week other than work at my desk.  My big accomplishment was the final preparation of the application for the electrical permit for wiring the barn.  By the 19th I finally tested negative and was free to move about (Lowes and Home Depot) and get back to work on the barn.

MONDAY 20 – THURSDAY 23 March

Here I am on the front porch with Cabela.  She is not our cat, but has effectively been abandoned by her owners across the street.  She craves human attention, and we feed her in the morning to make sure she is getting at least some food without having to hunt.

Today was a big day for me and the barn project; I went to the Livingston County Building Department and submitted my application for an electrical permit for wiring of the barn.  The application was processed and the permit issued while I was there, which was very convenient.


Our 2020 Airstream Flying Cloud 27 FBT travel trailer back home and parked in our guest site.

We had been thinking about replacing the kitchen refrigerator and when it started making occasional noises we were motivated to start looking in earnest.  This particular LG at Costco was larger than we wanted/needed but our visit there gave us a good idea of what sizes and features were available and at what price.

Tuesday the 21st was also a big day for us as we drove to Woodland Airstream in Grand Rapids, Michigan, to retrieve our 2020 Flying Cloud travel trailer, something we were originally scheduled to do last week.  The trailer had been there since October 22 for a long list of minor repair and maintenance issues, and one big repair issue (the ridge that had developed across the kitchen floor from side-to-side).

We had a pleasant drive over.  The trailer looked great, with no indication that there had ever been a problem, and we were pleased with the work.  We settled our bill (the ridge was a massive job done under warranty) and hooked up the trailer to the F-150.  The drive home was equally pleasant and uneventful, and it was nice to finally have our travel trailer back on our property.


FRIDAY 24 – MONDAY 27 March

We would a nice little vegan restaurant (Bombay Food Junkies) not far from our hotel for dinner on Friday evening.

Billie Teneau, a long-time family friend in St. Louis, Missouri had passed away back in late February.  She was in her late 90’s and was a bicyclist and successful Senior Olympian.  Her memorial service was this Saturday at the St. Louis Ethical Society.

We drove down on Friday and stayed in a hotel that was conveniently located relative to the Society as well as my sister and niece, and Linda’s sister.  We drove home on Monday.


My sister (Patty) and her grandson (Logan) doing some coloring at Mellow Mushroom while we wait for our food.

My mother was a life-long member of the Society, her parents having been members when she was born, and my father joined when they married.  My sister and I were also born into the Society and grew up there.  When I moved away from home to go to college I never again lived anywhere that had a Society.  Once we had children our Sunday morning ritual became tent camping.


My niece (Amanda, right) with her daughter, Lilly (left) while we wait for our food at the Mellow Mushroom.

The service was well-attended and very nice.  There were people there that that I knew, or knew of, but many more that I did not.  Billie, and her late husband Richard (Dick), had varied interests, each with its own associated circles of colleagues and friends, but I knew them mainly as two of my parents’ best friends over most of their adult lives.

My sister (Patty) and her daughter (Amanda) attended the service as well.  After the service, we went to a Mellow Mushroom restaurant convenient to where Amanda and her family live.  We visited with Linda’s sister (Sister Marilyn) on Sunday and returned home on Monday.

TUESDAY 28 – FRIDAY 31 March

The grand-daughters at a branch of the Ann Arbor Library.  The 10-year-old (Mads) in the small chair and the 4-year-old (Sadie) in the big chair.

Linda was busy the rest of this week babysitting the Ann Arbor grand-daughters and doing accounting work for the bakery.  In her absence, I turned my attention to the barn.  I continued trying to fill in the trench for the conduit from the utility pole to the barn, and started purchasing Sch 40 PVC conduit and various fittings that I would need to wire the barn.


Sadie on the rope climbing structure at the nearby elementary school.


This part of the conduit trench is also not completely filled it yet, and collects water.


Checking out availability and prices of conduit bodies at the big box stores.  Running individual conductors in conduit is not going to be less expensive than running NM-B (Romex) cable, but it will definitely be better.


Like plumping parts, electrical devices and fittings have code names and one of the things I had to learn was the proper names for various conduit fittings.  The ones that seemed to give me trouble were the LB, LL, and LR conduit bodies, but I finally figured it out.  Hold the conduit body with the cover facing me and the end connection pointing up.  If the other connection comes out the back, it’s an LB (L shape, Back connection).  If the other connection is on the left, it’s an LL (L shape, Left connection) but if the other connection is on the Right, it’s an LR (L shape, Right connection).

20230220 – Accessory Building Project Update

[ This post is mostly photos with captions. ]

MONDAY 20 February

The barn as seen from the southeast.  The trench with the conduit for the service conductors still needs to be completely filled in.  The green(ish) bags along the edge of the driveway are top soil.

Although we were still involved in final packing decisions for our cruise, it was a reasonably nice day, weather-wise, so I took a few more photos of the new barn doors and the daytime light levels in the barn with the doors closed.  We zoomed with Paul and Nancy at 5:30 PM, to compare notes and see if there was anything any of us had forgotten to pack for our upcoming cruise.


The inside front half of the barn, with the doors closed, as seen from the landing at the top of the stairs to the storeroom.  The 12,000 Lumen ceiling light and the light over the entry door are both turned on. The bottom seals on the roll-up doors are slightly off the concrete to allow them to relax and expand.


The large/west RV bay as seen from near its roll-up door.  All of the doors are closed.  The 12,000 Lumen ceiling light and the light over the entry door are both turned on.


The small/east RV bay as seen from near the entry door.  All of the doors are closed.  The 12,000 Lumen ceiling light and the light over the entry door are both turned on.


The Barrina 2’ integrated LED strip light under the stairs is turned on.  In general, the light levels were adequate with this minimal amount of lighting supplementing the daylight coming in through the windows and sun tunnels.  With RVs in the two bays, however, additional lighting will be needed.


202302(16-18) – Accessory Building Project Update

[ This post is mostly photos with captions. ]

THURSDAY 16 February

This is how the roll-up doors were packed for shipping.  They were made in Missouri and shipped to West Virginia by mistake.  Dan (from Everlast Doors & More) chose to drive to West Virginia to get them, rather than delay the installation by some unknown number of additional weeks.

It was a BIG DAY today.  Dan, from Everlast Doors & More, showed up with the two large roll-up doors for the barn!  Chuck (the builder) arrived shortly thereafter to help Dan with the installation by operating the Pettibone Telehandler.  The telehandler was used to unload the crates from Dan’s trailer and then to lift each door into position while Dan secured the mounts on each end from a ladder.


One of the doors has been removed from the trailer by the telehandler and is being moved into the large/west RV bay.


One of the roll-up doors positioned in the large/west RV bay, ready to be uncrated.


The chain drive box for a roll-up door.


The main ring gear on one end of a roll-up door tube.


A shaft support and tensioner on the opposite end of the roller tube from the ring gear.


A chain drive box mounted on the ring gear end of the roller tube.


The other roll-up door being lifted into place.  It is supported by a small section of the original shipping crate to allow the telehandler forks to get under it, and is strapped down to hold it in place.


The small/east RV bay roll-up door (on the left in this photo) is installed.  The large/west RV bay roll-up door is being lifted into position with the telehandler.  The telehandler weighs 28,000 pounds, so Chuck (the builder/operator) kept it off of the poured concrete at all times.


Dan is securing one end of the large/west RV bay roll-up door to the vertical steel support and bracket.


FRIDAY 17 February

The weather forecast for today was for cold temperatures and light icing.  I texted Dan early and suggested that he not finish the doors today.  He appreciated that, and said he would be out around noon tomorrow to continue the installation.


SATURDAY 18 February

Dan works on the chain drive end of the small/east RV bay roll-up door.

Good to his word, Dan was back around noon and put in a long afternoon finishing the installation of the two big roll-up doors.  He did not like the weather-stripping that came with the doors, and wanted to come back late next week with a different product and finish up.  He would also finish installing the lag screws for the side channels at that time.  (As it turned out, the weather stripping did not get installed until mid-late March, but that’s for another/later post.)


Dan checks the small/east RV bay roll-up door for proper operation.


The large/west RV bay roll-up door in the closed position.


The barn finally has all of its doors and is now closed in and can be secured.


20230215 – Accessory Building Project Update

WEDNESDAY 15 February

The Hyperlite light fixture is the small gray object top center in the photo.

The Motor Cities Electric Utilities crew was here today to replace the utility pole in the SE corner of our property, but that work was not directly related to the barn project, and I covered it in a general post for February 01 – 21.

The other thing that happened today was I bought an appliance cord (pigtail) and wired up the Hyperlite outdoor LED fixture that I recently bought on Amazon.  This is a 40W, 5,200 Lumen, 5000K integrated LED light fixture.  I mounted it above the entry door inside the barn so I could test its intensity and beam spread.  Besides possible use on the outside of the barn, I was planning to use these fixtures for interior lighting along the outside edges of the RV bays.  They come in 60W and 100W versions, but I will use more of the lower wattage / lower lumen units for better, more even coverage.


The Hyperlite light fixture has two parts with a hinge design that allows them to be separated for installation.  This is the base unit of the light fixture mounted to a framing member above the entry door.  The WAGO lever-nut connectors have been installed on the pigtail power cord.  It has the weathertight seal that goes between the two parts.  The lamp head is adjustable from 0 (straight down) to 90 degrees (straight out) and contains the electronic module and wires for connecting to the incoming power.  The base unit has five (5) access holes with weathertight plugs for getting power into and out of the box.  It has provision for mounting screws in the back and a built-in bubble level to aid in the installation.  It’s listed on Amazon as a commercial unit, and the construction appears to merit that description.


The lamp head has been set onto the hinge pins of the base and the wires connected via the WAGO lever-nuts.


I finally got a chance to test the 12,000 Lumen light fixture at night.  It made a LOT of light!


One of the Barrina 2’ LED strip lights lit up the area under the stairs quite nicely.

In addition to the 12,000 Lumen ceiling light fixture, and the light over the entry door, I bought two Barrina 2’ LED strip lights from Amazon to test.  These are 20W, 2,500 Lumen, 5000K integrated LED fixtures that I plan to use for the ceiling lighting in the shop and storeroom.  (They also have a 4’, 40W, 5,000 Lumen version.)  For testing purposes , however, I mounted one of these under the stairs/landing, where it will likely remain.  They came with plug-in power cords, so I used one to plug the fixture into an extension cord with multiple receptacles.  They also come with pigtail cables for direct wiring (via an outlet box) and 4’ connector cables, that allow them to be connected end-to-end, only requiring one power feed to an entire string of fixtures.


The is the large/west RV bay at night.  With nothing in the bay, the 12,000 Lumen ceiling fixture by the entry door lights up the entire space surprisingly well.  The two strip lights under the stairs are also on, and the Hyperlite light over the entry door is probably also on.


This photo was taken from the right/east RV bay door.  The main light source is the Hyperlite fixture on the wall above the entry door.  The light under the stairs is from one of the Barrina 2’ LED strip lights.


202302(07-10) – Accessory Building Project Update

Winter was still with us, and seemed unable to make up its mind as to whether it would hang around for a while or depart the Great Lakes Region earlier than usual.  Although we finally had electrical power to the barn, which was a huge deal, the big roll-up doors were not yet available for installation, which meant the building was not yet truly weather tight.


TUESDAY 07

As I mentioned in the regular post for February 01 – 21, we picked up the 14’ Werner 2-sided step ladder from Lowe’s a few days ago.

The new 14’ stepladder and 12,000 Lumen light fixture.  The light fixture is being powered from an extension cord plugged into the one duplex receptacle that was installed by the electrician as part of the service entrance. The bottom cords of the roof trusses are 16′ above the floor.

As I mentioned in the regular post for February 01 – 21, we picked up the 14’ Werner 2-sided step ladder from Lowe’s a few days ago.  I managed to get the new ladder opened and raised into position by myself, but going forward I plan to always have someone help me put it up, take it down, and move it around, unless I can find a wheel kit for it.  Otherwise, it’s really too much ladder for one person to handle safely.  I used it to hang a 120-Watt, 12,000 Lumen, 5000K integrated LED flat panel light fixture that I bought a few weeks ago at Rural King.  I had already attached the plug cord that came with it, and wanted to test the beam pattern and brightness when it was suspended just below ceiling height (about 15’6”).


WEDNESDAY 08

The dually tire tracks leading into the drainage ditch.

When the snow had melted, I discovered that one of the utility trucks had driven into the ditch along the road where the new pole was stored, and driven back out right over the end of the culvert under the driveway, partially crushing it.  Ugh.  I took photos and e-mailed a couple to the case manager who had been assigned to our project and asked what, if anything, DTE might be able to do about this.  Other than not ever getting advanced notification when crews would be here working, this was the only damage that had occurred to our property during the whole project.  And the culvert wasn’t crushed shut, so it could still drain, but this damage should not have occurred.

The dually tire tracks in the drainage ditch clearly headed up and over the end of the culvert into the gravel driveway.

Sometime after that, but still in the first two weeks of the month, I got another customer satisfaction survey from DTE.  This one acknowledged that the project to replace the pole/transformer and get power to the barn had been completed, and asked for feedback.  So, I provided it.  Well, once again, I got a call from a customer service representative.  In fact, it was they same women I had chatted with the first time.  My complaint by that point was that the case manager had not replied to my e-mail, even though the last communication I got from her said to contact her if there were any remaining issues.  She said she would escalate that and check on the other pole that was sitting in our yard.

The top center of this photo is the east end of the culvert under the driveway.  A little bit of the metal is visible, but the top was squashed down and it is mostly covered and filled with mud.


FRIDAY 10

The builder’s Pettibone Telehandler on site, waiting to help install the two large roll-up doors.

Although it took some doing, the builder (Chuck) managed to get his Pettibone Telehandler relocated from a jobsite in Washtenaw Country to our driveway in front of the barn.  This machine weighs about 28,000 pounds and has to be moved by a tractor on a flatbed equipment trailer.  Chuck has a guy he uses for this work, and today was they day they were able to get it arranged.  The telehandler will be needed to install the two larger roll-up doors, which are now in the possession of Everlast Doors & More, the local company through which they were ordered, and who will install them (with Chuck’s assistance).


Special Blog Post for 20230131 – Accessory Building Project Update

There are no photos for this post. ]

TUESDAY 31 January

Looking back on the last two (2) weeks, it had been an amusing, confusing, slightly sad, but exciting and gratifying time.  The electrical service work for the barn (with upgraded power for the house) was done.  The crews had all been very professional and had done the work well.  But they were also friendly and helpful, as they put up with my presence, questions, and photography with good humor.

The only question that remained, power wise, was when a crew would show up to change out the pole in the SE corner of our yard.  This pole does not have a transformer on it, but it does have the tap for our Comcast/Xfinity broadband cable to the house.  It supports the electric distribution wires that run E-W down our side of the street, along with the AT&T and Comcast cables.  These lines also T-off and go across the street to a pole in our neighbor’s yard to supply services to their house.  It does not have a transformer on it, but it looked to me like the T would make installing a new pole tricky.  I guess I will find out just how it’s done when someone shows up and does it, assuming I am at home when the work happens.  Never once have we been contacted in advance to let us know that a crew was scheduled to be onsite.

…..

Special Blog Post for 20230130 – Accessory Building Project Update

This post has 9 photos. ]

MONDAY 30 January

Expect the unexpected, right?  For me, that’s inline with the idea that “things happen beyond our control, but how we deal with them is up to us.”  After a week of somewhat strange communications, but no additional work, a crew from Rauhorn showed up today.  Rauhorn is another DTE contractor.  I think they do both overhead and underground work, and were prepared for both, but the remaining work was mostly underground.

The small excavator was used to “hang” the large spool of 3-conductor, 3/0 AWG service conductor cable so it could unwind easily as it was fed into the 2” Schedule 40 PVC electrical conduit through the bottom of the meter enclosure.  The conduit is visible coming out of the bottom of the meter enclosure and into the ground.


I was already familiar with Rauhorn as they did some of the work on the power upgrade for our neighbor’s house across the street back in mid-November.  When they were finished doing that work, I asked the crew chief if he had a few minutes to came over and look at what I was planning to do, conduit-wise.  He did, and gave me some very useful suggestions as to how to do it to make it easier on whatever underground crew eventually showed up to install the electrical cable to the barn.

The trench from the open end of the conduit towards the pedestal with the service conductors already pulled through.  The open end of the conduit is at least 24” below grade, but they did not trench that deep all the way to the base of the pedestal.  There is no conduit from this point to the pedestal, as the cables they installed are rated for direct burial.  That also means it does not matter if dirt or water gets into the conduit.  The conduit was optional, but it saved me the cost of having DTE (or a contractor) dig the whole trench, allowed me to route the cable away from some trees, and will provide external protect in the event that someone ever decides to dig in this area.


This crew was here “to complete the installation of power to the barn,” but were surprised to find that major pieces of the work they planned to do had already been completed, specifically the pedestal and the 350 kcmil service drop conductors.  (I was not surprised that they were surprised.)  But they were fine with the situation.


The trench for the barn service conductors to the base of the pedestal.  The top cover of the pedestal has been removed to allow access to the junction blocks.


I explained about the advice I got from one of their guys before trenching in the 2” Schedule 40 PVC electrical conduit, and pointed out the stake that marked the location of the free end near the new pole.  With the small excavator (12” bucket), they came prepared to dig a trench, but only had to use it to unearth that end of the conduit (and hang the large cable spool).  They dug up to the base of the pedestal by hand as there were live conductors buried there.


The 3-conductor, 3/0 AWG service conductor cable being fed into the 2” Schedule 40 PVC electrical conduit through the bottom of the meter enclosure.

They were glad to have the 7/16” rope already through the conduit and used it to pull the 3/0 AWG, 3-conductor underground service conductor (USG) cable from the meter enclosure up to the pedestal.  To does this, they suspended a large spool of the USC cable off of the excavator bucket so that it could unwind horizontally.  The free end of the cable was attached to the rope in the meter enclosure in such a way that it would not pull loose.  One guy helped guide/feed the cable into the conduit attached to the bottom of the meter can, while two guys pulled it through the conduit from the other end by hand with the rope.  They stopped with enough cable still at the meter enclosure to make the connections to the meter lugs.


The barn service conductors through the conduit and up through the pedestal.  They were then trimmed to the length needed to fit into the junction blocks.  At this point, the crew was dealing with live (energized) un-fused wires.  They knew what they were doing, and had the right personal protective equipment, but this was still not work for the faint of heart.

On the other end, they opened the top pedestal cover and routed the cable from the barn up through the bottom and out the top.  They cut each wire to length to fit into the large junction blocks that were already there.  As they were working, I noticed that one of the hot conductors that had been terminated by the previous crew had about an inch of exposed conductor below the insulated junction block.  That was a major oversight that could have led to a short or an energized pedestal cover (the covers are made of metal).  Rather than try to cut the live exposed metal strands shorter, one of the guys removed the conductor from the junction block, wrapped electrical tape around it up past where the wire insulation ended, reinserted it, and tightened it.  He was wearing proper personal protection equipment, (PPE), and clearly knew what he was doing, but all of this was on a live, unfused wire.


The barn service conductors enter the meter enclosure from the large conduit on the left and are attached to the meter socket lugs at the top.  (Meter enclosures/sockets have been built this way for a long time, going back to when almost all utility conductors ran overhead and entered the meter enclosure from the top.)  The black, red, and bare/aluminum conductors attached to the bottom meter lugs are the service entrance conductors.  They are enclosed in a sheath as they exit the meter enclosure at the lower right and go through a hole in the side of the barn, where they are then routed up into the bottom of the main load center and connected to the main breaker (first disconnecting means) at the top of the enclosure.  Because this is a sheathed cable assembly, it is not required to be in conduit.  Although I would have preferred that it was, this work was done by the electrician, under permit, and inspected/approved by the County.  As such, it was not appropriate for me to change it (and would have been a bit of work to do so).


ep was to install a meter, at which point we finally had power to the barn!  I closed the main circuit breaker (which serves as the main disconnect for the barn) and then closed the circuit breaker for the Siemens FirstSurge surge protection device.  Two green lights indicated that I had power to both buses of the panel.  (I later checked the GFCI receptacle the electrician had installed way back when, and confirmed that I had 120 VAC and the GFCI feature worked.)


The trench with the barn service conductors bending into the bottom of the pedestal. This photo shows that the wires, which are direct -burial, are not buried very deep at this point.


The final step was to put the upper cover back on the pedestal and secure it, and use the excavator to push dirt back into the trench and up to the base of the pedestal.  One of the crew members said they would transmit the meter number to DTE.


Almost done.  They meter was seated in the socket and, just like that, we had power to the barn!  It was obviously nice to finally have power to the barn, but the five (calendar) days it took to do this work were fascinating for me to watch and document.  I learned a lot from the various crews, who were all (mostly) good sports about me being around with a camera and asking lots of questions.

As the trench by the pedestal was being filled back in, I took this photo to show that the bottom cover of the pedestal does not extend very far below grade, and the wires going to barn bend almost immediately as they leave the pedestal towards the conduit.  The same is true for the service conductors going to the house.  Any digging within a 5’ radius of this pedestal would risk contact with these conductors.  They are all insulated, of course, but still …


I e-mailed the DTE case manger and the planning consultant (with a couple of photos) to let them know the work had been completed and I had power to the barn.  As far as I knew, I was now done dealing with DTE other than to get the account number for the new meter and pay the bill each month.


The meter enclosure cover installed and secured.

Although I was not going to pull an electrical permit until mid-March, and probably not start wiring the barn until early April, it was time to work on the electrical plan in earnest.  As soon as we returned from our travels I would need to be ready to start buying electrical materials and devices and staging them in the barn.  Of course, I needed the big roll-up doors in order to do that.

Special Blog Post for 202301(24-29) – Accessory Building Project Update

There are 3 photos in this post. ]

TUESDAY 24 January – SUNDAY 29 January

When the Motor City Electric Utilities crew finished their work on Monday the 23rd, the project was well on its way to completion, but not quite finished as we still did not have power to the barn.  During the week, I got an e-mail from our DTE planning consultant with contact information for the “case manager” who would schedule the work, and letting me know that I would now be dealing with her from now on.  I e-mailed her and introduced myself, and cc:d the planning consultant.  I included photos, and let them know the work was almost completed, and that all that remained to be down was to pull the underground service conductors from the barn meter enclosure to the pedestal, terminate them at both ends, and install the meter.  Once again, the reply that I received was basically “what?”

By this point, and after discussion with some friends, I had come to the conclusion that my customer satisfaction survey reply, and subsequent conversation with a customer service representative, appeared to have triggered a response from DTE.  While I was glad that the work was getting done, I was saddened that the people responsible for planning and scheduling the job, and with whom I had worked closely, appeared to be unaware that the work was taking place.  Indeed, the planning consultant indicated that he had only just released the work orders for scheduling.  And that was not right; it’s never right to bypass people.  Go through the reporting chain to the people responsible and make a higher priority of the work, sure, but do not go around them.

Sometime during this week, the builder also got word that the roll-up doors would not be available by the end of the month and he was trying to pin down a delivery date.  At this point, it almost didn’t matter.  We would be traveling from late February to early March, and I would not be starting the wiring until we got back.  In fact, I had to do some painting even before the electrical work, which I couldn’t do until the temperatures were warmer and would stay that way overnight.  Also, I had no interest in doing electrical work in the cold and neither did Marty, who offered to come down and help.

The main load center for the barn with the Siemens FirstSurge device mounted externally, lower right and connected to a 2-pole, 20 Amp circuit break, lower right in the enclosure.  This was the only wiring I intended to do on the barn before apply for an electrical permit in mid-June, but I wanted this device in place before the electrical service was energized.

I did, however, manage to accomplish two small things in the barn this week.  A while back I bought a Siemens FirstSurge Type 2 “whole house” surge protective device (SPD) and wanted to install it in the main service panel for the barn before utility power was connected to it.  Type SPDs get installed after (downstream of) the main disconnecting means, which in this case is the 200 Amp main breaker in the Siemens load center.

The unit is large at approximately 3” x 6” by 2” deep.  It is a sealed unit, with four wires coming out a female threaded stud.  I had intended to mount it directly to one of the knockouts on the load center, using a male threaded adapter from inside the enclosure, but I ultimately decided against that approach.

As shown in the photo, I ended up mounting it with four screws to one of the horizontal skags that the enclosure (and the siding) is attached to, and connecting it to the enclosure using a 12” piece of liquid-tight flexible non-metallic conduit.  The two hot leads from the device were wired to a 2-pole, 20 Amp circuit breaker, installed in the lowest two positions in the right circuit break bank.  (The neutral and equipment grounding conductors were terminated in the usual way.)

Type 2 SPDs are also available in circuit breaker form, which is the most convenient way to add one to an existing panel.  However, I really liked the more robust specifications of the FirstSurge device.

The sub-panel on the south wall of the shop just east of the door.  This is a lug-style panel (no main circuit breaker) that will be fed from a 100 Amp 2-pole circuit breaker in the main load center through fairly large feeder cables.  Although both the bus and the travel trailer have 240V/50A (120V/100A) electrical systems, most of the power used in the barn will be used in the shop.


The other thing I accomplished in the barn was hanging the sub-panel in the shop.  No wiring was involved; just deciding exactly where I wanted to place the enclosure.  I wanted it to be convenient to the door, but comfortable, as I will be using many of the circuit breakers as switches.  But I also had to make sure the location was compliant with the NEC.


Last, but not least, I continued to read the 2023 NEC Handbook and started working again on the electrical plan for the barn, as well as researching light fixtures and other devices for the project.

As an aside, The Motor Cities Electric Utilities crew on the 23rd, reattached the riser conduit for the AT&T cable and terminal box to the new pole as best they could.  They stapled the cable to the pole about a foot above the terminal box, as that was as much slack as they had to work with.  If you look closely you can see the wire goes directly (through air) from there to the junction block on the main cable.  It should be stapled all the way up the pole, but that will require a longer wire.  I was told that it would be up to AT&T to remedy this, ditto for Comcast if it involves their cables, but that I might have to call these companies myself and be “persistent” in getting them to come out and do something about it.  Ugh.  I just don’t see why I should have to deal with that situation.  Presumably DTE reports to Comcast & AT&T that they have replaced this pole and additional work needs to be done.

Special Blog Post for 20230123 – Accessory Building Project Update

There are 19 photos in this post. ]

MONDAY 23 January

Digging to find the underground service conductors and the AT&T cable from the house.  The wooden stake with the red tip, behind the crew member, is where our DTE planning consultant thought the ground pedestal should (might) be located.  The stake to the right, with the orange top, marks the location of the free end of the 2” Schedule 40 PVC electrical conduit that Marty and I installed back on November 22nd.  A comparison with the three (3) previous special blog posts makes in clear that we had snow yesterday.  Still, the crew said the ground was not frozen and was easy to dig.  They extended their digging from the old pole to the new one, as new wires would be run in that area.

I


did not expect work to be done on Sunday, and none was.  I also did not know when a crew would be out next to continue the project, but I did not have to wait long to find out.  Around 9:30 AM, a three-person crew showed up from Motor City Electric Utilities, a DTE contractor.  They arrived with a crane/auger truck and a bucket truck, but they also had a trailer with a small excavator (back-hoe) with a 12” bucket.


This photo is from the south facing north.  The new pole is on the left.  The existing underground service conductors from the house are clearly visible running up the old pole on the right.  The AT&T cable is also visible at the right/lower end of the small PVC conduit lying on the ground.

The insulated disconnect pole is hanging from the neutral distribution line after being used to disconnect power from the house.  The crew member in the bucket is dis-mounting the Comcast cable from the old pole, using the bucket to lift it up, and mounting it to the new pole.


The first thing then did was start hand digging (with a shovel, obviously) by the old pole, looking for the underground service conductors from the house.  The AT&T line to our house (no longer in service) also runs underground, along the same/parallel path as the power lines. (The service conductors for the house run underground from the meter, at the SW corner of the garage, to the old pole and then up to the transformer.  I presumed these were one continuous run, but splices were eventually found underground at the base of the old pole.)


The lower/AT&T cable being moved up and anchored to the new pole.

The next thing they did was open the disconnect switch so they could work safely around the conductors from the transformer secondary taps to the house.  But first they worked on disconnecting the AT&T and Comcast cables from the old utility pole, raising them up, and securing them to the new pole.  As part of this work, they had to route the existing AT&T cable down the new pole as best they could.  (The Comcast/Xfinity cable comes to our house from a different pole in the SE corner of our yard.)


This crew used the hoist on the end of their crane truck to support and lift the broadband and phone cables.  The latching hook is the orange thing visible near the center of the photo.


At this point, the existing house underground service conductors were disconnected from the new transformer and the old pole, and cut off about 4’ above where they exited the ground.  The AT&T cable was also disconnected from the old pole, but not cut.  (Note that our Comcast/Xfinity cable comes to our house from a different pole in the SE corner of our property.)  With everything disconnected from the old pole, the crane truck was then used to pull it out of the ground then lay it down.  It was then lifted and put on a pair of racks on the crane truck to be taken away.  The hole left by the old pole was partially filled in, but was reused to install the new ground pedestal (junction box).


The crane truck is used to pull the old pole out of the ground.


The bottom section of the old pole is loaded onto carrying racks on the crane truck.


The crew had decided early on that they were going to install the new ground pedestal (junction box) in the hole left by the old pole.  At this point, they dug up the underground service conductors from the house for a few feet back from the pedestal location.  A new cable assembly, consisting of three (3) 350 kcmil conductors, was then routed down the new pole to provide the service drop to the pedestal.  (At 350 thousand circular mils, these are big multi-strand conductors.)


The 3-conductor, 350 kcmil cable that will run from the rack to the pedestal.


At the upper end, the three wires were joined to the secondary transformer wires at the rack.  The bottom end was left loose initially.  The support post for the pedestal was then set into the ground and the conductors from the pole and the house positioned so the bottom pedestal cover could be attached.  The two sets of wires were then spliced together using very large, insulated terminal blocks for the hots and an uninsulated junction block for the neutrals.  The upper cover was put in place and secured, and all areas that were still excavated were filled back in.


Two of the crew set the support post for the pedestal, part of which is lying on the ground to the right.  The large 3-conductor 350 kcmil cable has not been cut to its final length, positioned underground, and secured to the new pole.


The underground service conductors from the house have been routed up into the bottom have of the pedestal and the crew is working to free the AT&T cable so they can move it out of the way and relocate it to the new pole.


This X-shaped cable stripper was the biggest wire stripper I have ever seen.  The house service conductors were 3/0 AWG, smaller than the 350 kcmil conductors the ran down the new pole, but still big.  (The 350 kcmil conductors will supply power to both the house and the barn.)


The junction blocks used to connect the cables together are visible in the center of the photo.  The orange thing is the handle of a large T-style hex wrench.  The junction blocks for the hot conductors are insulated, the one for the neutral is not.


A closer view of the junction blocks in the pedestal as the upper cover is put in place.


The 350 kcmil conductors are positioned underground and the first piece of protective PVC cover is secured to the pole.


A final look at the large conductors (for now) before they are re-buried.


Filling in the hole and making it safe.


Using the bucket, the protective covering for the 350 kcmil cables was attached all the way to near the bottom of the rack.  The conductors were then spliced together with the conductors from the transformer secondary taps at the rack.


Last, but not least, the disconnect switch was closed and utility power was restored to the house.  I e-mailed our planning consultant and included photos of the ending status of the work.


The finished installation connecting the new transformer/rack on the new pole to the new pedestal and the existing house underground service conductors.  The disconnect switch has been closed, and the house is back on utility power.

Although the crew was done working on the DTE-related project of getting power to our barn, they were not done working at our property.  The repositioned their equipment near the SE corner of our property and proceeded to grab one of the new 45’ utility poles from the ditch down the street and drag up to our place.  They had a work order for this pole as well, and used their crane truck to pick it up and deposit it in our yard.  They then spent a bit of time looking at the pole they had to replace.    In the end, they left without doing anything else, but I don’t know why.  Perhaps they did not have everything they needed, or it was just too late in the day to start.  It looked like a tricky job to me, as power, phone and broadband lines T off at this pole and go across the street to the pole that supplies our neighbor’s house.


Done for the day, and moving on to the next thing.

As always, I e-mailed our DTE planning consultant and included a few photos of the work.

Special Blog Post for 20230121 – Accessory Building Project Update

This post has 11 photos. ]

SATURDAY 21 January

Friday came and went with no additional work being done, and no indication of when another crew would be on site, but sometime in the morning, a different DTE crew showed up, again with multiple trucks of various kinds.  Working from a bucket truck, they opened the disconnect switch, disconnecting power from our house.  The whole-house generator quickly came online and took over providing power to the house.

Bucket trucks positioned for the aerial work.  The bucket on the left has an insulated pole that was used to operate the disconnect switches (old and new).

Their first task was to disconnect the conductors from the existing transformer primary to the two distribution lines.  The bucket was then used to support each line (in turn) as it was disconnected from the existing insulated stand-off and then lifted up and attached to new insulated standoff on the new/higher crossbar.  This increased the height of the lines over our center driveway and over the road to the west where it cuts through the SW corner of our property.  Indeed, getting these lines raised was one of the reasons the existing pole was being replaced.  The other reason was its age and condition.


The second bucket getting ready to go up.


Two buckets, each securing on one of the distribution lines to the new cross-bar.  The line on the left is the “hot” (notice the disconnect switch).  The line on the right is the neutral.  Besides being connected to one of the primary taps on the transformer, the neutral is bonded to the bare copper ground wire that was installed the full length of the new pole and establishes a local earth reference for the voltage.


Disconnecting the old transformer.

One of the bucket trucks was positioned to disconnect the house underground service conductors from the existing transformer secondary taps and then dis-mount the existing transformer while the other one, which included a hoist, was used to support and lower the old transformer as it was removed from the old pole.


The old transformer on the ground.

The old pole was then “topped” a few feet above the AT&T and Comcast cables.  The new 50 KVA transformer was then hoisted up and hung on the new pole.  The rack was already installed just below it, but I’m not sure when that happened.  The rack is a large vertical assembly with three (3) insulated standoffs.


The new transformer being hoisted into position.  Note that the new transformer is pre-wired with both primary and secondary conductors.  Note also that the old pole has been “topped” to make more room for the buckets to get into position.


Both buckets work together to get the new transformer on the previously installed mounting bolts.

The primary taps of the transformer were connected to the neutral conductor and the disconnect switch for the distribution lines and the wires from the secondary taps were secured to the rack.  The ground conductor was also attached to the distribution neutral and the secondary center-tap on the transformer.  The existing service conductors for the house were then temporarily routed to the rack and connected to the secondary transformer conductors.  The disconnect switch was closed, and power was restored to our house.


The bucket that was used to hoist the new transformer up was also in the best position to attach the wires from the secondary taps to the insulated stand-offs of the rack.  The rack has three stand-offs, one for the neutral conductor and one for each of the two hot (240 V) legs.


In this photo, the existing house underground service conductors (USC) have been temporarily spliced to the new transformer secondary conductors at the rack.


In this photo it is a bit clearer that the house underground service conductors are still attached to the old pole.  The Comcast/broadband (upper) and AT&T (lower) cables are also still attached to the old pole.


The crew is done for the day and pulling out.  Our house is now running off of the new 50 KVA transformer.  I checked inside and the voltage seemed to be a volt or so higher, and less subject to dropping when loads were energized.  (We have uninterruptable power supplies throughout the house to protect sensitive electronics.  The units we use have a digital voltage display, so I can keep a close eye on what’s happening vis-à-vis electrical power.  We also have a DTE EnergyBridge device, which monitors and reports our electrical energy usage in real time, via our smart meter, but also gives us access to historical data.)

Significant progress was made today towards having upgraded power to the house and, eventually, to the barn.  I e-mailed the planning consultant and included a couple of photos.

Special Blog Post for 20230119 – Accessory Building Project Update

There are 6 photos in this post. ]

THURSDAY 19 January

The DTE crew that was here yesterday and did, in fact, return today and got a lot accomplished.  Not everything, of course, but based on what had previously been explained to me, I did not expect them to complete the job today.  DTE has crews (and/or contractors) that do “overhead work,” crews/contractors that do “underground work,” and (apparently) crews/contractors that do “fusing work.”  Which is fine; each of those kinds of work requires different equipment, knowledge, and skills.  Our project required all three types of crews (or at least overhead and underground ones).

The new, 45’, utility pole in the driveway near the existing pole and the new hole that was dug yesterday.

The new pole is lowered onto a cradle, allowing the top (narrower) end to be off the ground high enough to attach various things to it.

The work today was fascinating.  They started by pulling the new pole out of the drainage ditch (where it had been for a while), down the street, and then up the driveway.  They positioned it in the yard close to where they needed it, but off of the driveway where they could work on it without being in the way of the trucks.  Crew members drilled holes for the mounting of the new crossbar, transformer, and the rack and attached a bare copper ground wire along the full length of the pole.

The new pole resting on the cradle.  The cradle is hinged, and folds flat for storage.

One of the crew attaches an insulated stand-off to the crossarm near the top of the new pole.  The insulated standoff and disconnect switch for the hot line are already installed.

A new crossbar was attached near the top of the pole and new insulated standoffs and a disconnect switch for the distribution lines were mounted.  The crane truck was used to hoist the pole up with the crossbar parallel to the distribution lines so it would pass between them.  The pole was then lowered down into the new hole (dug yesterday) and then turned 90 degrees so the crossbar was above, and perpendicular to, the power lines.  They sighted the pole for plumb from two directions, about 90 degrees apart.  When they were satisfied that it was vertical, a 2-part epoxy was mixed and poured into the hole.  After a suitable amount of time, they then partially back-filled the hole with 1”-size gravel to secure it in position.


The crane truck has lifted the new pole between the distribution wires with the crossarm parallel to the wires and going up between them.  Ground crew have then turned the pole 90 degrees so the crossarm is perpendicular to the wires.  The crane has set the pole into the new hole.  The crew member nearest the camera is checking the pole for plumb.

The new pole was 45’ long, compared to the old one at just 40’.  They were both in the ground to about the same depth, and the top of the new pole was now a comfortable 5’ above the top of the old one.  This added height was one of the main reasons for the new pole.  The other reason was the condition of the existing pole, which had been there since the early 1970’s (best estimate).


All of this work was done without disconnect the existing transformer primary taps from the distribution lines.  The crew obviously knew what they were doing, and had all of the necessary personal protective equipment (clothing) to be working with energized, un-fused, high-voltage wires, but it was still impressive to watch.


The new pole, secured in the new hole, with the primary taps on the existing transformer reconnected to the distribution wires.  The service conductors for the house are still attached to the old pole, as is the AT&T cable.

With new pole secured in the new hole, the disconnect switch was closed, restoring utility power to our house.  The power was only disconnected for about an hour, but the house was never without power as the whole house generator started up and ran flawlessly the whole time.


Again, I e-mailed our planning consultant to let him know what had been accomplished today and included a couple of photos.  Again, he seemed surprised.  I thought that was odd, but I was just pleased that crews were at our house and the work was getting done.


Special Blog Post for 20230118 – Accessory Building Project Update

[ There are 6 photos in this post. ]

WEDNESAY 18 January

Without any notification, a 4-person DTE crew showed up around 9 AM with three huge trucks and a pick-up truck.  I presumed they were here to start replacing the existing utility pole and transformer that feeds our house with a new, taller, pole and a new, (much larger), transformer, as this  new transformer will now also supply power to the new barn.  I bundled up and went out to introduce myself.  I would hang with them for the duration of their visit, chatting with them about the work and taking photos.

The vacuum excavator (hydrovac) truck arrives.

The hydrovac truck in position by the existing utility pole.  Some of the DTE trucks are also visible.

One of the trucks was a crane with an auger, but they did not use it.  They had to dig a hole for the new pole close to the existing pole, which meant it would also be close to the existing underground service conductors from the house.  In this situation, they prefer to dig the hole with a “hydrovac” (water jet / vacuum) truck.  Even though the location of the underground wires had been marked by MISS DIG, the DTE crew said the marker flags can be off by several feet from the actual cable location.  Ditto for the underground AT&T cable.  DTE uses a contractor for the hydrovac work, and a truck was on the way from Roseville on far east side of the Detroit Metro Area.  (We are on the far west side of the Detroit Metro Area).

Operating the hydrovac truck is a 2-person job; one of them controls the high-pressure sprayer and vacuum tube, while the other one controls the equipment at the truck.

The first 12” of the vacuum tube (orangish color) is a hard metal collar with a fairly keen edge, allowing it to “cut” into the ground while retaining its circular shape as the dirt is loosened by the high-pressure water spray.

The hydrovac truck eventually arrived, got positioned to do the work, and proceeded to dig a 6.5-foot-deep hole some 12” – 16” in diameter, about 30 inches to the west of the existing pole.  As the dirt was blasted loose, the vacuum hose sucked it up, along with anything/everything that came loose, including some larger rocks.

It took at least 90 minutes to dig this hole, which surprised me, but the operators worked carefully to get it right.  There wasn’t much for the DTE crew to do while they waited for this hole to be dug.  One of the bucket trucks, however, had the new 50 KVA transformer, and that crew member went ahead and prepared/attached the small conductors that would go from the primary taps to the distribution wires and the large conductors that would go from the secondary taps to the “rack” below the transformer on the new pole.

[ As an aside, we have two main load centers in our house, a 200 Amp panel in the basement and a 100 Amp panel in the garage.  Although we would never draw the maximum combined amperage of 300 Amps, even at an 80% derated current of 240 Amps these panels represent the possibility of a 57,600 VA (Watt) load on the transformer.  The barn has a 200 Amp main load center, which at an 80% derated current of 160 Amps, represents the possibility of another 38,400 VA of load.  Combined with the house, that would be a possible 96 KVA load.   The existing transformer is a 10 KVA unit, and is being replaced with a 50KVA unit.  This will be a good size, in my opinion, but not overkill. ]

(The distribution voltage is 13,200 Volts (13.2 KV), but the current through the primary coil of the transformer is relatively low, so the wires do not have to be very large.  If the transformer was operating at its maximum rating of 50,000 Volt-Amps (50 KVA), the current in the primary wires would be about 3.8 Amps.  By comparison, the voltage between the two “hot” secondary taps is 240 Volts.  If the secondary was supplying the full rated capacity of 50 KVA, the current in the secondary conductors would be about 208 Amps.  That amount of current requires really big wires.)

Conductors attached to the secondary taps of the new transformer.

In what was the first of several “comical” events (from our point of view), the crew was scheduled to be at a required training session in Pontiac at noon, at least a 30 to 40-minute drive from our house.  They left sometime after noon and headed there.  Things got done, but far less than if they had been able to stay and work.  As they prepared to leave, they said they would be back the next day.


The hole for the new utility pole covered and marked for safety.

I was pleased and excited that the work had finally begun.  I e-mailed our planning consultant, as he had indicated early on that I should let him know as things happened and send a few photos.  The reply I got was, essentially “what?”


Special Blog Post for 202301(06-17) – Accessory Building Project Update

[ There are no photos with this post. ]

As described in a regular blog post, we left for the long drive to Florida on Monday, December 26, picking up our middle grand-daughter on the way.  We stopped for the night in Chattanooga, Tennessee and arrived at our destination in Orlando the evening of the 27th.  We started the return drive home on Tuesday, January 3 (2023) and spent that evening in Macon, Georgia, with a stop the next evening in Covington, Kentucky just across the river from Cincinnati, Ohio.  We arrived home the afternoon of the 5th, after first returning our grand-daughter to her parental units and younger sister.  The barn project was not on our minds (much) during this time, as we were visiting “the happiest place on earth” with our 10-year grand-daughter while hanging out with our friends, and Eastern/Atlantic travel companions, Nancy and Paul, and their family.  No progress was made on the barn project during this time, nor was any expected.  We knew before we left that the roll-up doors had been delayed until (at least) the end of the month.

FRIDAY 6 January – TUESDAY 17 January

This was mostly a waiting period, but I did stay in touch with our DTE planning consultant.  No pressure, though; winter had settled in and I would not be doing any electrical work on the barn until spring.  Also, my copy of the 2023 NEC Handbook had arrived just before Christmas, so I spent a lot of time reading this 1339-page book.

The NEC is incredibly comprehensive, covering residential, commercial, and industrial electrical installation.  I paid particular attention to the residential requirements, of course, but read much of the other material as a matter of curiosity.  In spite of two degrees in Electrical Engineering, my exposure to power engineering is limited, and I am certainly not an electrician (which is a primary audience for the NEC).  As I would be doing the final wiring of the barn, I was glad to have the time to study the CODE.  The Handbook version is longer than the basic CODE book, and especially nice as it contains a lot of additional commentary, drawings, and photos, to clarify and illustrate much of the CODE text.

During this window, we received a generic customer satisfaction survey from DTE.  We have been pleased with the quality of power we receive, the response to outages when they have occurred, and the attention to preventative maintenance, such as tree trimming, so I filled out the survey to reflect our general satisfaction with the company.  There was a box at the end asking if there was anything other feedback we wanted to provide.  Well … since you asked.  While my interactions with our DTE planning consultant have been positive, and I said so, I was disappointed that the company was “quick to take our money, but slow to do the work, and that I had no idea when the work would actually be done.”  I clicked “SUBMIT,” figuring nothing would come of it.

Well … I got an e-mail acknowledging receipt of the survey and thanking me for taking the time to submit it.  An automated response, I presumed, so again, I did not expect anything to come of it.  I then got an e-mail indicating that my comments had been reviewed and that someone would be contacting me.  “OK, sure” I thought.  But someone did call.  We had a nice chat, which I appreciated as I had a chance to explain more clearly the feedback I was trying to provide.  Again, I figured that would be the end of it.  Not long after, however, the project took a decided turn, and I will cover that in the next five (5) special blog posts on this project.

Special Blog Post for 202212(01-31) – Accessory Building Project Update

[ There are 3 photos for this post. ]

As November gave way to December, it became clear that we had reached the stage in this project where sayings such as “the last 10% of a project takes 50% of the time” always seem to come into play.  Not labor hours, of course, but calendar time, and visible milestones, for sure.  The building is constructed; the electrical service entrance (meter enclosure, main panel, and outlet/receptacle) is installed, inspected, and approved; and the driveway is finished (for now).  Separate from the building contract, the 2” Schedule 40 PVC electrical conduit has been trenched in from the meter enclosure to near the existing utility pole.  Other than wiring the building, which is on me to do, it looks/feels like we are very near completion of the builder’s portion of the project, but big things remain to be done.

FRIDAY 02 December

Chuck, the builder, let me know that he had finally gotten an estimated availability date from the vendor for the two large roll-up doors … December 28th (of this year).  There is always a list of a few minor things that need to be done or corrected, but these doors are one of the two remaining major components of the actual building construction, the other being the gutters.  At this point, I presumed that they would not be installed until early in the New Year.  Work on this project started in the second half of June, not long after we left for our 4-month journey through Eastern/Atlantic Canada, so mid-January would mark the seven (7) months point.

TUESDAY 06 December

Today was a big day; we finally received the costs to have the electric power on our property upgraded and extended to the new accessory building (RV barn, workshop, storeroom).  Also, sometime today (or yesterday) the gutter sub-contractor was apparently here and installed the gutters and downspouts on the two long sides of the barn.

WEDNESDAY 07 December

Today was, perhaps, an even bigger day than yesterday, as I finally received the actual contract for the electric utility work.  All that remained to do was read it carefully, sign it, scan the pages, and e-mail them back to a special e-mail address at DTE Energy.  I looked the contract over, especially the costs.  The language used throughout the documents was specialized for DTE’s purposes, but I had a sense of what was what, and everything appeared to be in order.  I was missing a diagram that the cover letter said I was supposed to have, and had a few other procedural questions, so I e-mailed our DTE planning consultant back.

The most expeditious way to move things along was to scan the signed documents and e-mail them back.  This would trigger a reply e-mail with a link to a special payment website.  I decided to hold off submitting everything until tomorrow so I could read all of the boilerplate contract language.

The way the project was now moving, and with real winter just around the corner, it appeared that I might not get any wiring done in the barn until spring.  Since I would have time between now and then, I had been considering purchasing the 2023 version of the NFPA 70 / NEC (National Electric Code) Handbook, which will be available on December 15, 2022.  It’s a bit spendy, but the Handbook contains the complete text of the CODE along with extensive inline commentary, diagrams, and photos that “explain/illustrate” what the CODE language means, and how it is applied in practice.  That sounded like some interesting and meaningful “home study” over the early winter months.

The builder was here today to see what was wrong with the shop and storeroom doors, and fix them if possible.  Before looking at the doors, we were both surprised to see that the gutters had been installed (on the long sides of the building).

Both doors are very difficult to open, and both of them have dead-bolts that will not slip into their strike plates, even with jiggy-jogging them.  Chuck determined that the difficulty in opening was due to bottom sweeps that were a bit too thick, although they might become a bit more compliant with use and age.  The sweeps snap in and out fairly easily, and he will try to get slightly thinner replacements for both of them.

The storeroom door appeared to be installed correctly, with an even reveal between the door and the frame on the inside and with everything square.  The solution for the dead-bolt will be to grind the strike plate, which is OK with me.  (It’s what I would have done if I was fixing it.)  He would have to come back to do that.

The Shop door, however, was not installed correctly, being slightly out of square and not having an even reveal between the door and the frame from the inside.  Chuck said he would be out in the next few days to remove it and reinstall it, or have one of his carpenters do it.  It’s already trimmed out, so I don’t know if that means removing and reinstalling all of the trim, but he said it was the only correct way to fix the problem.

THURSDAY 08 December

Linda had to go into the bakery today, so during the first part of the morning I read over the entire DTE contract package.  I then signed it in the two places that I needed to, and scanned those two sheets, saving them as PDFs and renaming them for clarity of content.  One was the “Line Extension Agreement” and the other was the “Secondary Services Agreement.”  I attached both PDFs to an e-mail and provided additional contact information per the information from my DTE planning consultant, and sent the e-mail off to the special DTE e-mail address.  I wasn’t sure how long it would take for DTE to respond, so I left to run some errands.

While I was out, I got a text message with the payment link.  So far, so good.  When I got home, I also had an e-mail with the payment amount.  But I had a second e-mail indicating that I had not submitted all of the required documentation.  I spent the second half of the afternoon scanning the rest of the pages into PDFs, renaming them, attaching them to an e-mail (along with some additional information), and sending it off to the special DTE e-mail address.  By then, it was late enough in the day that I was tired of dealing with this and ready to sit on the sofa and work a puzzle or watch a Youtube video while I waited for Linda to get home.

After an easy dinner of salad and pizza, Linda used the payment link and paid the invoice.  Correct documents or not, they were more than happy to accept our money (CC).

I will check e-mail tomorrow morning to see if I got it right on the 2nd try.

FRIDAY 09 December – WEDNESDAY 14 December

Well, the contract was accepted as complete and we received verification that our payment had been received.  I contacted our DTE planning consultant to let him know.  He replied back that it might take a couple of days for him to receive official/internal confirmation, at which point he would generate the work orders needed for the project.  That internal communication eventually took place, at which point I was notified that the work would “probably” be completed by the end of January, but not later than 17 February (2023).  That was discouraging to hear, but this was the first time I had dealt with DTE on a project like this, so I was not familiar with all of the steps or the timelines involved.  Regardless, it was out of my control.

The free end of the conduit near the utility pole with the 7/16″ rope passed through the hole in the end cap and everything taped to prevent dirt and water intrusion.

Sometime prior to the 14th, the DTE planning consultant made another site visit to have a second look at the utility pole replacement and the conduit we had installed from the pole to the barn.  Because the conduit runs downhill from the pole location to the meter location, he suggested I try to seal up the open end by the conduit as best I could to prevent water/dirt from getting in.  Given the time of year, if water got into the conduit and froze it would prevent the cables from being pulled through and we would have to wait until the spring thaw to get the service conductors installed from the pole to the barn.  He also marked the location for the ground pedestal (junction box), but indicated that the crew(s) that did the work might place it in a slightly different location.


A view of part of the trench, filled in and raked out.

Marty and I had placed a 7/16” rope in the conduit after we assembled it and put it in the trench.  One end was tied around the lugs in the meter can, and the other end came out the open end of the conduit and up a wooden stake marking the end of the conduit, as we planned to bury it, where it was tied at the top so the end could be easily located later.  I had tried to seal the open end with a rag, but this was not adequate.  I had a cap with a domed end, so I drilled a 1/2” hole in the end of it, fed the rope through the hole, and slid the cap over the end of the conduit.  Although not glued, it was a snug fit.  I taped around the rope at the hole, and around the cap and conduit with Gorilla tape.  I retired the rope to the wooden stake, and then buried everything.

The trench beyond the free end of the conduit has been back filled and marked with a stake that secures the rope. Plywood has been put down and covered with plastic and dirt to keep as much water out as possible.


THURSDAY 15 December – SATURDAY 31 December

With the holidays coming, and a trip planned between Christmas and early January, not much else happened on this project the rest of the month.  The builder was notified that the roll-up doors were now delayed until the end of January, 2023.  Oh well.  Again; out of our (and his) control.

Special Blog Post for 202211(15-30) – Accessory Building Project Update

[ Note:  This post mainly consists of 26 photos with captions.  All of them were taken on a Google Pixel 6 Pro smartphone and processed using Faststone Image Viewer. ]


TUESDAY 15 November – WEDNESDAY 30 November

As previously noted, the electrical service entrance was prepared on Thursday, November 10.  By this time, the weather was changing, becoming cold enough that I could no longer paint.  Any painting that remained to be done, such as the outside of the two interior shop/storeroom walls, and the sides of the staircase, would have to wait until spring 2023.  With my painting activities curtailed for the winter, and with the electrical service entrance work done, I turned my time and attention to designing the electrical plan for the building using QCAD.  Indeed, I started with the building floor plan, turned off details that were not relevant, and added new layers for all of the electrical stuff.  Outlets, switches, a sub-panel for the shop/storeroom, and wiring would be fairly straight forward; it was just a matter of how many devices, where they would be placed, and how/where the wires would be run.  Lighting, on the other hand, lead me down something of a rabbit hole researching lighting requirements and fixtures.

With a 16’ clearance to the bottom of the roof trusses, I need to use “high bay” light fixtures for the RV bays.  These fixtures are much brighter (8,000 to 35,000 lumens) than the typical “shop/utility” tube lights used in many residential garages and workshops (2,000 to 4,500 lumens).  Selecting fixtures that will work the way I need them to, required me to jump back into lighting parameters such as illumination (in lumens), color temperature (in degrees Kelvin), Color Rendition Index (CRI), beam patterns and coverage (as a function of height above the working surface), mounting/wiring methods, suitability for use in unconditioned spaces (the RV bays), and energy efficiency.  The last one was easy, as all of the lighting that I install will be LED, which has a 10:1 energy advantage over tungsten filament bulbs.  (LEDs use ~1/10 the energy of a tungsten light source for the same amount of illumination, or provide 10x the amount of illumination for a given energy consumption.)  LEDs also have a lifespan that is 10 to 50 times that of tungsten bulbs, and come in a variety of color temperatures, specifically 5,000 K (Daylight) which is appropriate for areas where work is being done.  A comparison to fluorescent lighting would probably be more appropriate, but LEDs still come our way ahead on all of these parameters.  I will have more to say on this subject once I have actually selected light sources.


The electrical service work (meter box, load center, and one duplex outlet) was inspected and approved on Wednesday, November 16.  This was a critical milestone in the project, as DTE Energy won’t do anything relative to getting power to the building unless/until this work is completed, inspected, and approved.  I e-mailed the DTE planning consultant (John B.) late in the evening to let him know this work was done.  Following this approval, I purchased the 2” Schedule 40 PVC electrical conduit and couplers from City Electric Supply in Waterford, Michigan.  They did not have the sweeps I needed, or the 22.5-degree elbows.  I found the sweeps at Lowe’s and/or Home Depot, but had to order the 22.5-degree elbows online (Amazon).


MONDAY 21 November

In spite of the cold weather, and 4” – 5” of snow on the ground, there was work that had to be done.  On the couple of occasions when it had snowed prior to today, I used a gasoline powered backpack leaf-blower to remove the snow from the electrical cable paths from the existing utility pole to the house (which had been marked by MISS DIG 811) and the area from the pole to the barn where I intended to dig a trench and install the conduit for the electric service entrance cable.

I had a few errands to run today, and when I returned I found two DTE subcontractor trucks parked in the street in front of our house, with one of them blocking the first driveway entrance.  That wasn’t a problem, as the bus is currently parked in front of the house and I had no immediate use for the first entrance.  Still, I was curious why they were there so I walked over and talked to the guy in the lead truck.

They had spent the morning working at our neighbor’s house across the street.  Our neighbors are the third owners of the first house built in this subdivision.  Built in the late 1960’s, the house still had its original 240/120V, 100A electrical service.  They are upgrading it to 200A, and that meant a new main panel, a new meter/box, a new transformer, and new cable from the pole to meter.  Their existing service was overhead wires from the pole to the house, but DTE will not upgrade those wires.  As with new construction (like our barn), they will only run cable underground from the pole/transformer to the meter on the side of building.  They also install a terminal strip on the pole a few feet below the transformer and connect the wires from the house and the transformer together at the terminal strip.  These particular sub-contractors where an “underground” crew and had spent the morning digging a trench from the pole to the meter location, installing direct-burial cable, leaving enough of it coiled up on a hangar on the pole to reach the terminal strip, and then back-filling the trench.  A DTE crew will come out and remove the old overhead cable and transformer, mount the new transformer and terminal strip, route the new cable up the pole, and make all of the connections.

The sub-contractors were on a break, and I asked if the guy would be willing to take a few minutes to look at my situation.  The thing that has been a source of confusion for me was where to end the trench/conduit, and what direction it should be pointed.  My DTE planning consultant had simply indicated “about 10’ from the existing pole.” But that lacked the specificity that I wanted as we were (apparently) also getting a new/taller utility pole that would (probably) be installed “about 5’ to either side of the existing pole.”  It would, of course, be in line with the existing overhead cables (power, broadband, and phone).  I knew that DTE would also install a ground mounted junction box/pedestal and that the wires from the house, barn, and transformer would be joined in this box.  But it was not clear exactly where the pedestal would be placed relative to the existing pole, much less the new pole in an as yet undetermined location.  My confusion/concern was also partly fueled by not having ever dealt with this before and not understanding exactly what was actually going to happen.

The sub-contractor looked at my proposed path and filled in a few critical pieces of missing information.  I learned that the junction box would (likely) be installed about 3’ from the new pole, directly away from the edge of the driveway.  If I located the end of the conduit in-line with a line offset from the existing pole by 3’, and stopped a few feet short of the possible closer junction box location, it would be a perfect setup for a crew (like his) to do what they need to do.  I also learned that they will NOT install additional conduit from my conduit to the junction box; all the cable they use is rated for “direct-burial” and does not actually require conduit.  (Conduit is nice, however, especially in rocky soil or other situations where it might be subject to damage.)  They will simply trench from the end of my conduit to the junction box/pedestal location, as well as from the pedestal location to the new pole location.  Finally, he assured me that I would not have any difficult bending the 2” Schedule 40 conduit along my indicated path.  Based on what I learned, I staked out the actual path for the trench/conduit from the barn to near the existing utility pole, using landscape flags.


TUESDAY 22 November

Today was spent digging a trench and installing approximately 90 feet of 2” Schedule 40 PVC electrical conduit, including a 36” radius sweep (quarter circle) and a 12” long 22.5 deg elbow.  The conduit will house the service entrance cables that the power company will run from the pole to the building.

My friend and fellow converted bus owner, Marty, who is a licensed electrician, agreed to come over and help with this task.  I was glad to have the help.  The work proved to be quite physical, and often required coordinated effort; I doubt that I could have accomplished it by myself.  Linda also helped, off and on throughout the day, taking breaks from her accounting work to take photos, fetch things that we needed from the garage, fixing a light lunch, and taking on the task of cleaning the rented trencher with our power washer once we were done digging.  (We had chosen this day to do the work because the high temperature was going to be well up in to the 40’s.)

But before that happened, I used yellow marker paint (spray can designed to work when inverted) and “painted” the path that I had marked with flags yesterday.  I then unloaded the 36” trencher from the trailer as I wanted to be ready to work as soon as Marty arrived around 9 AM.


On Monday evening, November 21, I rented a 36” trencher from the local Home Depot for 24 hours.  This would allow us to use the machine all day and still be able to clean it and return it on time.  (The 24-hour rental was only 22% more than the 4-hour rental.)  This particular machine digs a trench approximately 5-1/2” wide.  This photo is from 8:30 in the morning as I prepare to back the trencher off of the tilt-bed trailer, which was part of the rental.  The machine was chained down to the trailer for transport.  The only issue I had was releasing the tension on the front chain, but I eventually figured out how to loosen it.  (Photo by Linda.)


I had never operated a piece of equipment like this, but last night I studied the directions that came with it, and it seemed straight forward enough.  In this photo, I have backed the trencher up enough to cause the trailer bed to tilt down and touch the ground so I could back the trencher off onto the driveway.  (Photo by Linda.)


Marty and I decided to dig the trench for the conduit starting at the meter and working towards the utility pole.  In this photo, I am driving the trencher over to the meter box location.  Although not obvious from these photos, the overnight low temperature was in the low 20s (F) and the ground was initial quite firm.  It was not deeply frozen, however, and was easily dug.  By late morning the temperature had risen above freezing and we had a clear sky with a bright sun.  All of the areas of bare dirt (not grass) within a 15-foot radius of the meter box turned to mud, which only got worse as the day went on, with a high temperature in the low 40s (F).   (Photo by Linda.)


When digging, the trencher is driven backwards.  The operator stands on the platform at the rear and can see the digging chain when it is raised, but cannot see it when it is lowered.  I’ve just dug a short section of trench coming out from the riser conduit into the meter box, and have lifted the chain out of the ground.  Where the chain meets the body of the trencher (yellow) a horizontal auger is just visible.  When digging, the auger moves all of the dirt off to the left (when facing forward).  Visible on the safety bar above the blade is a piece of white tape.  It was already there when I picked up the machine, but turned out to correspond to an ~27’ trench depth, which is what we were aiming for.  DTE Energy requires the top of the conduit to be at least 24” below grade.  (Photo by Linda.)


I did not get a photo of the control panel, but it consisted of a choke and throttle for the engine, a control lever to lower/raise the blade, two drive controls for the left and right drive treads (like a bulldozer), and a lever to engage/disengage the chain.  The engagement lever moved sideways, and had to be pulled over with my right hand and held there while also operating the right drive tread.  It was actually easier than it sounds, and I got the hang of operating this beast fairly quickly.


Marty spots me to get the tip of the blade as close as possible to the riser conduit into the meter box, and let me know when the blade was at the correct depth.  (When the blade was lowered and digging, I could not see any of it, including the piece of white tape that served as our depth gauge.)  Because the trencher is driven backwards while digging, I was able to see the yellow stripe (about 2” wide) through the operator platform, which was perforated and ridged for good traction.  (Photo by Linda.)


Conduit assembly started at the meter box end.  I held a 36” radius sweep against the riser conduit into the meter box with the other end at the bottom of the trench while Marty marked the point where we needed to cut the riser so we could join it to the sweep.  The upper portion of the riser had a threaded fitting already installed into the meter box.  A nut inside the meter box threaded onto the fitting to secure the riser to the box.  (We set the lower portion of the riser aside after cutting it, and eventually used it as the last piece of conduit at the pole end.)  In this photo, we are adding a 22.5 deg elbow to the end of the sweep.  I held one end of the sweep against the side of the barn so that it was parallel (vertical) while the other end rested on the concrete apron (horizontal) and Marty loosely fit them together and marked them at the position where the elbow was flat on the concrete and bending in the correct direction.  We then lay the pieces down on the apron for assembly.  We could not trench in a direct line from the meter box to the pole because of several trees, but the combination of the sweep and the elbow got the conduit pointed in the direction of the straight portion of the trench.  Part of the trench is visible behind Marty.


This is a view of the trench from near the existing utility pole.  (This pole will be replaced with a taller one located within 5 feet either side of the existing one.)  The end of the conduit is propped up above the trench so we can add an additional piece to it.  The first 30’ (approx.) after the sweep/elbow is straight and angled away from the trees.  It then curves around the trees in a broad sweep.  At the pole end, the conduit is running approximately parallel to the edge of the driveway and about 3 feet farther away than the pole.


DTE requires a minimum depth of 24” from grade to the top of the conduit.  This photo shows that we are at 27” (the trench depth varied from 27” to 30”).  A single piece of this 2” Schedule 40 PVC conduit does not appear to be at all bendable.  However, the DTE contractor that was here yesterday assured me that a longer run would bend just fine for the curve I had marked out.  We added two 10’ pieces (“sticks”) at a time, and then pulled it around into the trench with no difficulty, keeping the free end out of the trench and resting it on a shovel handle set across the ditch so we could install the next piece(s).


This is the utility pole end of the trench/conduit.  The stake marks the end of the conduit.  We used a 125’ steel “fish tape” to pull a 100 foot, 7/16” rope through the conduit from the pole end and into the meter box.  (This rope has a 300 lb. pull strength.)  Marty handled the meter box end while I fed the rope into the conduit.  There was approximately 4 feet of rope at the meter box, which Marty wrapped around the meter socket before putting the cover back on.  I had about 6 feet of rope at the pole end, which is just visible in the lower right corner of the photo.  The white object in the trench is a cotton rag that I stuffed into the end of the conduit to keep dirt out.  The end of the conduit is about 6 feet from the existing utility pole (5’ to the west and 3’ to the north.  Everything after this will be done by DTE or their sub-contractors.


WEDNESDAY 23 November to MONDAY 28 November

I was sick with an upper respiratory viral infection during this time (and beyond), and nothing else much was accomplished on the barn.  I did learn on Monday that the ETA for the two large roll-up doors is now December 28 (of this year).  I also emailed our DTE planning consultant to let him know the conduit was installed in the trench and included pictures, as requested.  He indicated that he would (finally) do our plan/quote on Monday, November 28.   On Monday, I also heard from Phil at Precision Grading that he would have the 21aa stone delivered tomorrow and be on site to finish the west pull-through driveway extension to the barn.


TUESDAY 29 November

Phil arrived around 10 AM.  He got his front-loader and bulldozer unloaded from his equipment trailer and then unloaded a large roll of road/construction fabric from the box of his dump truck using forks on the front-loader.  I made myself available to help with placing the road/construction fabric, but otherwise spent most of the day cleaning up the dirt along both sides of the conduit trench.  This included gathering up medium-to-large rocks and using them as fill for the somewhat larger hole near the meter and along the first 5’ of the trench.  I took occasional breaks to take photos of the driveway work.  We both finished up around 4:30 PM.  It was a long, hard day, but a lot got accomplished.


This is a view looking SW from the SE corner of the bar showing the first pieces of road fabric in place on the “1×3” stone and crushed concrete base layer.  Phil is standing in front of the front loader at the left of the photo.  His dump truck and equipment trailer are in the street.  The bulldozer is barely visible at the far corner of the barn.


This is a view looking W from near the existing utility pole at the edge of the existing west pull-through driveway.  The area covered by the road fabric is the new driveway extension/approach for the barn.  This is where most of the new gravel will be placed.  This new area will slope down to the SW, away from the barn and from the yard to the right in this photo.  (Note that the yard to the right will drain to the NW and surface water will flow N along the east side of the barn and then flow W past the rear of the barn.  Phil had previously graded the area around the barn, but will return at some point to add soil and regrade this area to ensure proper drainage.)


This is a view looking NE from the SW corner of the existing pull-through driveway.  The curved edge of the new area to the left is to accommodate the left steer tire of the bus when swinging around from the pull-through driveway to pull into the left RV bay.


This is a view looking SE from the SW corner of the barn.  The pull-through driveway slopes down from just before the existing utility pole all the way to the street.  The yard on the other side of the new driveway extension slopes towards the camera and to the left.  The new driveway extension slopes away from the barn and away from the yard to the right and down towards the street.


This is a view looking SW as the gravel train prepares to back into the driveway and dump the gravel from the rear trailer.  Phil will help the driver get it positioned so that the gravel pile is mostly on the road fabric.


The first load of stone has been dumped and the truck is pulling out while lowering the trailer box.  The driver pulled to the far side of the street and then unhooked the rear trailer so he could back in and dump the main truck box.


This is the second load of stone and is being dumped from the actual dump truck.  The two piles of gravel visible here contain a lot more gravel that it might appear (approximately 20 cubic yards, or about 60,000 pounds).


In this photo, Phil is using the front loader to scoop up the gravel and move it to various locations on the road fabric.


Here, Phil is using the front-loader to deposit/spread the 21aa stone.


Phil needed more stone to finish the job.  He had some at his shop, which isn’t too far from our property, so he dropped his equipment trailer and took his dump truck to get it.  His stone is darker than what was delivered earlier, due to being a bit wet.


Once all of the gravel was placed and spread somewhat evenly, Phil switched to the bulldozer to grade it.


Besides getting a relatively flat surface and consistent thickness, Phil used the bulldozer to carefully grade the stone along the edges.  The bulldozer is very heavy, so it also created some compaction of the stone.


Buy the end of the day, the new driveway extension was a surface that could be driven on comfortably, but was not as compacted as I wanted it to be.  In the next few days, I would use the F-150 to drive back and worth over the gravel from a variety of directions to pack the surface, but that’s for a future post.


WEDNESDAY 30 November

One of the carpenters from Patriot Builders was here today to install the locking door knobs and deadbolts for the entry, shop, and storeroom doors.  The three door knobs and two deadbolts (shop and storeroom) were all keyed alike.


Exterior view of the shop door with the locking door knob and deadbolt installed.


Exterior view of the storeroom door with the locking door knob and deadbolt installed.


Interior side of the entry door with the locking door knob installed.  Besides the window, this door has deeper jams to match the thickness of the wall, protruding 1/2” into the interior to accommodate drywall or plywood, should we wish to add that in the future.


The exterior side of the entry door with the locking door knob installed.  This slightly broader view shows the panel detailing on the lower portion of the door and a bit more of the window.

Special Blog Post for 202211(01-14) – Accessory Building Project Update

[ Note:  This post consists of 13 photographs with captions.  All photos were taken on a Google Pixel 6 Pro smartphone and post-processed with Faststone Image Viewer. ]


TUESDAY 01 – MONDAY 14 November


A view of the shop looking toward the NE corner from the door in the SW corner.  The ceiling/joists and walls have been primed with Killz-2 using an airless sprayer and then painted with Valspar Pro Storm Coat Exterior semi-gloss acrylic white paint.  The spray nozzle clogged frequently and the whole process was messy and inefficient.  Still, it was probably better than doing the joists and the OSB on the ceiling with a brush and roller.

The stairs to the storeroom.  The risers have been primed and painted white.  The treads have been primed and painted light gray using Valspar Pro Deck, Floor, & Porch anti-skid paint.  The stair walls and the spaces at either end of each step have been trimmed in 1x pine but have not yet been primed/painted.  The doors for the shop and storeroom have been installed.

The extension of the west pull-through driveway to the front of the barn.  Phil (Precision-Grading) was here most of the day on the 5th, initially redistributing the 1×3 crushed concrete based, and then finish grading the dirt on the other three sides of the barn.

The view of the accessory building from the NW after the finish grading.  The grades on the E, N, and S sides were sloped away from the building a bit more and tapered gradually into the existing terrain.  That created some extra dirt in addition to the large and small piles that were already there.  Phil had me designate low areas to fill in, and I selected ones that were both obviously in need of some fill and not too far from the building to make it efficient for him.

The main/permanent entry door for the barn.  The carpenters removed the temporary one and replaced it with this one.  Besides the class window, this door has extra deep jams which will allow it to be properly finished off if I ever decide to install paneling/drywall and trim.

Looking straight up the stairs to the storeroom, the risers and trim have been primed/painted white and the treads have been primed/painted light gray with anti-slip floor paint.  Although not visible, the landing at the top of the stairs and the floor of the storeroom have also been primed and painted with the light gray anti-slip paint.  Everything will have two coats of paint when the job is done, although some of that might not happen until spring 2023.

The carpenters trimmed between the OSB and the stairs, under the trim on the top and front of the walls, and along the floor.  I was able to get all of this primed and painted (one coat) before the weather turned too cold.  The Valspar Pro Storm Coat paint can be applied down to 35 degrees (F), but the weekend after these photos were taken, the lows started dropping into the mid-to-low 20s (F) at night and only rising into the 30s during the day.  That signaled the end of the painting until spring.  As is obvious in these photos, the larger walls that enclose the shop and storeroom have not been primed and painted yet, a big job that will have to wait until next year.

The electrician (Bill) was finally able to fit our barn into his extensive commitments and install the service entrance.  Seen here is the meter can and riser conduit on the SE corner of the building.

The meter can with the cover removed.  The black and red wires are the two ‘hot’ leads (L1 and L2) and the bare aluminum wire is the neutral, all going to the load center on the other side of the wall.  The conduit lower/left is where the wires from DTE will come into the meter can and attach to the lugs at the top of the box.  The meter blades will plug into the four vertical spring-slots and then the cover will go back on and be secured by DTE.

The electricians had to chisel out part of the foundation to allow the riser conduit descend vertically (more or less) below ground level.  I will install the 2” Schedule 40 PVC Conduit that connects to this pipe and runs through the yard to junction box by the utility pole (once it is installed).  I will rent a trencher from The Home Depot in Howell for this work.  The horizontal white device is just a clamp for the ground wire.  The wire coming up from this device goes through the wall and into the bottom of the load center; it does not go through the meter can.  It leaves the clamp through the bottom and then runs to the right where it attaches to two, 8’ long copper ground rods driven into the ground next to the foundation.

The top few inches of both ground rods are visible, as is the bare copper ground wire that connects them to the ground bus (and case) of the load center.

Shown here is the Siemen’s 240/120V – 200A Load Center.  The service entrance cable and ground wire come through the wall and up into the bottom of the load center.  Just visible at the top/right is a yellow 12-2+G Romex cable that feeds a duplex outlet out of sight to the left of the photo.

I put in a request for the Miss Dig 811 service late last week with a work start date of November 10.  I had to create an account and do the whole thing online, but it was otherwise a fairly smooth process.  The only caveat was that I could not draw the work area polygon using the pencil on my iPad Pro and ended up having to do the whole thing on my laptop computer.  The confirmation said the site would be marked not later than 12:57 PM on November 10.  The utility location service showed up around noon on that date, and was done before one o’clock.  The flags and paint for the DTE electric (magenta) and the AT&T phone (orange) cables to the house are marked.  (The AT&T cable is no longer in use.)  We have natural gas and broadband cable on the property as well, but they are on the other end of the house, well away from the work area, and did not need to be marked.


Blog Post for 202210(18-31) – Accessory Building Project Update

[ Note:  This post covers updates on the accessory building (barn) project for the 14 days from Tuesday, October 18 through Monday, October 31, 2022.  There are three photos with captions. ]


TUESDAY 18 October

The accessory building (barn) is so close to being done that I am getting a bit impatient for it to actually be finished.  Which is to say, to have all of the stuff the builder is taking care taken care of.  Once he is done, there will still be a lot for us to do, but most of it cannot be started until all the permitted details are complete and he has gotten the final inspections.  Top of the list, for me, is all of the electrical work that I still have to do, and the first step is arranging for our electric utility, DTE Energy, to run power to the building.  I put in my service request with them on Wednesday, October 12, and expected to hear back from a planning consultant not later than tomorrow.  I now have to design the electrical plan, which I will do in QCAD (the same software I used to design the building).

In the meantime, the one thing I can do is prime and paint the walls in the shop and storeroom, as well as the risers on the stairs, and then prime and paint the floor in the storeroom and the treads on the stairs.


WEDNESDAY 19 October

The HVAC technician (Mike) from Lakeside Services (Lakeside Heating and Cooling) arrived around 1 PM today to service the Bosch hot-water baseboard heating system for the house, and the heating portion of the Bryant HVAC unit for the library.  He was here until about 3:30 PM.

I spent most of the day at my desk working on the final post for our trip and a parallel post for the activities this past week related to the accessory building (barn) project.  I knew that the electrician might be here sometime this week, and by mid-afternoon I had it in the back of my mind that I should   check to see if he was on site.  I went outside around 2:45 PM and saw several vehicles down by the barn, so I walked down to check it out.  I could hear the unmistakable sound of a circular saw, so figured it was probably not the electrician.  I was right.

What I found instead were three vehicles and three carpenters.  The crew chief was Rob, who is Patriot Builders lead finish carpenter.  (Chuck, the owner, is a framing carpenter, and Garrett, who I met last week, does both framing and finish work.)  A bit to my surprise, they were installing OSB on the inside of the studs for the sides of the staircase, and also installing OSB on the interior of the shop and storeroom walls.  I had not realized they were going to finish off the stairs, and had (apparently) forgotten that they were going to finish off the walls.  All of which was great.  I had a brief, but very nice, chat with Rob and then left them to work in peace without any more interference from me.  I texted Chuck to let him know the guys were here and that I met them briefly.


THURSDAY 20 October

Sometime around this date the DTE planning consultant assigned to our work order showed up on site (unannounced).  I was in the middle of painting, but obviously stopped to give him whatever time he needed.  We had a very nice chat about what I was trying to accomplish.  By the time he left, it was clear that he wanted to have DTE run power to the barn from the same transformer that powers the house.  It also appeared that he had determined that we needed a larger transformer, but also needed a new utility pole, possibly taller than the current one, located within ~5 feet of the current one.  As best he could tell from the ground, he thought our current transformer was 10KVA and said something about switching it to a 25KVA.  He indicated that wire from the junction box to the barn would be $10/foot (I would need close to 100 feet) and there would be a charge for the new/larger transformer, but probably not more than $1,500.

I pointed out that the house already has a 240V/200A main load center and 240V/100A, secondary load center (not a subpanel), and that the barn would have a 240V/200A load center as well.  I noted that 24KVA is only 100A at 240V (or 200A at 120V), so a 25KVA transformer would still be far below the capacity of my three load centers, and that my total existing loads exceed the load center capacities.  This is actually typical, as load centers never draw their full rating, and probably rarely draw half of their full rating for more than a short period of time.  Still, as long as we are going to the trouble and expense of doing this work, I wanted to make sure the new transformer was adequately sized.  (My research later revealed that the next size up from DTE is 50KVA.)

As I understood the order of events, it would go something like this:  0) Get confirmation that the meter can, load center, and an outlet have been installed in the barn by a licensed electrician and the installation has been inspected and approved by the permitting authority (Livingston County Building Department, in this case).  1)  Deliver new pole to the site.  2) Install the new pole, transformer, and terminal strip.  3) Install a junction box in the ground about 5 feet from the new pole.  4)  Disable the power to the existing transformer.  5)  Move the existing wires to the new pole.  6) Run wires from the new transformer to the terminal strip.  6) Run new/large wires down the pole from the terminal strip to the junction box.  7) Connect the existing wires from the house to the junction box.  8)  Pull the new wires for the barn from the meter box to the junction box.  (I will have the 2” PVC conduit already installed in a trench.)  9)  Install the new meter for the barn.  10)  Energize the new transformer.

He indicated that it would likely be a month before this got done, but to get the process moving along, and provide me with the cost estimate, he needed the LOAD SHEET, asap.  He also ‘suggested’ that I include any/every thing I thought I ‘might’ possible ever want to power.  I got the sense that this LOAD SHEET was part of a justification/approval process for the cost of whatever work has to be done, determining what our share of that initial cost will be, and what payback the utility company can expect.

I already had the LOAD SHEET pdf, and it indicated that most of it has to be filled out and signed by a licensed electrician.  I explained that the meter can and load center were being handled by the builder’s electrician, but that I did not have my own electrician for the job.  I explained that I have an EE background, but am not an electrician, and asked it would suffice for me to fill it out myself?  He didn’t say ‘no,’ which I took to mean ‘yes,’ or at least ‘okay, not great, but I’ll work with that.’  He also made it clear he needed it sooner rather than later.

From this meeting forward, I continued painting during the day when it was warm enough and I had some daylight to work with.  In the evenings, I worked on determining the loads I would need to power and filling in the LOAD SHEET.


FRIDAY 21 October

The floor joists for the storeroom floor are exposed on the underside in the shop, and I do not plan to install a flat ceiling onto them.  With that in mind, I thought it might be easier to prime/paint the joists and the underside of the OSB storeroom floor with a paint sprayer.  I don’t own one and have never used one.  Thinking this might be a one-time use, not wanting to spend a fortune, and not having an air-compressor with adequate CFM or an oil/water separator/filter, I got a Wagner Control Pro 130 airless sprayer at the local Lowe’s.  I chose Killz-2 for the latex primer and Valspar Pro Storm Coat semi-gloss acrylic latex for the paint.  Even though I will be using the paint inside, this exterior paint is formulated to deal with outdoor temperatures with cracking.  It can also be applied down to 35 degrees (F), so well suited to what I needed to accomplish given the time of year.


FRIDAY 28 October

Towards the end of the afternoon, I finally uploaded the LOAD SHEET to my DTE planning consultant, along with an Excel Spreadsheet I had created to catalog my current and future loads, both for the house and for the barn.


MONDAY 31 October

For the balance of this post, I am going to just include a few photos.

The south/interior wall of the shop with a view through the door to the area under the storeroom stairs.  Closed-cell spray-foam insulation is visible between the floor joists for the storeroom above.  The walls have been spray-foamed and then covered with OSB.

The stairs leading up to the storeroom as seen from the large/west bay door opening.  The side paneling and studs have been removed under the high end of the stairs.  The area under the landing has never enclosed as the door the to shop is there.

The storeroom looking SW from the NE corner.  The floor has been masked off at the base of the walls for painting.  Likewise, the Velox sun-tunnel diffuser in the center of the ceiling has been masked off.  The transparent painter’s plastic had the unexpected benefit of spreading the light out more towards the walls.  The step ladder is a 6-foot model.  The ceiling height is ~7 feet.


202210(11-17) – Accessory Building Update

[ Note:  This is an update post on the accessory building (barn) we had built while we were traveling in Eastern/Atlantic Canada and New England.  It is long, and contains 12 photos with captions. ]


TUESDAY 11 October

Our barn builder (Chuck) was due to come by today to meet with his insulation sub-contractor (Mike), and then meet with us.  He texted me mid-morning to let me know that he and Mike would be here at 11:30 AM.  Mike got here first, so I walked down to the barn and introduced myself.  Chuck showed up a few minutes later.  The three of us looked at the insulation part of the job, and discussed a few options.  When it sounded like we were all on the same page, I left them to discuss business.

The view of the SE corner of the barn, on a cloudy fall day, looking towards the NW from the existing driveway near the utility pole.

We were not insulating the entire barn (that would be a big/expensive job), but we were insulating the shop room on the main floor and the storage room above it.  The original plan was to spray foam the walls of both rooms with closed cell foam, and use blown-in insulation above the ceiling of the storeroom.  After talking it through, Chuck and Mike agreed that it made more sense to go ahead and spray foam the top side of the storeroom ceiling, which would have a layer of OSB on the underside anyway.  That would make the entire envelope for the two rooms really tight against air infiltration or leakage, so I was OK with that change.  (Note that the floor of the shop is concrete with 4” of foam insulation underneath.  The floor of the storeroom is plywood, and the joists are exposed and will not be insulated.)

Once Chuck and Mike were done, and Mike took off, Chuck, Linda and I walked the barn.  It was the first time since we left on our trip that we were able to talk to him face-to-face, and in the barn.  We had a few questions, which he answered, and there were a few details to discuss, which we did, and he gave us an approximate timeline to finish the job.

A closer view of the SE corner of the barn looking towards the NW.  The stairs to the storeroom are just visible through the large door for the smaller bay on the right.  The tall, narrow green trim on the side near the front of the building is the location of the electrical service entrance.

There was a modest list of smaller things that needed to be done, including removal of some of the OSB that currently enclosed part of the underside of the stairs to the storeroom (which my plans indicated should be open on both sides).  Most of the tasks should be completed by the end of October, but the job won’t be completely finished until the two large roll-up bay doors are installed sometime in November, the driveway and finish grading are completed, and the final inspections have taken place.  The driveway and grading work will happen as soon as Phil (Precision Grading) is available and the weather allows the work to be done properly.


Chuck indicated that the next building inspection might happen as soon as this coming Friday, but the storeroom ceiling had to be installed before the insulation could be installed.  The insulation will likely be installed early next week (if the storeroom ceiling is in), followed not too long after that by the electrician, who has to install the meter can, the 200A distribution panel, and one electrical outlet (per code).  The tunnels and diffusers for the four sun tunnels still have to be installed, along with three insulated entry doors:  The main entrance (between the two big bay doors) and the doors for the shop and storeroom.


WEDNESDAY 12 October

This view is of the entrance to the shop (main level) and the staircase going up to the storeroom, as seen from the east side (smaller RV bay).  The OSB enclosing the space under the stairs has been partially removed at my request.

The lead carpenter (Garrett, I think) and his two assistants were here today, so I walked down and introduced myself.  By the time I got to the barn, they had already installed the OSB ceiling in the storeroom, including the sun-tunnel and diffuser, and were working on cutting out the portion of the OSB on the sides below the staircase that I wanted removed.    I spite of having just the door opening (no windows) there was enough light to see clearly.  Artificially lighting will be needed, of course, but I was pleased with the effectiveness of the sun-tunnel/diffuser.  I only stayed a few minutes as they were clearly busy.  I texted Chuck to let him know they were here and that I had met them briefly.


THURSDAY 13 October

This view is of the entrance to the shop (main level) and the staircase going up to the storeroom, as seen from the west side (larger RV bay).  The OSB enclosing the space under the stairs has been partially removed at my request.  A small portion of the shop room is just visible through the door opening.

 Yesterday, I finally managed to get on the DTE website and locate the information I needed on the process/procedure for getting electrical power to the barn.  I had printed off the instructions and called one of the indicated numbers, but it was already after hours, so I had to wait until today to pursue this further.


After breakfast I made the call to DTE.  Actually, there were two phone numbers, one for commercial and one for residential.  I called the commercial number first, as that’s what the instructions seemed to indicate I needed  to do.  The voice menu made it fairly obvious that this number was for builders and I needed to call the residential number, so I did.

I spent about 15 – 20 minutes with Jennifer, the customer service representative, at the end of which time I had a work order number and a phone number for the service center.  She said to give them four business days to contact me, but to call them if I had not heard from them by then.  She reiterated the information in the website instructions:  I will have an initial phone call with a planning consultant and then do whatever I need to do as a result of that.  There will then be a site visit, after which we will have costs and then make decisions and service commitments.  Getting power to the barn is a big deal, and doing it in the best, but also most economical, way is important to the overall project, both in terms of  capability and cost.  There are really only two main options:  1) Have DTE run a cable to the barn from a transformer, or 2) Pull a cable from the house to the barn.  This second option does not involve DTE directly, unless we would need to upgrade the power to the house, which is likely.

This is a view of the 2nd story storeroom as seen through the door opening from the landing at the top of the stairs.  The two walls that are visible are the exterior walls of the barn.  Not obvious in this photo is that there is space between the wall studs and the exterior wall, eliminating any thermal bridging.  The white material on the walls is house wrap, and it extends around the two interior walls as well.  Besides providing a vapor barrier, the house wrap will prevent the spray foam insulation from contacting and adhering to the exterior siding.  The OSB ceiling has been installed along with the sun-tunnel and diffuser, which are nicely lighting the windowless space.

I think the most straight-forward approach would be to run power directly to the barn from the existing pole that feeds the house.  (This pole is actually closer to the barn connection point, at 88.5 feet, than it is to the house service entrance, at 95.5 feet.)  DTE might be able to piggyback off the existing transformer, install a larger transformer as a replacement for the current one and then piggyback the two feeds, or install a second transformer just for the barn.

Regardless of those options, which would be determined by DTE, we would end with a second meter.  Our neighbor has this exact setup, and the readings from the two meters are combined into a single residential rate bill.  The main disadvantage is that we would not have any backup power to the barn, at least initially, if the grid goes down.  That would be a major issue in terms of a heating system for the shop and storeroom, and more minor issue for the chargers that maintain the batteries in the bus and travel trailer.

The main advantage to pulling power from the house is that we have a 20 KW Kohler whole-house backup generator with grid-monitoring and an automatic-transfer switch.  One of the downsides, however, is that the closest straight-line distance between the house (garage) and barn is ~155 feet, and the required wire run could be 30 to 40 feet longer than that.  That’s a long run, and would require really large size wires in order to properly support the 240V/200A main distribution panel in the barn.  The other downside, which relates to the first, is that we already have a 240V/200A main distribution panel (for the house) and 240V/125A main distribution panel (for the garage and library).  I doubt that the existing service entrance cable from the transformer to the house is adequate for that total (525A) potential load.  Of course, some of the loads will be shifting location as I relocate the shop from the garage to the barn, and the reality is that we never draw anything close to 325A now.  And we never will, but everything has to be sized correctly to work safely as a system.  It’s going to be an interesting process, regardless of the final solution.


FRIDAY 14 October

This is the view from the landing at the top of the stairs to the storeroom, looking south toward the inside of the front of the barn.  The entry door is visible between the two larger bay door openings.  (The doors will not be available for installation until sometime in November, 2022).  The wall structure and headers over the large door openings are visible as are some of the roof trusses.  The trusses are set on a 24” spacing, and the bottom members of are 38’ long, spanning the 36’ width of the building with a 1’ overhang/soffit on each side.

Around breakfast time, I got a call back from Sharon in the DTE Northwest Planning office.  She confirmed that the work order for my service request had been created, and verified my information.  She followed that up with an e-mail giving me the name and contact information for the planning consultant (John) who will work with me.  She requested that I send/e-mail him a site plan and that it identify the location of the current electrical service (pole/transformer) and distances to the house (existing) and barn (new).

We were outside working on the trailer when a vehicle pulled in the driveway by the barn.  I suspected from the lettering on the doors that it was the Livingston County building inspector, who Chuck had indicated might be here this week, so I walked down and introduced myself.  He needed the approved plans for the building, which I did not have, but then he spotted the 2’ long piece of 4” plastic pipe with the rubber end caps, and surmised that the plans were probably in there.  I had picked up this tube on Monday when I saw it, but it was very light and I don’t recall opening it to see what was inside.  It was, indeed, the plans for the project, which were required to be on site at all times.


This is the view of the space under the stairs after some of the OSB has been removed from both sides.  Opening this up will allow me to keep rolling tool and parts carts here that I can easily move to the bus, trailer, or anything else I might have in the barn to work on.

I was helpful, to the extent I could be, but was careful not to say too much as I was not the builder and the permits were not issued to me.  The inspector was confused initially by a notation about a 12×42 something, until I explained that the building was sitting on 12”W x 42”D trenched concrete footing.  He then had a moments hesitation when he realized the 16’ tall 6×6 engineered posts did not extend below the surface of the concrete. (I think he was expecting this to be a pole barn.)  Again, based on my conversation with Chuck on Tuesday, I was able to explain the anchoring system used to secure the posts.  The only thing he found, and wrote up as a “deficiency,” was the lack of proper handrails on the stairs going up to the storeroom.  Deficiencies do not halt the project, but have to be taken care of before the final inspection.


I texted Chuck to let him know the inspector had been there and what he had cited.  Chuck called me back to discuss handrail options and we agreed on a straight wooden handrail with a gripable profile that could be applied to the top of the 2×4 cap that is already in place.


SATURDAY 15 October

Here’s another view of the space under the stairs as seen from the smaller/east RV bay near the shop and looking ~WSW.  A small portion of the low end of the staircase is still enclosed down to the floor to provide additional vertical strength (to prevent sagging and bouncing) and prevent any side-to-side motion.  The OSB on the sides is attached to 2×4 studs sitting on base plates that are anchored to the concrete floor.  I have been up and down this staircase several times, and it is very solid under foot.

My existing site plan for the barn project did not include the existing utility pole location, or distances to the house and barn service entrance points, that DTE needed, so I spent part of the day modifying my QCAD drawing to include those features.  Although I had determined the location and this pole, and the approximate distances involved, on more than one occasion, I was unable to immediately put my hands on that information.  It was thus easier, and less time consuming, at that point to get my 100’ tape measure and a stake, and just measure it again.

The distance to the service entrance point near the southeast corner of the barn was ~88’6” and the distance to the house service entrance point (southwest corner of the garage) was ~95’6”.  I had previously told DTE the distance to the barn was less than 100’, so I was relieved that this was actually the case.  Also, as the service entrance points were now both known locations, knowing the distances from each of them to the pole allowed me to draw auxiliary circles centered on each point with the corresponding radii, and thus accurately locate the pole on the drawing.  (I was pleased that the pole ended up adjacent to the north side of the west driveway, where it is actually located.)  While I was at it, I marked the (approximate) location of the other three utility poles on our property, as well as the pole just off our property near the northwest corner, and added notations for some of the other things on the drawing.  (The distribution line was already shown, as was the location of the Consumers Energy gas line.)  Once I was satisfied with the revised drawing, I saved it as a QCAD dwg file, and then again as an 11×17 PDF.  I then e-mailed the PDF to John, the DTE planning consultant.


SUNDAY  16 October

Here’s another view of the space under the stairs as seen from the larger/west RV bay and looking ~ESE.  A small portion of the low end of the staircase is still enclosed down to the floor to provide additional vertical strength (to prevent sagging and bouncing) and prevent any side-to-side motion.  The OSB on the sides is attached to 2×4 studs sitting on base plates that are anchored to the concrete floor.  I have been up and down this staircase several times, and it is very solid under foot.  There is still a small space enclosed on both sides where I could store something, but I have no idea at this point in time what it would make sense to keep there.

Today was Sadie’s 4th birthday party for family at her parents’ house in Ann Arbor.  (Her “Buddies party” was last weekend at Domino Farms).  On the drive home in the afternoon (Linda was driving) I texted Phil at Precision Grading, to let him know we were home and to check on the completion of the driveway and finish grading for the barn, as well as the possible timing for redoing our French Drain in the valley behind the house.  Phil has done all of our driveway and septic tank work since we bought the house, and built a French Drain for the west portion of our property that works really well.  But he is also the sub-contractor for the excavating, grading, and driveway work on the accessory building.  Indeed, Phil referred us to Chuck (the builder).


MONDAY 17 October

This is a view from the staircase landing by the storeroom door looking down towards the large west bay door opening.  The trailer that is visible through the door opening holds the spray foam insulation equipment and materials.  There is a large air-compressor at the front of the trailer along with an air dryer.  The mixing unit in the center of the trailer draws the two chemicals out of 55-gallon drums (one is visible to right towards the rear) that weigh ~500 pounds when full.  The two chemicals are mixed in the spray nozzle at 1,200 PSI at the end of a heated hose bundle that keeps the materials at 110 degrees (F).  The Westinghouse portable generator sitting on the floor in the barn is rated at 28,000 Peak Watts and was used to run the equipment as we did not yet have power to the barn.  For comparison, our Kohler whole-house natural gas generator is rated at 20,000 Watts (continuous) and the genset in our bus, powered by a Yanmar 4-cylinder/4-stroke turbo-diesel engine rated at 28 HP, can produce 17,500 Watts (continuous).  Mike said the portable generator weighs between 500 – 600 pounds, and burns a bit gasoline when in use.

I had to drop-off the Airstream at the dealership in Grand Rapids today.  When I got home at 3 PM, there were two trucks and a trailer in the driveway by the accessory building (barn).  I suspected it was the insulation sub-contractor, as Chuck (the builder) had said last week that they would probably be here early this week.  I walked down to see, and that was, indeed, the case.  They were in the middle of spraying closed-cell foam in the shop, however, so I did not linger or talk to anyone.


From left to right, the west (interior), north (exterior), and part of the east (exterior) walls of the storeroom after being spray foam insulated on the inside with two inches of closed cell foam.  Mike’s assistant is scraping off any foam that got on the interior face of the wall studs, or other surfaces that would prevent the OSB wall panels from being installed properly.

I went back down later when it appeared they were finished spraying, and got to see the finished result of their work.  I was also able to chat with Mike (the owner) and his assistant for bit while they were cleaning up the site and packing up their equipment.  Per his agreement with Chuck (the builder), Mike had foamed the walls to ~2” thick and the space above the storeroom ceiling to ~3” thick.  He had actually sprayed the exterior walls (two for each room) slightly thicker and the interior walls (two for each room) slightly thinner to maintain an ~2” average use of material.

Although I would have liked a thicker application of the spray foam everywhere, it would have cost more and wasn’t really necessary for the intended use of these spaces.  For much of the winter they will be maintained at 40 – 45 degrees (F) except when I want/need to work out there, and the amount of spray foam that is there will allow me to do that fairly economically.

This is the view looking NE from the shop door opening showing the spray foam insulation on the inside of the north and east exterior walls.

Phil (Precision Grading) called me around dinner time and we had a nice, long chat.  We don’t talk too often, as Phil is a very busy one-man business and works long hours, but we always have a good conversation when we speak.  Phil has done all of our driveway and septic tank work since we bought the house in February 2013.  He recommended Chuck (Patriot Builders) for our accessory building project, and is the sub-contractor for all of the excavating, grading, and driveway construction.  I also have him lined up to replace the failing drain in the valley behind the house with a properly constructed French Drain to get the water away from that part of the yard and out to the wetland at the northeast corner of our property and then into the pond to our east.  That was one of the reasons I had texted him yesterday.

20221011-17 – Post Trip Tasks (It’s Not Over ‘til It’s Over)

[ Note:  This is a long post without any photographs.  There will be a separate update post, with photos and captions, about the accessory building (barn) project. ]


TUESDAY 11 October

The driving portion of our grand tour of Eastern/Atlantic Canada and New England ended yesterday, but the trip itself wasn’t really over until all of the post-trip tasks had been completed.  This post covers the seven (7) days following our arrival back home.  A big part of returning home, of course, was the accessory building (barn) we were having built in our absence, but I will cover things related to that in separate, ongoing posts.

Top of the list was emptying out the trailer and moving back into the house, much of which we did as soon as we got home, and some of which I described in the post for October 10.  But there was a great deal more to do than I described there, and today we continued with the “things that must be done.”

Foremost for us was washing and Walbernizing the Airstream, as the weather forecast was for a dry, partly sunny day with an afternoon high temperature in the 70s (F).  But it wasn’t the only thing on the list; high on my list was laundry.  After coffee and bagels for breakfast, I sorted the soiled laundry into the requisite categories (white-hot, white-cold, dark-warm, dark-cold, bedding/linens-warm, and blankets/bedspreads-cold), and put the white-hot load in the washing machine.

Washing the Airstream wasn’t a matter of simply turning on the outside water.  I had to get the tall (8’) step ladder out of the shed, along with the 100’ hose/reel and one of the wheelbarrows (to use for moving stuff between the trailer and the garage).  We have a 2-tank water deionizing system, so I had to get that out of the library.  Other items included:  McGuire’s Automotive soap; the spray nozzle for the hose; the long-handle brush; the bucket for soap; and the medium (6’) step ladder, all of which had to be moved from the garage to the wash area in the driveway in front of the house (where the water faucet is located, and the gravel drains well).  And, I still needed to empty the three outside storage bays in the trailer, and empty out the back of the F-150.  Linda helped with many of these tasks, of course.

On top of all that, our barn builder (Chuck) was due to come by today to meet with his insulation sub-contractor (Mike), and then meet with us.  He texted me mid-morning to let me know that he and Mike would be here at 11:30 AM.   Tuesday was also grass mowing day, so our lawn care guy (Keith) would be showing up sometime around noon.  We have not seen him since the Tuesday just before we left in June, so we knew there would be some catching-up conversation.  Besides maintaining the yard, Keith had sent occasional photos of the progress on the barn.  At a minimum, he had already mowed more times than we prepaid, so we owed him payment for services rendered.

But I digress.  We wrapped up our conversation with Chuck, as described in the separate post on the barn project, and he went on to his next appointment.  By then, it was lunch time, so we had grilled cheese sandwiches.  Very tasty.  I transferred the laundry from the washing machine to the clothes dryer, and then we turned our full attention to washing the trailer.

While not as big as the bus, it was still a lot of work.  I started with the roof (of course), which required me to work from the 8’ ladder.  Even then, it was sometimes an uncomfortable reach to get to some of the areas, and almost impossible to reach others.  For as streamlined as the Airstream trailer is, the roof is littered with stuff that is not very aerodynamic, and is hard to clean.  Too make matters more difficult, walking on the roof is ill-advised, and you have to be very careful where you step.

Linda stayed on the ground (she doesn’t like ladders) and managed the soap bucket, brush, and hose.  The procedure was as follows:  climb the ladder, get the hose from Linda, spray an area, give the hose back to her, get the soapy brush from her, scrub the rinsed area, give the brush back to her, get the hose from her, rinse the area I just washed, and give the hose back to her.  Climb down the ladder, move it to the next location, and repeat; at least a dozen times, probably more.

(Once we have the bus and the trailer in the barn, I will be buying a taller step-ladder, probably 14 feet, and some sort of adjustable platform that can go between two ladders to provide a stable work surface.  Alternatively, I might but some scaffolding with wheels.)

Once the roof and the end caps were done, I could reach the rest of the body from the ground.  Working from the top down, I did the upper half and then the lower half.  (This is not true for the bus, as the upper half still requires a ladder or work platform.)

We were busy enough all day that I wasn’t keeping a close watch on the time.  I think we actually started washing the trailer around 1 PM and finished sometime around 5 PM, but that included an extended time-out to chat with Keith.  It was probably 5:30 PM or later by the time we had cleaned up our equipment and put everything away.  But the trailer was clean and ready for the Walbernize One-Step Cleaner & Sealer.

AMAZON was having their 2-day pre-something-or-other event today and tomorrow, so Linda put some things in our cart.  Among them was a new 2-slice toaster with openings wide enough to toast bagels.  It also had a bagel setting, so it would only toast on one side, essential for proper bagel toasting.  She also ordered a new frying pan, some baking sheets, and a pair of adjustable carbon-fiber walking/trekking poles.  I had been keeping an eye on a propane tank level monitoring kit.  It was still available, and still on sale for the same price I had seen previously, so I investigated a bit further into how it actually worked.  It turned out to use sonar, and was made by a company that makes various products using this technology for industrial applications, so I put it in the cart as well.

As I did not finish the post for this day until a week later, I no longer recall what we had for dinner, but whatever it was, I’m sure it was delicious, as always.  Being Tuesday, after dinner we watched the FBI shows on CBS.


WEDNESDAY 12 October

The forecast for today was for intermittent rain with cooler temperatures and overcast skies.  We had planned to treat the exterior aluminum on the trailer today with the Walbernize One-Step RV Cleaner & Sealer, but the weather was not conducive, either to the task or to our mood for doing it.  We were both a bit tired after the last two days, and decided to take it easier today.  Besides, I still had laundry to do, and wanted to work at my desk for a while to wrap up my blog post for Monday (October 10th).

I needed to get the F-150 in for service, specifically to have the brakes checked/repaired, so I called Brighton Ford and made that appointment for Monday 24 October.  We also needed to pick up Linda’s car, and our mail, from our daughter’s house, and drop off some gifts we had picked up in our travels.  Linda contacted her to check on timing and the reply was “any time after noon.”  It’s a nice, 45-minute, drive in the country to get to her house, so we timed our departure to arrive around 12:30 PM.

Before we left, however, I noticed a blue car in the driveway by the barn, so I walked down to see who was there.  There was at least one other vehicle there, and it was the lead carpenter and his two assistants.  I introduced myself and we chatted for a few minutes and then I left them to their work, which I will describe in separate posts about the barn project.

We visited with our daughter for a bit, but did not overstay our welcome as she was in the middle of a project.  She is redoing floors (wood and tile) and bathrooms (vanities, fixtures, wallpaper, etc.) and has already redone most of the lighting and installed smart switches and dimmers throughout the house.  She also put in remote controlled window shades, and has done a lot of painting.  She’s incredibly handy, has excellent taste and color sense, and is meticulous in her work.

On the way home, I ran some errands while Linda did some grocery shopping.  I topped up the fuel in the F-150 ($4.49 for regular / 87 octane) and then got the truck washed.  I used the same drive-through car wash I have used for a long time, but this time the final overhead brush in the drying area bent my antenna in two places.  That had never happened before, so something had obviously changed with their equipment.  But it won’t happen again, at least not there.  I did not even bring it to their attention (there would have been no point) and instead drove directly to Brighton Ford to see if I needed to add this to my service list for the 24th.  It turned out to be an easy, user-serviceable, job to replace the antenna, so I went to the parts department to get one.  They were on back-order (of course), so I ordered (and paid for) one.  I picked up a pair of replacement windshield wiper blades while I was there, and replaced them as soon as I got home.

Back at my desk, I finally managed to get on the DTE website and located the information I needed on the process/procedure for getting electrical power to the barn.  I printed off the instructions and called one of the indicated numbers, but it was already after hours, so this had to wait until tomorrow.  I will cover the details of this in my accessory building project update post, as all of this has to do with the barn project.

I did contact our friend, and fellow bus owner, Chuck (not-the-builder) to arrange a dinner get-together so we could catch up with him and Barb.  Saturday, 5 PM was agreed upon at the La Marsa in Brighton.  I also contacted our friend, and my former co-worker, Kate about getting together.  Tuesday the 18th was agreed to, with the place TBD.  Part of being gone for so long is that we were eager to reconnect with friends and family in person and (hopefully) they with us.

For dinner, we had breaded chicken cutlets, brown rice, and corn, with turkey gravy.  All vegan, of course, and all very tasty and satisfying.

After dinner, we had a ZOOM call with Paul and Nancy.  They had finally taken delivery of their 2022 Alliance Paradigm 370FB 5th wheel trailer (RV) and had it delivered to the RV park in Gulf Shores, Alabama, where they plan to keep it, and will have it moved in/out of storage seasonally for their use.  They had been busy getting the things they needed for it, and getting it set up to live in.  It was great to chat again, and get a real-time video tour of the interior.  It was very nice, of course.

Wednesday is not one of our regular TV nights, but this past Sunday we missed the 3rd/final episode of Van Der Valk (for the season), so we streamed that.  It was followed by an episode of NOVA on Computers and Crime, so we watched that as well, and then went to bed.


THURSDAY 13 October

Today was someone’s 4th birthday; Happy birthday, Sadie Rose!  She was in pre-school all day, of course, so a happy birthday Facetime call had to wait until after dinner.

The weather forecast still had a possibility of rain today, so we deferred the Walbernizing of the trailer for another day.  Our main focus instead became finishing the job of completely emptying the inside of the Airstream and then thoroughly cleaning the inside as well as everything that had been stored in it, especially items that had to do with food (storage, preparation, consumption, cleaning, etc.).  That also included laundry, of course, which I continued to work on.  Before that happened, however, I was able to chat with Erich, the Service Manager at Woodland Airstream, about our upcoming appointment and list of issues, most notably the furnace and the transverse hump/bulge/ridge in the kitchen floor.

Breakfast was waffles with some of the Maple Butter we got at Domaine Acer in the Gaspé Peninsula.  It was just as delicious as we remembered, and brought us back briefly to the wonderful discovery of that place and its products.

After breakfast, I called the DTE phone number in the instructions.  Actually, there were two phone numbers, one for commercial and one for residential.  I called the commercial number first.  The voice menu made it fairly obvious that it was for builders, and that I needed to call the residential number, which I did.  I will cover the details of the conversation, and follow-up actions in my accessory building update post, as all of this had to do with the barn project.

As long as we were on a roll, we both logged in to our MyChart app on our iPads and set up our Annual Medicare Wellness Visits with the HFHS Columbus Medical Center Internal Medicine Department in Novi.  Our primary care physician retired in July, so we will both be seeing new, and different, doctors now.  I then used the CVS app on my iPad Pro to schedule both of us for our seasonal flu shots and the newest bi-valent CoVID-19 booster next week.

We also did a partial winterization of the fresh water system and the drain traps in the Airstream, which went something like this:  Drained the fresh water tank;  Opened the hot and cold low point drain valves;  Removed the drain plug from the water heater;  Used an air-compressor to blow out the fresh water lines and water heater as best we could;  Drained the little bit of water in the gray tank (onto the ground);  Filled the two sink traps and the shower trap with enough potable antifreeze to make sure some of it ended up in the gray tank;  Added potable antifreeze to the toilet flushed it into the black tank, and left some on top of the valve to keep the seal moist.  (The reason for the antifreeze in the waste tanks was to keep the knife valves from freezing if there was any residual water left in the tanks.)

Lunch was leftovers (chicken cutlet with gravy, rice, and corn).  Yum.

We were done working on the trailer by 5 PM, and ready to quite for the day.  We continued to be amazed by how much stuff we had brought into the house and garage as a result of emptying out the trailer and truck.  Linda continued to sort and separate stuff, setting aside things she does not intend to put back on board, and ran several loads through the dishwasher.  We wanted everything to be clean before we packed/stored it until the next time we use the tailer.  And at this point, we do not yet know when that will be, exactly or even approximately.

I was still working on this post the following week, and no longer recall what we had for dinner.  Whatever it was, it was undoubtedly good, after which we Facetimed with her Sadie, and sang happy birthday to her.

We didn’t have any Thursday evening TV programs we were watching at this point, so we streamed Masters of the Universe – Dr. Strange: The Multiverse of Madness.


FRIDAY 14 October

Around breakfast time, I got a call back from Sharon in the DTE Northwest Planning office, regarding the service request I had initiated yesterday.  More details about this call will be in the separate update post about the accessory building project.

Late morning, we finally got around to putting the Walbernize One-Step RV Cleaner & Sealer on the exterior of the Airstream.  It was cooler than we would have liked, and a bit breezy, which wasn’t great.  But it was also cloudy, which was good, as the product is not supposed to be applied in direct sunlight.  I worked on the upper half of the body, using a ladder, while Linda worked on the lower half from the ground.  It was an easy enough product to use:  wipe on, let dry to a haze (doesn’t take very long), and wipe off, always working with the grain of the aluminum.  The results are always very nice, and the body is slick to the touch afterwards, it’s just a lot of surface area and takes a while.

I was still working this post on Tuesday, the 18th, so I no longer recalled details of what we had to eat today, or other such minor considerations.  I do recall that after dinner we watched an episode of Star Wars: ANDOR and The Lord of the Rings: The Rings of Power and then the latest episode of The Great British Baking Show.  Our tastes in TV and movies are, if nothing else, eclectic.


SATURDAY 15 October

We were finally getting back into our normal “at-home” routine, starting the morning with coffee and our iPads.  Saturday mornings are also the weekly breakfast gatherings of members of the South Lyon Area Amateur Radio Club (SLAARC).  We did not go today, but I am looking forward to resuming our attendance at these gatherings.

Breakfast was scrambled eggs (Just Egg) with bacon, two slices of toast (expertly toasted in our new toaster), and an orange, split equally between us.  There might have been orange juice involved as well, but I don’t recall at this point.

We had enough recyclables to warrant a trip to Recycle Livingston.  Our membership had expired last month, so Linda made out a check for the renewal before we left.

My existing site plan for the barn project did not include a few pieces of information that DTE needed.  I spent part of the day modifying my QCAD drawing to include those features and e-mailed it to the DTE planning consultant (John).  Further details about this will be in the accessory building project update post.

The final task in cleaning the Airstream was to apply 303 Aerospace Protectant for the window and door seals, and adjust one of the window latches.  It was chilly outside, so this was a less-than-completely-comfortable task, but I got it done.  Except for the seals for the three bay doors; I forgot to do those, and just let it pass for now.  The window seals tend to stick, but the bay seals do not, so it was merely for preventative maintenance and could wait until spring.

We both got showers and left around 4:40PM  to join our friends, Chuck and Barb, for dinner at La Marsa.  It was great to see them again.  We were glad we could all fit in dinner as quickly as we did, as they have an early November departure planned for their winter RV resort in Naples, Florida.  They plan to be back, however, from Thanksgiving to New Year’s, so we should have another opportunity to get together with them yet this year.  The meal (food), however, was a disappointment.

We both had Koshary, a dish we have had many times at this, and other La Marsa locations, and it was not as good as normal.  The caramelized onions they put on top had been burnt to a crisp and were not tasty.  The dish has always included some amount of capellini (angel hair or fine pasta) but this time seemed to be made with spaghetti, which was too thick, and there was too much of it.  Linda also thought it had too much tomato paste, so both the taste and texture were “off.”  We didn’t complain, but I doubt that we will order it again any time soon.  They have other things on the menu that we can eat, and like, so we have not given up on the restaurant.  We were reminded, however, of how quickly a restaurant can lose their regular customers if someone is not paying attention to the consistency and quality of the dishes, especially ones (like Koshary) that are both signature items for this chain, and a dish we have never seen on a menu anywhere else.

Back home we watched Father Brown and Midsummer Murders on PBS.  Death in Paradise had been moved ahead of Father Brown and Broadchurch, which we had already seen, was put in the 10 PM time slot.  It was fabulous (another great Nicola Walker role), but we had no desire to see it a second time.  We might have streamed something else instead, but I no longer recall what we did.


SUNDAY 16 October

Today was our grand-daughter Sadie’s family birthday party and brunch.  She turned 4-years-old this past Thursday, and it was the first time we were able to see her, and big sister Madeline, (and son, Brendan and daughter-in-law Shawna) in person since we got home.  Our daughter (Meghan) and son-in-law (Chris) were there, along with Shawna’s brother, Rob, and his family (Becky, Jack, and Juniper).  It was nice to see everyone, the food was wonderful, and the kids made sure it was an energy-filled gathering.

On the drive home (Linda was driving) I texted Phil at Precision Grading, to let him know we were home.  Phil has done all of our driveway and septic tank work since we bought the house, and installed a French Drain in the west portion of our property that works really well.  But he is also the sub-contractor for the excavating, grading, and driveway work on the accessory building.  We are on his future project list to replace the drain in the valley behind the house with a proper French Drain, so I needed to check on that as much as anything else.

At home, I went ahead and put the stinger for the Propride 3P Hitch into the receiver of the F-150 and lined it up with the hitch on the Airstream.  Linda then came out and assisted with the actual hitching up process, following the procedure we had now used for almost four months.  With the trailer secured to the truck, we removed and stowed the chocks and the tongue jack stand, and the combo was ready to go in the morning.  I was going to finally need to use the Lot Bar, which we bought at the same time as the hitch in October 2019, so I made sure I had the necessary tools in the truck to install it once I got to the Airstream dealer tomorrow.

For dinner, Linda prepared home-made Raman from scratch (except for the noodles, of course).  It was amazing (naturally), and I suggested it be added to some regular menu rotation for the coming winter months.

Sunday evening is one of our two PBS nights, featuring Masterpiece Theater.  Tonight, was the first episode of the new season of Miss Scarlet and the Duke, followed by the premier of the Magpie Murders and then the US premier of Annika, staring Nicola Walker, whose work we have come to really enjoy and respect.

Tomorrow would be an early/busy day for both of us, so I set an alarm on my phone for 7 AM before turning in for the night.


MONDAY 17 October

I took today as the final day of our post trip tasks, as well as the resumption of some of our “at home” routines.  My me that meant taking the travel trailer to Woodland Airstream in Grand Rapids, Michigan for the scheduled appointment to take care of our list of service items before the factory warranty expired on November 8, 2022.  For Linda, that meant the first trip (of probably many) to Ann Arbor to provide child care for one or both of the younger grand-daughters while their parents worked.  Today, that meant watching (playing with) Sadie, as her Montessori pre-school was closed today.  She also had to hang around long enough to also spend time with Madeline after she got home from school while dad took Sadie to her ballet class.

I was scheduled to arrive at Woodland Airstream between 10 and 11 AM, and Erich (the service manager) had me on his calendar for around 10:30 AM to go over the repair list.  I pulled out of the driveway at 8:15 AM for the approximately 1-hour and 45-minute drive to the northeast side of Grand Rapids, Michigan.  There was a light mist as I pulled out, and I drove in and out of rain of varying intensity for the entire trip.  I missed the morning rush hour traffic in and around the Lansing, Michigan area, and the trip went smoothly even with occasional construction zones.

I arrived right around 10 AM to a very light-to-intermittent rain, and parked the truck-trailer combo in a convenient spot that was not blocking traffic or parked vehicles.  I checked in with Joyce, the service writer, and then checked in with Erich to see if they had chocks and blocks I could use to secure the trailer while I unhooked it.  (I did not want to leave my personal chocks or jack stand, if possible.)

It was probably 10:30, or a bit later, by the time I had the truck unhooked and the Lot Bar installed.  The Lot Bar is an accessory for the Propride 3P Hitch that allows the trailer to be moved around (at low speed) by a tow vehicle with a conventional trailer ball, such as on an RV dealer’s parking lot (thus the name of the device).  Woodland Airstream has several of these devices, but they now charge $50 to install and uninstall them.  Which is fair, as it involves some amount of time of their labor to do this if the customer doesn’t take care of it themselves.  I didn’t mind doing it, even in the very light rain, as I have had this accessory since we bought the hitch, and had yet to use it.  I knew exactly how it had to be installed, but had never actually done it.  It was very easy.  We never leave home without.  In the event that we had to have unexpected repairs attended to while traveling, it is highly unlikely that most RV service facilities would have one.

Erich met with me around 10:45 AM and I walked him through a few of the items on our list that I thought would make more sense if I could just have him look at something while I pointed to the problem area.  He was very attentive and, in spite of always being very busy, took the time and gave me his undivided attention.  I then met with Joyce to go over the paperwork, sign it, and give her the keys.  The estimated time to turn the trailer around was 3 to 4 weeks, but I told her we had no plans to use it again until spring, and it was fine with me if they took the time they needed to address everything correctly.  Most of the items were already identified as warranty, but I anticipate there will be things we have to pay for, beyond the winterization.  At a minimum, I want to get a couple of spare “sail switches” for the propane furnace and a spare fresh-water pump to carry as spare parts.

I had hoped to chat with Steve, our salesman, but he was tied up with a customer.  I was standing near the front door, waiting to see if Steve was going to have a break, but perhaps looking a bit lost, when a gentleman standing there asked if he could help me in any way.  Long story short, it was John, the CEO of Woodland Airstream, and the GM of the Grand Rapids location.  We had a really nice chat, but since he asked, I shared my concerns about the bulge in the floor.  He was confident they would be able to take care of it.  I made sure he knew how pleased we were with all of the employees we have interacted with, starting with our very first contact with Steve in August 2019.

Woodland Airstream recently opened a location in Indianapolis, Indiana and John said it was doing very well.  I also learned that they are about to break ground on a location in Clarkston, Michigan (much closer to our house) that will allow them to conveniently serve the whole southeast Michigan market, and possibly take in northwest Ohio.

While I am not completely happy with Airstream at the moment, as I think there are way too many items on our list for a 3-year-old trailer with no more than 10,000 miles on it, Woodland Airstream has been an absolutely top-notch, first-class group of people to deal with.  Woodland Airstream is an Airstream exclusive dealership, as a result of which they have a great relationship with Airstream and their customers ultimately benefit from that.

It was 11:45 AM by the time I was done at the dealership.  I texted Linda that I was about to head for home, but then decided to drive the short distance in the opposite direction on Plainfield Avenue NE to Anna’s House.  So, I texted my change in plans.  Anna’s House is local chain of restaurants that is well known for their breakfast offerings, including vegan ones.  I was in the mood for lunch, however, and ordered their vegan hamburger with French fries.  I should have ordered breakfast, as the burger was very disappointing.  I texted Linda again when I was ready to leave the restaurant, and again when I got home around 3 PM.  It’s been a long-standing practice of ours, ever since we finally had cell phones with text messaging, to let each other know when we are on the road and have reached our destinations.

Back at the house, there were trucks and a trailer down by the barn, so I figured the insulation crew was there, and walked down there to check on things.  There will be more details on that in the separate accessory building project update post.

Phil (Precision Grading) called me around dinner time and we had a nice, long chat.  We don’t talk too often, as Phil is very busy and works long hours, but we always have a great conversation when the opportunity presents itself.

For dinner, Linda made sandwiches of vegan deli slices and cheese with lettuce and vegan mayo on toast.  We had a few Fritos and orange slices on the side.

Monday is one of our two CBS nights, so we watched our usual programs and then went to bed.

20220909 – Barn Project Update – Stairs, Roof, & Doors

FRIDAY 09 September – Special Blog Post

I texted our barn builder, Chuck, today to get an update on the project and requested a photo of the interior stairs that lead up to the storeroom above the shop.  I got back six photos, which was great.  What wasn’t so great was that the stairs were enclosed with plywood from the hand rails all the way to the floor.  My design drawings clearly showed the area under the stairs as open, and the handrails supported by spaced verticals.

I was counting on the open space under the stairs for storage and possibly work surface(s).  I communicated that back and Chuck said they could do that.  He described this as “outdoor deck style” stairs.  He also indicated said the shingles were staged on the roof and ready to install as soon as the sun tunnels came in, which he expected to be very soon.  It will be great to finally have the roof sealed against the weather.

I have not seen photos yet of the interior of the shop or the storeroom, but there isn’t much light in there at the moment.  What I could see, through the opening for the door to the shop, was that it had not been spray foamed yet, but I wasn’t expecting that to be done at this stage.  The front entry door, the shop door, and the storeroom door are not installed yet either.  The building appears to be coming along nicely, but still has a ways to go to be finished.

The only real issue we have at this point is a mix-up on the two large bay doors and the cost associated with getting it straightened out.  It appears that Chuck costed out the project based on “overhead” (folding garage style) doors, even though my drawings clearly show roll-up doors, and we specifically discussed this at the beginning of the project (chain drive initially, but the ability to add motors later when we have electricity in the building).  The cost difference is $6,000 and it appears we have a difference of opinion as to who is going to cover that added cost.  We have just exchanged text messages so far, and have not had a chance to discuss this on the phone yet, but the issue is there and needs to be resolved.

Anyway, here are the photos of the stairs as they existed on the date of this post:

The view into the shop door opening (under the staircase landing) from the large/west RV bay.


View of the shop door opening from the small/east RV bay.  The fully paneled construction of the staircase is evident.


The view of the area under the staircase.  Dark and essentially inaccessible.


The staircase up to the storeroom above the shop as seen from the small/east RV bay.


The staircase up to the storeroom above the shop as seen from the entry door in the front wall.  The entry door is centered on the front wall of the building between the two large bay doors, and the staircase is essentially in line with it.

The staircase up to the storeroom above the shop as seen from the large/west RV bay.


20220825 – Barn Project Update

THURSDAY 25 August – Special Blog Post

As I mentioned in my regular blog post for this date, I checked my phone before going to bed and had a text message from our builder with four photos of the barn.  The windows were in and the siding was almost done.  It looked good, and should be a nice addition to our property and lives.  Here are the photos with a little additional information in the captions.


This is the view looking north at south/front elevation of the building, which faces the street.  The two large openings are for the 12’ wide by 14’ high RV bay roll-up doors.  The small opening in-between them is the entry door.  I tried to adjust the image so some of the interior detail might be visible.  The back, right corner of the building has interior walls from the floor to the bottom of the roof trusses, which are 16’ above the concrete floor.  The ground floor will be a shop, and the floor above it will be a storeroom.  The door into the shop is mostly in line with entry door and the door to storeroom is directly above it.  A staircase will go up the center of the barn to storeroom.  (Photo by Chuck-the-builder.)


This is the view looking SE at the NW corner of the building.  The narrow vertical features are fixed pane windows.  The three on the west (right) side and the one on the back will provide light to the full-depth (~46’) RV bay on the west half of the building.  The bottoms of these windows are 6’ above finished grade.  The small opening, lower left, is one of two double-hung windows for the shop.  (Photo by Chuck-the-builder.)


This is the view looking SW at the NE corner of the building.  Again, the narrow vertical features are fixed pane windows.  The two on the east (left) side will provide light to the (~30’) RV bay on the east half of the building.  The bottoms of these windows are also 6’ above finished grade.  Both of the double-hung shop windows are visible.  (Photo by Chuck-the-builder.)


Just for completeness, this is the view looking south at the north/rear elevation.  The windows are as previously described.  (Photo by Chuck-the-builder.)

20220816 – Bellevue Beach CG to Pippy Park CG, NL

TUESDAY 16 August

A popup camper boondocking on the isthmus as seen from the freshwater lake side in the early morning light and mist.

Well, today turned out differently than originally planned but we are, if nothing else, willing to be flexible with our plans when we need to be.  We were supposed to be at the Bellevue Beach Campground for two nights.  In checking the weather last night, and again first thing this morning, it looked like if we stayed another night, we would be breaking camp, hooking up, driving, unhooking, and making camp in the rain tomorrow morning.  But if we left today, we could do all of those things without the rain.  The weather at Bellevue Beach had also turned cloudy overnight and we actually awoke to fog on the lake and hills, so the idea of driving 5 hours round trip to visit Bonavista and Elliston (Puffins!) seemed even less appealing than it did before.  Getting to our next campground a day early also meant we would have an extra, full day to explore the St. John’s area, where there were lots of things to see and do, even in the rain if necessary.

The Isthmus in the early morning light and mist.

A decision had to be made, but we don’t like to make decisions on an empty stomach, so we had our usual morning coffee and then avocado toast for breakfast.  This decision also required information, namely, could we get into the Pippy Park Campground a day early AND snag the same site we already had booked for the following five nights?  I called the campground and the answer was … yes!  Earliest check-in time was 1 PM, and the Park was only about 1-1/4 hours’ drive time, but we did not have to be there right at 1 PM, so no rush.  We went for a walk around the RV portion of the campground and then along the beach on the ocean side of the isthmus.

A green ground cover plant with hints of red and orange.  A sign that fall is just around the corner here in Bellevue Beach, Newfoundland?

We saw a bird yesterday (a black headed gull of some kind) on the beach that did not try to move when I approached it so I presumed it was injured or ill.  I photographed it but did not include the photo in yesterday’s blog.  The tide was in compared to our walk yesterday, but the bird was still there, just above the water line.  It was dead, lying on its back (it was upright when we saw it yesterday) and something had started to eat the underside.  I couldn’t tell the order of events, but the end had come for this creature.  I felt bad for it, and hoped it hadn’t suffered too much or for too long, but nature is harsh that way.

A fireweed plant against a bright green fir backdrop.  A common sight while walking the Bellevue Beach Campground RV loop.

By the time we finished our walk it was almost 11:30 AM.  Without rushing, we started preparing for our departure.  The process went smoothly (we really like our arrival and departure lists).  We were ready to go by 12:30 PM, but it was closer to 12:45 pm by the time we pulled through the gate and out onto Hwy 201 (Main St.).  On the way out, we let the campground know that we were leaving early to avoid weather and that our site was available.  We did not ask for a refund.

The entire trip, except for short distances at each end, was on the Trans-Canada Highway.  The T-CH in this part of Newfoundland is a really good road and we rolled along at 100 km/hr without interruption and only an occasional slowdown to 70 km/hr at intersections with other secondary highways or developed areas.  As we got closer to St. John’s it became a limited access, 4-lane divided highway, but we also picked up more traffic.

We also saw a lot of this grass plant while walking the Bellevue Beach Campground and isthmus.  It happily joins the fireweed behind in this open patch of the woods.

In spite of the fact that we were headed south and east towards the North Atlantic Ocean, the terrain continued to be quite hilly, with many long grades.  Again, this part of Newfoundland reminded us of the terrain up towards L’Anse-aux-Meadows at the tip of the western peninsula; rocky hills with shorter flora and lots of “ponds.”  (Some of what they call “ponds” here would definitely be called “lakes” back home.)

As we approached St. John’s, we got an alarm beep on our Tireminder TPTMS for the trailer tires with an indication of “leaking.”  That’s not something we ever want to see, but we have the system for a reason.  (A similar system is built-in to the F-150.)  I kept a close eye on the pressures and did not see a leak taking place.  I also checked the temperatures and they seemed normal for the ambient temperature, cloud cover, and road conditions.  The ambient temperature had dropped from the mid-70s to the mid-60’s, which would cause a minor reduction in pressure.  We had also been traversing relatively high elevation terrain and were starting to work our way down in altitude.  Again, this would cause a minor drop in pressure.  The pressure in all four of the tires, as well as the spare, had dropped a little, but not in an unexpected way, and the drops were consistent across all the tires.  The readings were stable, so I suspect it was a false alarm, perhaps triggered by the cold inflation pressures being slightly lower than when we started the trip back in mid-June and set the alarm thresholds.  The pressures are still more than sufficient for proper tire function.

We arrived at the Pippy Park entrance gate / registration booth just before 2 PM.  Linda had us registered and moving to our site (#149) in short order (W3W=”line.toddler.march”), a pull-through, 3-way/50A with Wi-Fi.  At -52.730… W longitude, this is the farthest east we have every driven or camped.  Indeed, St. John’s is the easternmost city in North America, but not the easternmost point of land.

The site had an uphill slope as we pulled in, but I could see that there was a section that looked to be flat and level.  I was able to position the trailer fairly easily so that it was level, side-to-side, less than one inch high, front-to-back, and with the truck aligned so we could put the tongue jack down and easily disconnect the truck from the 3P hitch.  We think this was the first site we have had on this trip that was level, side-to-side, and also the closest to level, front-to-back.  We like it when that happens.

Even without having to level, it took us until 3:30 PM to make camp and finally sit down to a late lunch of southwestern vegetable soup and crackers with crunchy peanut butter.  This was because of some additional tasks that we do not normally do.

One of those was to drain the fresh water tank and refill it (to 50% capacity) along with a very dilute bleach mixture (Camco freshening agent).  Pippy Park is a municipal campground set in a much larger municipal park, and the water here is municipal, so fully treated.  Just what we needed to refresh our on-board water supply.  I like to keep the fresh water tank at 50% capacity (about 20 gallons) to keep some weight low over the trailer axles, but also in case we find ourselves stopped somewhere unexpectedly without hookups.

The tap already had a pressure regulator, so I did not use ours and just moved the hose over to the shore water connection.  I also did not use the filter or softener.  That simplified our usual setup quite a bit, and will shorten our departure routine by 15 – 20 minutes.  The water pressure was the best we have seen on this trip.   I went ahead and connected the drain hose for the waste water tanks while it wasn’t raining.  Last, but not least, I got the VIAIR air-compressor kit out of its storage tub in the bed of the truck in anticipation of checking the trailer & truck tires manually and adjusting them.  I didn’t do that today, as the tires need to be at ambient temperature, but I will before we leave here.

Pippy Park Campground is very nice, which is to say, it’s very much to our taste.  It’s a good-sized place, but only a small part of a much larger urban park.  Most of the sites are on loops through thick woods, and are back-in with water/septic/electric(15/30A), but they also have space for tents .  Each site is surrounded by forest on three sides and affords a lot of privacy.  Our site was in the section of the campground that has full-service pull-through sites with 50A electrical and Wi-Fi.  The sites are out in the open, but well-spaced and the entire section is surrounded by trees.  It’s been described as “like a state park with a really nice RV park.”  We agreed with that description and were happy with our site.

After having had no usable Internet access at Bellevue Beach, even from our smartphones, we were anxious to see how good the Park Wi-Fi was.  We connected our various devices to the system, which is password protected, and it was amazing!!!  Response times and data rates appeared to be on a par with what we get from our xFinity broadband service at home and we were able to update numerous apps on our tablets and smartphones very quickly.  I started my computer, logged in to our WordPress website, and assembled/published the blog post for yesterday in about 15 minutes.

We have put 5,264 miles on the F-150 since we pulled out of our driveway on June 15th, a combination of towing and touring, and the odometer currently reads 31,544 miles.  The service interval for the oil is 10,000 miles, but we’ve been towing in mountains and I would like to get the oil changed while we are in St. John’s.  I searched for Ford dealers in town and Cabot Ford Lincoln came up.  It was also relatively close to our campground, so that was a bonus.  I tried to call them, but just got shuffled around through an automated menu system.  All I wanted to know was if I had to make an appointment, or did they have “quick lane” service for oil changes?  I left a message with the automated receptionist, but did not get a return phone call.  In fact, a listing also came up for a Quick Lane business located at the exact same address, so I wanted to know if that was part of the dealership.  I clicked the website link and got the master website for this franchise.  I gave it my City and Province and it said there were no Quick Lane locations here.  Arrrgh.  I will probably drive to the Ford dealership tomorrow morning and see if I can sort something out in person.

Since St. John’s is an actual city (as opposed to a town or village), Linda checked Happy Cow to see if there were any vegan restaurants here.  Veggie/vegan places often pop up, but pure vegan restaurants are rare.  And when we find one, it’s usually near a college or university, and a bit of funky place.  In this case, one vegan restaurant popped up; Peaceful Loft.  And it was downtown, not near the local university.  The last time we ate at a sit-down restaurant was last month at Salty Rose’s & The Periwinkle Café in the Cape Breton Highlands of Nova Scotia, and that was actually counter service.

We were both feeling much better, and well enough to go out for dinner, so we headed out around 6 PM with the restaurant address in the F-150 navigation system.  The fastest/shortest route took us past Memorial University and then through an extensive neighborhood of beautiful homes, some of them very large, before yielding to a more urban setting of colorful row house arrayed on streets that ran every which way and intersected in unusual ways.  These are known as the “jelly bean” houses because of the way they are painted.  Those houses, in turn, gave way to a business district, which is where we found the Peaceful Loft among other Chinese restaurants.  The whole trip took 20 minutes and the closer we got to the restaurant the more it reminded us of San Francisco, California.  St. John’s is built on and around large hills, some of which have steep slopes, and roads tend to go directly from here to there.  It was all very cool, and quite a departure from our experiences in Newfoundland thus far.

The Peaceful Loft had a nice vibe.  It was run by an older couple, husband and wife, who were originally from Macau.  He handled the front of the house (customers and phone orders) and she did the cooking.  He was very gracious and kept apologizing for how long things were taking.  He tried to talk us out of the vegan Abalone, telling us it was “too expensive and tastes like seafood.”  We assured him that it was not a problem; we wanted to try new things, and actually appreciated and enjoyed not being rushed through our meal.

L-2-R, our two main dishes, Stir-fried Singapore Rice Noodles, and vegan Abalone with Vegetables and Rice, and our sauces.

The menu was extensive, but before we were allowed to order, we were served hot tea, soup, and three sauces.  All of the sauces were home-made daily, and we sampled them while waiting.  If the tea or sauces got low, they were promptly refilled.  We ordered spring rolls for an appetizer, and two main dishes: Stir-fried Singapore Rice Noodles, and vegan Abalone with Vegetables and Rice.  Oh, my goodness, the food was amazing.  There were only seven other diners while we were there, and we were able to interact with the proprietor quite a bit, which made the meal all the more memorable.  He boxed up the leftovers for us, and we will get another entire meal out of them.  He included two oranges for later.  We told him we would probably be back on Saturday, and he suggested we get there before 5 PM as they get busy after that and wait times increase.  Fair enough.

The F-150 navigation system took us back to Pippy Park pretty much the reverse of how it got us downtown.  We knew there were TV stations in St. John’s, so Linda turned on the TV and scanned for channels.  It found two: the CBC and Canada’s Superstation.  We watched a few minutes of Jeopardy and turned it off.  As much as we watch TV, and stream programs at home, we haven’t really missed it while traveling.

An update photo of the barn project (photo by Keith).

During the evening I received a text message from Keith (the lawn care guy) with a photo of the barn.  The roof is on, the gable overhangs are framed out, and the concrete floor is poured.  Notice the interior wall that is going up on the right-hand side towards the rear.  This is the front wall of the workshop.  There will be a storeroom on top of the workshop.  The envelope around these two rooms will be fully insulated.